Jam Custard Pastry Pockets


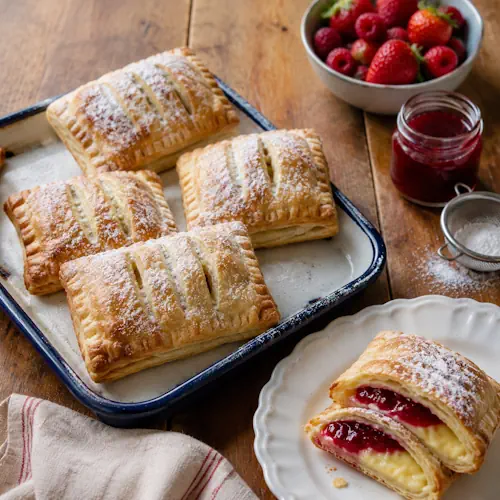
Golden puff pastry pockets filled with vanilla custard and berry jam.

Jam Custard Pastry Pockets

Crisp air fryer pastry pockets filled with creamy vanilla custard and raspberry jam. These golden pastries are simple to prepare and finished with a light dusting of icing sugar.
Couverts4
Total time 55 minutes
estimated costs pp $1.30
Deel op Facebook Print Recipe

Equipment

Ingredients

Instructions

  • Cut each pastry sheet into four pieces.
  • Spoon 1 tablespoon jam and 1 tablespoon custard onto the centre of six pastry rectangles, leaving a 1 cm border.
  • Do not overfill.
  • Brush the borders with beaten egg.
  • Place the remaining pastry rectangles on top.
  • Press the edges firmly with your fingers, then crimp with a fork.
  • Cut a small cross in the top of each pastry to allow steam to escape.
  • Chill for 20 minutes to firm.
  • Preheat the air fryer to 180ยฐC.
  • Line the basket with baking paper trimmed to fit.
  • Brush the pastry tops with beaten egg.
  • Air fry in batches for 10 minutes, or 13 minutes if frozen, until puffed and deep golden.
  • If the pastry is still pale underneath, carefully turn and cook for 3 minutes.
  • Cool on a wire rack for 10 minutes.
  • Mix the icing sugar, vanilla extract and milk to make a thick glaze.
  • Drizzle over the cooled pastries and sprinkle with crushed freeze-dried berries, if using.
  • Best eaten on the day they are made, or refrigerate in an airtight container for up to 2 days.

Notes & Wine Advice

Serving Suggestions

Serve the pastry pockets once they have cooled and the vanilla glaze has set. They are especially good with tea or coffee.

Recipe Notes

Strawberry, raspberry or apricot jam can be used. Do not overfill the pastries, as excess jam or custard may escape during cooking.

Cooking Advice

Seal the edges firmly before crimping them with a fork. If the pastry is still pale underneath after air frying, carefully turn the pockets and cook for another 3 minutes.

Storage Advice

These pastries are best eaten on the day they are made. Leftovers can be refrigerated in an airtight container for up to 2 days.

Wine Advice

These sweet jam and custard pastries are better suited to tea or coffee, so no wine pairing is necessary.

Nutrition values

Serving: 190 gr | Calories: 545 kcal | koolhydraten: 67 g | Eiwitten: 8 g | Vet: 27 g | Verzadigd vet: 12 g | Natrium: 330 mg | Suiker: 31 g
————————————————————————————————–
Course; Air fryer / Dessert / Pastry
Cuisine; England / European
Season: All Seasons
Occasions Birthday / High Tea / Party / Weekend

About Jam Custard Pastry Pockets

Jam Custard Pastry Pockets combine crisp puff pastry with two familiar sweet fillings: fruity jam and creamy custard. The pastries are sealed into individual pockets and cooked in the Airfryer until puffed and deeply golden. A simple vanilla glaze provides the finishing touch.

Choosing the Jam

The recipe works with strawberry, raspberry or apricot jam, so you can easily vary the flavour. Choose a relatively thick jam because very runny preserves are more likely to escape from the pastry during cooking.

Raspberry gives the pastries a slightly sharper fruit flavour, while strawberry is sweeter and apricot provides a gentle tang.

Using Ready-Rolled Puff Pastry

Ready-rolled puff pastry makes these pockets particularly easy to prepare. There is no need to make or roll pastry from scratch, and the sheets can simply be divided into evenly sized rectangles.

Keep the pastry cool while working with it. Puff pastry rises best when the layers of dough and fat remain chilled before cooking.

Adding the Filling

Place the jam and custard in the centre of the pastry while leaving approximately 1 cm clear around the edges. This clean border is needed to create a secure seal.

Avoid adding extra filling even if there appears to be room. Overfilled pastry pockets are much more likely to split or leak as the filling heats.

Sealing the Pastries

Brush the exposed pastry edges with beaten egg before placing the second piece of pastry on top. Press firmly with your fingers and then crimp the edges with a fork.

Cut a small cross in the top of each pocket. This allows steam to escape and reduces pressure inside the pastry as the filling becomes hot.

Chilling Before Cooking

Chill the assembled pastries for approximately 20 minutes before air frying. This firms the pastry and filling and helps the pockets retain their shape.

The pastries can also be cooked from frozen. In that case, allow approximately 13 minutes for the initial cooking time rather than 10 minutes.

Cooking in the Air Fryer

Preheat the air fryer to 180ยฐC and line the basket with baking paper trimmed to fit. Brush the tops with beaten egg immediately before cooking to encourage an attractive golden finish.

Cook the pastry pockets in batches so there is enough room for the hot air to circulate. They should become puffed and deep golden.

Checking the Underside

Puff pastry can sometimes brown more quickly on top than underneath in an air fryer. Check the base after the initial cooking time.

If necessary, carefully turn the pastries and cook for another 3 minutes. This helps create a crisp base rather than leaving the underside soft.

Vanilla Glaze

Allow the pastries to cool before adding the glaze. Mix icing sugar with vanilla extract and just enough milk to produce a thick consistency that can be drizzled over the surface.

Optional sprinkles or crushed freeze-dried berries can be scattered over the glaze before it sets.

Serving the Pastry Pockets

Jam Custard Pastry Pockets are particularly suitable for High Tea, a Birthday or a Party. Their individual size makes them easy to serve without additional preparation.

They are best on the day they are cooked, when the puff pastry is at its crispest. Serve them with tea or coffee once the glaze has set.

Storing Leftovers

If you have leftovers, place them in an airtight container and refrigerate for up to 2 days. Because the filling contains custard, the pastries should not be stored for extended periods at room temperature.

Jam Custard Pastry Pockets are an easy way to turn ready-rolled puff pastry into a homemade sweet treat. Crisp pastry, fruity jam, creamy custard and vanilla glaze create a simple combination that works particularly well for afternoon treats and special occasions.
Air Fryer Pavlova


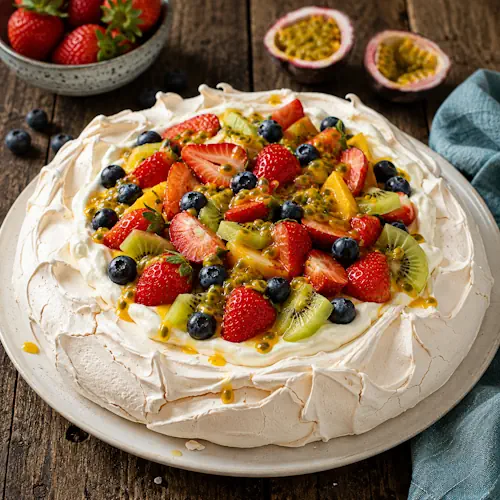
Crisp homemade pavlova topped with whipped cream, fresh strawberries, blueberries, kiwi and passion fruit on a rustic wooden table.

Air Fryer Pavlova

A light and crisp air fryer pavlova with a soft marshmallow-like centre, topped with whipped cream and fresh fruit. This compact version of the classic dessert is ideal when you want pavlova without heating a full-size oven.
Couverts6
Total time 1 hour 10 minutes
estimated costs pp $1.25
Deel op Facebook Print Recipe

Equipment

  • baking paper
  • electric mixer
  • Mixing bowl
  • spatula

Ingredients

Instructions

  • Preheat the air fryer to 120ยฐC. Line the air fryer basket or a suitable air fryer pan with a piece of baking paper cut to fit.
  • Whisk the egg whites until stiff peaks form. Gradually whisk in the caster sugar, one spoonful at a time, until the mixture is thick and glossy.
  • Whisk in the vanilla extract, vinegar and cornflour.
  • Spoon the meringue onto the prepared baking paper, shaping it into a mound with a slight dip in the centre.
  • Air fry for 20 minutes, then reduce the temperature to 100ยฐC and air fry for another 35 minutes, or until the pavlova is crisp on the outside and set underneath.
  • Switch off the air fryer and leave the pavlova inside to cool completely.
  • Store the cooled pavlova in an airtight container for up to 1 day if not serving immediately.
  • Whisk the icing sugar and thickened cream until soft peaks form. Spoon the cream over the pavlova and top with the chopped fresh fruit just before serving.

Notes & Wine Advice

Serving Advice

Top the pavlova only shortly before serving so the meringue stays crisp. Use a colourful mixture of fresh fruit such as strawberries, raspberries, kiwi fruit, mango or passion fruit. Serve as a Dessert with the whipped cream generously spooned into the centre.

Air Fryer Advice

Air fryers can vary considerably in temperature and airflow. Check the pavlova towards the end of cooking without repeatedly opening the basket. The outside should feel dry and crisp while the centre remains softer.

Cooling Advice

Leave the pavlova inside the switched-off air fryer until completely cool. Cooling it gradually helps reduce sudden temperature changes that can cause excessive cracking or collapse. Some cracking is completely normal for pavlova.

Storage Advice

Store the undecorated pavlova in an airtight container at room temperature for up to 1 day. Once topped with cream and fruit, refrigerate leftovers and eat them as soon as possible because moisture will gradually soften the meringue.

Wine Advice

A lightly sparkling Moscato dโ€™Asti works particularly well with pavlova. Its gentle sweetness and fresh fruit character complement the meringue, whipped cream and fruit without making the dessert feel excessively rich.

Nutrition values

Serving: 165 g | Calories: 315 kcal | koolhydraten: 42 g | Eiwitten: 4 g | Vet: 16 g | Verzadigd vet: 10 g | Natrium: 45 mg | Suiker: 39 g
————————————————————————————————–

About Air Fryer Pavlova

Air Fryer Pavlova takes one of Australia’s best-known desserts and adapts it to a compact modern appliance. Pavlova is built around a deceptively simple mixture of egg whites and sugar, yet its distinctive character comes from the contrast between a delicate crisp shell and a soft, almost marshmallow-like interior.

The Story Behind Pavlova

Pavlova takes its name from Russian ballerina Anna Pavlova, who toured Australia and New Zealand during the 1920s. Both countries have long claimed a connection with the dessert, and its precise origin remains the subject of culinary debate. What is beyond dispute is that pavlova became deeply established in the food culture of both countries.

In Australia it developed into a familiar celebration dessert, particularly at gatherings where a large dessert can be placed in the centre of the table and decorated generously with cream and colourful fruit.

What Makes Pavlova Different from Meringue?

Although pavlova begins with the same basic combination of whipped egg whites and sugar used for meringue, its desired texture is different. A conventional crisp meringue is usually dried until relatively firm throughout. Pavlova deliberately retains a softer centre.

The small quantities of cornflour and vinegar contribute to that characteristic interior. The result is a dessert with several textures at once: a fragile outer shell, a softer centre and creamy and juicy elements from the traditional toppings.

An Australian Dessert with Fresh Fruit

Fresh fruit has become one of the visual signatures of Australian pavlova. The pale meringue and cream provide a neutral base for brightly coloured fruit, making the finished dessert particularly striking without complicated decoration.

The fruit also has a culinary purpose. Pavlova contains a substantial amount of sugar, so tart or aromatic fruits provide useful contrast. Passion fruit is especially associated with Australian versions, although berries, kiwi fruit and mango are also common choices.

From Conventional Oven to Air Fryer

Traditional pavlova is prepared in an oven at a relatively low temperature. An Airfryer uses the same principle of heated air but circulates that air much more actively in a smaller cooking chamber.

This recipe adapts the dessert to that environment by using a moderate initial temperature followed by an even lower temperature. The compact cooking space also naturally produces a smaller pavlova, making it practical when a full-size celebration dessert would simply be too much.

Why Sugar Is Essential

Sugar does much more in pavlova than provide sweetness. As it is gradually incorporated into whipped egg whites, it helps stabilise the foam and contributes to the smooth, glossy structure of the meringue.

This is why the caster sugar is added gradually rather than all at once. Fine caster sugar dissolves more readily than coarse granulated sugar, helping create the characteristic smooth meringue mixture before cooking.

A Modern Version of a Classic

The air fryer does not fundamentally change what pavlova is. Egg whites, sugar, cornflour, vinegar, cream and fruit still create the familiar combination that defines the dessert. What changes is primarily the cooking equipment and scale.

That makes Air Fryer Pavlova a useful bridge between a traditional Australia dessert and contemporary home cooking. It keeps the recognisable flavours and textures of pavlova while making the recipe practical for a smaller appliance and a smaller gathering.

Air Fryer Chocolate Cookies


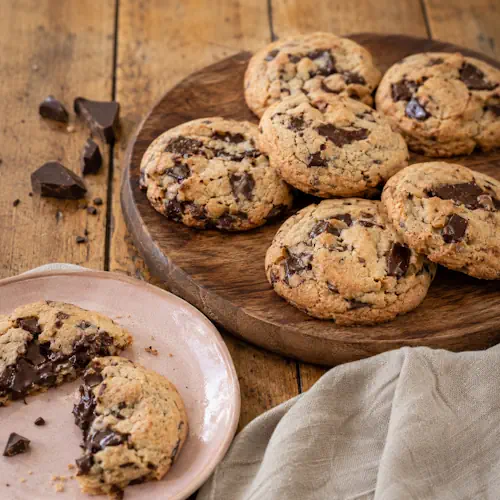
Soft chocolate chunk cookies with crisp golden edges.

Air Fryer Chocolate Cookies

Easy air fryer cookies with milk chocolate chunks and a soft buttery centre. These simple homemade cookies need only a few ingredients and cook until lightly golden.
Couverts4
Total time 20 minutes
estimated costs pp $1.20
Deel op Facebook Print Recipe

Equipment

Ingredients

Instructions

  • Using an electric mixer, beat the softened butter and brown sugar until light and fluffy, about 5 minutes.
  • Beat in the egg and vanilla extract until smooth.
  • Stir in the plain flour, bicarbonate of soda and chopped milk chocolate until a stiff dough forms.
  • Roll the dough into 12 walnut-sized balls and flatten them slightly.
  • Preheat the air fryer to 160ยฐC.
  • Line the air fryer basket with baking paper.
  • Air fry the cookies in batches for 9 to 15 minutes, until golden.
  • Leave the cookies in the air fryer basket for a few minutes before transferring them to a wire rack to cool.
  • Store in an airtight container for up to 1 week.

Notes & Wine Advice

Serving Suggestions

Serve the cookies once they have cooled slightly, while the chocolate pieces are still soft. They are delicious with coffee, tea or a cold glass of milk.

Recipe Notes

Make the dough balls approximately the same size so the cookies cook evenly. Flatten them slightly before air frying because they will spread during cooking.

Cooking Advice

Cook the cookies in batches and leave enough space between them for the hot air to circulate. Let them rest in the basket for a few minutes after cooking because freshly cooked cookies are soft and become firmer as they cool.

Storage Advice

Store completely cooled cookies in an airtight container for up to 1 week.

Wine Advice

These sweet milk chocolate cookies are better suited to coffee, tea or milk than wine, so no wine pairing is necessary.

Nutrition values

Serving: 150 g | Calories: 655 kcal | koolhydraten: 78 g | Eiwitten: 9 g | Vet: 35 g | Verzadigd vet: 22 g | Natrium: 190 mg | Suiker: 39 g
————————————————————————————————–
Cuisine; American
Season: All Seasons
Occasions Birthday / Party / Weekend

About Air Fryer Chocolate Cookies

Air Fryer Chocolate Cookies are simple homemade cookies with a buttery dough and generous pieces of milk chocolate. They require only a handful of familiar ingredients and are cooked in the Airfryer, making them convenient when you want freshly cooked cookies without switching on a conventional oven.

Simple Cookie Dough

The dough starts with softened unsalted butter and brown sugar. Beating these ingredients together until light and fluffy creates a smooth base and helps distribute the sugar evenly throughout the mixture.

The egg and vanilla extract are then beaten into the butter mixture before the dry ingredients are added. This straightforward method produces a firm dough that is easy to portion and shape.

Using Brown Sugar

Brown sugar contributes both sweetness and moisture. Its deeper flavour works particularly well with milk chocolate and gives the cookies a richer character than caster sugar alone would provide.

It also helps create the soft centre that contrasts with the lightly golden exterior of the finished cookies.

Milk Chocolate

Roughly chopped milk chocolate creates irregular pieces throughout the dough. Some pieces remain relatively large and soft after cooking, giving each cookie pockets of melted chocolate.

There is no need to chop the chocolate into perfectly even pieces. A mixture of smaller and larger chunks gives the cookies a more interesting texture.

Making the Dough

Once the butter and sugar are fluffy, beat in the egg and vanilla until smooth. Stir in the plain flour and bicarbonate of soda, followed by the chopped chocolate.

The finished mixture should form a relatively stiff dough that can easily be rolled into individual portions.

Shaping the Cookies

Divide the dough into 12 approximately equal portions and roll each one into a walnut-sized ball. Flatten each ball slightly before arranging it in the air fryer basket.

Keeping the portions similar in size helps them cook at the same rate and gives you consistently sized cookies.

Cooking in the Air Fryer

Preheat the air fryer to 160ยฐC and line the basket with baking paper. Arrange the cookies with enough space between them because they spread while cooking.

Depending on the size of your air fryer, you will probably need to cook them in several batches. Air fry each batch for approximately 9 to 15 minutes until lightly golden.

Cooling the Cookies

Freshly cooked cookies are quite delicate, so leave them in the air fryer basket for a few minutes before moving them. This short resting period allows them to firm enough to transfer safely.

Place them on a wire rack and allow them to cool. Their texture will continue to become firmer as they reach room temperature.

Serving Ideas

These cookies are particularly good while still slightly warm, when the pieces of milk chocolate remain soft. They need no additional topping or decoration.

Serve them with coffee, tea or milk as a simple sweet treat. They also work well for a Birthday, Party or relaxed Weekend treat.

Storing the Cookies

Once completely cool, transfer the cookies to an airtight container. They can be stored for up to 1 week, making them convenient to prepare ahead.

Air Fryer Chocolate Cookies combine a simple buttery cookie dough with generous pieces of milk chocolate. Their short ingredient list and straightforward air fryer method make them an easy option whenever you want a batch of homemade chocolate cookies.

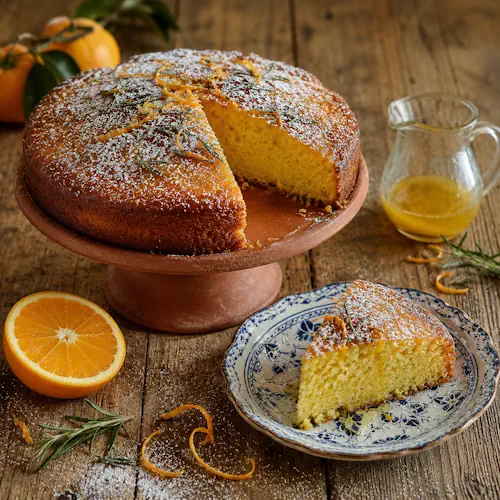
Orange Polenta Olive Oil Cake


Moist orange olive oil cake with rosemary and a fragrant citrus drizzle.

Orange Polenta Olive Oil Cake

A moist orange cake made with olive oil, ground almonds and polenta, finished with a fragrant rosemary-orange drizzle. Fresh citrus and yoghurt give the cake a soft texture and bright flavour.
Couverts4
Total time 2 hours 15 minutes
estimated costs pp $1.85
Deel op Facebook Print Recipe

Equipment

  • baking paper
  • Cake pan 20 cm
  • electric mixer
  • Saucepan
  • Skewer
  • Wire rack

Ingredients

For Rosemary Drizzle

Instructions

  • Bring a saucepan of water to the boil.
  • Lower in the orange and cover the pan.
  • Reduce to a gentle simmer and cook for 30 minutes.
  • Remove the orange and leave it to cool.
  • Quarter the orange, remove any remaining seeds and place the entire orange, including the peel, in a blender with the lemon juice and zest.
  • Blend until smooth.
  • Preheat the air fryer to 160ยฐC.
  • Lightly grease a cake pan, 20 cm, and line the base with baking paper.
  • Beat the eggs and caster sugar with an electric mixer until pale and fluffy.
  • With the mixer running, slowly pour in the olive oil in a steady stream.
  • Once combined, whisk in the orange purรฉe.
  • Fold in the dry ingredients to form a smooth batter.
  • Pour the batter into the prepared pan.
  • Air fry for 45 minutes to 1 hour, until a skewer inserted into the centre comes out clean.
  • Cool the cake in the pan on a wire rack.
  • For the drizzle, combine the caster sugar, lemon juice, cardamom and rosemary in a saucepan over medium heat.
  • Bring to the boil, stirring until the sugar dissolves.
  • Add the rosemary and remove from the heat.
  • Leave to infuse for at least 30 minutes.
  • Pierce the top of the cooled cake all over.
  • Spoon the rosemary-orange drizzle over the cake.
  • Serve with Greek-style yoghurt or crรจme fraรฎche.

Notes & Wine Advice

Serving Suggestions

Serve the cake at room temperature with Greek-style yoghurt or crรจme fraรฎche. The creamy accompaniment balances the sweet citrus drizzle and aromatic rosemary.

Recipe Notes

Cooking the whole orange before blending softens the peel and removes much of its bitterness. Use the entire cooked orange, including the peel, for maximum citrus flavour.

Cooking Advice

Check the cake after about 45 minutes because air fryers vary in intensity. A skewer inserted into the centre should come out clean when the cake is ready.

Rosemary Drizzle

Allow the rosemary and cardamom to infuse in the citrus syrup for at least 30 minutes. Pierce the cooled cake before adding the drizzle so the syrup can soak into the crumb.

Wine Advice

The orange, almond and aromatic rosemary flavours pair well with a fresh dessert wine. Choose a suitable bottle from Renรฉ’s Wijnbeleving.

Nutrition values

Serving: 300 gr | Calories: 745 kcal | koolhydraten: 82 g | Eiwitten: 17 g | Vet: 43 g | Verzadigd vet: 7 g | Natrium: 410 mg | Suiker: 48 g
————————————————————————————————–
Course; Air fryer / Cake / Dessert
Cuisine; Italian
Season: All Seasons
Diets; Vegetarian

About Orange Polenta Olive Oil Cake

Orange Polenta Olive Oil Cake is a moist citrus cake made with a whole cooked orange, olive oil, ground almonds and polenta. Instead of relying entirely on butter for richness, olive oil gives the cake a soft texture and complements the fragrant orange. A rosemary, cardamom and citrus drizzle adds another aromatic layer after cooking.

Using a Whole Orange

One of the distinctive features of this cake is the use of an entire orange. The fruit is simmered before being blended, which softens both the flesh and peel. Cooking the orange also mellows the bitterness of the peel while preserving its concentrated citrus aroma.

Once cooled, remove any remaining seeds before blending the orange until smooth. The resulting purรฉe contributes flavour, moisture and texture to the cake batter.

Olive Oil in Cake

Olive oil works particularly well with citrus, almonds and polenta. It creates a moist crumb and gives the cake a slightly different character from a traditional butter-based sponge.

Add the olive oil gradually while whisking the eggs and sugar. A slow, steady stream helps it incorporate smoothly before the orange purรฉe is added.

Ground Almonds and Polenta

Ground almonds add richness and a subtle nutty flavour, while polenta gives the cake a slightly textured crumb. Together they make the cake more substantial than an ordinary orange sponge.

The combination also works particularly well with the rosemary and cardamom in the finishing syrup because the almonds provide a mellow background for those stronger aromatic flavours.

Cooking in the Air Fryer

The cake is cooked in the Airfryer at 160ยฐC. A cake pan, 20 cm, should fit comfortably inside the basket while leaving enough room for the hot air to circulate.

Cooking can take between 45 minutes and 1 hour. Check the centre with a skewer rather than relying solely on the cooking time, as different air fryer models can vary considerably.

Making the Rosemary Drizzle

The drizzle combines caster sugar with citrus juice, cardamom and rosemary. Heating the mixture dissolves the sugar and extracts flavour from the spices and herbs.

Allowing the rosemary to infuse for at least 30 minutes gives the syrup time to develop its distinctive aroma without requiring additional cooking.

Adding the Drizzle

Once the cake has cooled, pierce the surface all over with a skewer. Spoon the infused syrup gradually across the top so it can soak through the small holes and flavour the interior.

This step adds moisture as well as flavour, creating a contrast between the golden exterior and soft citrus-scented crumb.

Serving the Cake

Serve Orange Polenta Olive Oil Cake at room temperature with Greek-style yoghurt or crรจme fraรฎche. Their mild acidity and creamy texture balance the sweetness of the syrup.

The cake works particularly well for High Tea, a Birthday or a relaxed weekend dessert. Because the flavours are already quite complex, it needs very little additional decoration.

Storing the Cake

Allow the cake to cool completely before storing it in an airtight container. The olive oil, orange purรฉe and syrup help keep the crumb moist after baking.

If serving the cake later, keep the yoghurt or crรจme fraรฎche refrigerated separately and add it only when the cake is served.

Aromatic Citrus Cake

The combination of orange, rosemary and cardamom gives this cake more depth than a straightforward orange sponge. Rosemary contributes a savoury herbal aroma, while cardamom brings a warm citrus-like fragrance that complements the orange and lemon.

Orange Polenta Olive Oil Cake combines moist citrus fruit, almonds, polenta and olive oil with an aromatic rosemary drizzle. The result is a rich but fresh-tasting cake that works equally well as an afternoon treat or a simple dessert.

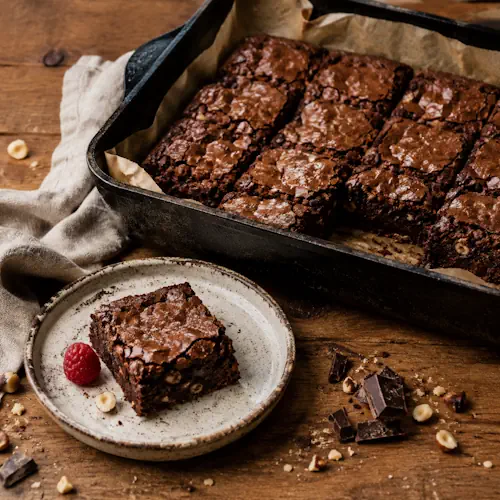
Chocolate Walnut Brownies


Fudgy dark chocolate brownies with hazelnuts and a crackly top.

Chocolate Walnut Brownies

Rich air fryer brownies made with dark chocolate, cocoa and crunchy walnuts. These fudgy chocolate squares are quick to prepare and finished with extra chopped chocolate and walnuts on top.
Couverts4
Total time 45 minutes
estimated costs pp $1.65
Deel op Facebook Print Recipe

Equipment

Ingredients

Instructions

  • Melt the butter and dark chocolate in a heatproof bowl over a saucepan of simmering water, making sure the bowl does not touch the water, or melt in the microwave on MEDIUM (50%) power until smooth. Let cool slightly.
  • Line a 20 cm square cake pan that fits in the air fryer with baking paper.
  • Preheat the air fryer to 160ยฐC.
  • Whisk the eggs, caster sugar and salt in a bowl until thick and creamy.
  • Stir the flour and cocoa powder through the melted chocolate mixture, then stir through the chopped chocolate and walnuts, if using.
  • Spoon the mixture into the prepared cake pan and air fry for 25 to 30 minutes, until set with a slight wobble in the centre.
  • Let cool completely, then slice into squares.

Notes & Wine Advice

Serving Suggestions

Serve the brownies at room temperature for a rich, fudgy texture. They are delicious on their own or served slightly warm with vanilla ice cream for dessert.

Recipe Notes

Allow the melted butter and chocolate mixture to cool slightly before combining it with the remaining ingredients. The walnuts are optional and can be omitted if you prefer plain chocolate brownies.

Cooking Advice

Do not overcook the brownies. They should be set around the edges while retaining a slight wobble in the centre when removed from the air fryer. They will continue to firm as they cool.

Storage Advice

Allow the brownies to cool completely before storing them in an airtight container. They will keep for up to 3 days at room temperature.

Wine Advice

Rich dark chocolate brownies work well with a sweet, full-flavoured wine. Choose a suitable bottle from Renรฉ’s Wijnbeleving.

Nutrition values

Serving: 220 gr | Calories: 780 kcal | koolhydraten: 77 g | Eiwitten: 13 g | Vet: 51 g | Verzadigd vet: 25 g | Natrium: 190 mg | Suiker: 51 g
————————————————————————————————–
Cuisine; American
Season: All Seasons
Diets; Vegetarian
Occasions Birthday / Party / Weekend

About Chocolate Walnut Brownies

Chocolate Walnut Brownies are rich, dense and packed with dark chocolate. This version combines melted chocolate and butter with cocoa powder, extra pieces of chopped chocolate and optional walnuts. Cooking them in the Airfryer creates a set exterior while leaving the centre deliciously fudgy.

Using Dark Chocolate

Dark chocolate forms the main flavour base of these brownies. Melting it together with butter creates a smooth, rich mixture that gives the finished brownies their dense texture and deep chocolate flavour.

Additional chopped chocolate is folded through the batter before cooking. These pieces create small pockets of chocolate throughout the brownies.

Adding Cocoa Powder

Cocoa powder intensifies the chocolate flavour without adding additional moisture. Combined with melted dark chocolate, it creates a stronger and more complex chocolate character than using either ingredient alone.

Sift the cocoa powder if it contains lumps so it incorporates smoothly into the batter.

Walnuts for Texture

Diced walnuts are optional but provide a crunchy contrast to the soft brownie centre. Their slightly earthy flavour also works particularly well with dark chocolate.

Chop the walnuts into relatively small pieces so they are distributed evenly throughout the batter and every portion contains some crunch.

Preparing the Chocolate Mixture

Melt the butter and chocolate gently in a heatproof bowl positioned over simmering water. The base of the bowl should not touch the water.

Alternatively, melt them in the microwave using medium power and short intervals. Stir regularly to prevent the chocolate from overheating.

Whisking the Eggs and Sugar

Whisk the eggs, caster sugar and salt until the mixture becomes thick and creamy. This helps give the brownies structure while keeping their characteristic dense texture.

Once the chocolate mixture has cooled slightly, combine the ingredients without excessive mixing.

Preparing the Cake Pan

Use a square cake pan, 20 cm, that fits comfortably inside the air fryer basket. Line it with baking paper so the brownies can be removed easily after cooling.

Spread the batter evenly into the corners so the brownies cook to a consistent thickness.

Air Frying the Brownies

Cook the brownies at 160ยฐC for approximately 25 to 30 minutes. The edges should look set while the centre retains a slight wobble.

The brownies continue cooking from residual heat after they are removed, so waiting until the centre is completely firm can result in a dry texture.

Cooling Is Important

Allow the brownies to cool completely in the pan before slicing. Freshly cooked brownies are very soft, and cutting them too soon can cause them to fall apart.

As they cool, the chocolate and butter firm and create the dense, fudgy consistency associated with brownies.

Serving Ideas

These brownies make a rich Dessert served alone or with vanilla ice cream. For a simpler treat, cut them into smaller squares and serve with coffee or tea.

They are also suitable for a Birthday or Party because they can be prepared ahead and divided into individual portions before serving.

Storing the Brownies

Keep completely cooled brownies in an airtight container for up to 3 days. Their high chocolate and butter content helps them remain moist and fudgy.

Chocolate Walnut Brownies combine dark chocolate, cocoa and optional crunchy walnuts in a compact air fryer dessert. Their rich flavour and soft centre make them particularly satisfying when you want a classic chocolate treat without using a conventional oven.

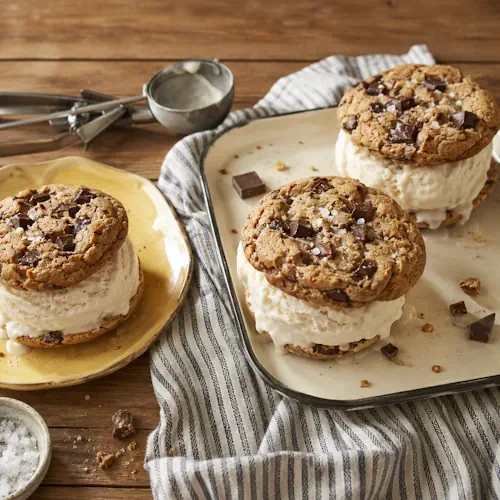
Chocolate Chip Ice Cream Cookies


Chewy chocolate chunk cookies filled with creamy vanilla ice cream.

Chocolate Chip Ice Cream Cookies

Soft air fryer chocolate chip cookies filled with creamy vanilla ice cream. A simple frozen dessert with crisp golden edges, chunks of dark chocolate and a cool vanilla centre.
Couverts4
Total time 35 minutes
estimated costs pp $1.45
Deel op Facebook Print Recipe

Equipment

Instructions

  • Preheat the air fryer to 160ยฐC.
  • Beat the softened butter and sugars until pale and creamy.
  • Beat in the vanilla extract and egg.
  • Fold through the flour, bicarbonate of soda and salt until a soft dough forms.
  • Stir through the dark chocolate chips.
  • Line the air fryer basket with baking paper trimmed to fit.
  • Divide the mixture into 8 equal portions and place them well apart in the basket.
  • Air fry for 12 to 15 minutes, until golden.
  • Check the bases are crisp and cooked through.
  • Leave the cookies to cool completely.
  • Store the cooled cookies in an airtight container for up to 3 days.
  • Place a scoop of vanilla ice cream between two cookies and gently press together.
  • Repeat to make 4 ice cream cookie sandwiches.
  • Serve immediately.

Notes & Wine Advice

Serving Suggestions

Assemble the cookie sandwiches shortly before serving so the cookies retain their texture and the vanilla ice cream stays firm. They are ideal as a simple frozen dessert during warmer weather.

Recipe Notes

Allow the cookies to cool completely before adding the ice cream. Even slightly warm cookies will soften the ice cream quickly. Dark chocolate chips provide a rich contrast to the sweet vanilla filling.

Cooking Advice

Leave plenty of space between the portions of cookie dough because they spread during cooking. Depending on the size of your air fryer, cook them in batches rather than overcrowding the basket.

Storage Advice

Store the cooled cookies in an airtight container for up to 3 days. For advance preparation, assemble the sandwiches and freeze them individually until required.

Wine Advice

The combination of dark chocolate and vanilla ice cream works well with a sweet dessert wine. Choose a suitable bottle from Renรฉ’s Wijnbeleving.

Nutrition values

Serving: 180 gr | Calories: 540 kcal | koolhydraten: 65 g | Eiwitten: 8 g | Vet: 28 g | Verzadigd vet: 17 g | Natrium: 270 mg | Suiker: 37 g
————————————————————————————————–
Cuisine; Australia
Season: Spring / Summer
Occasions Birthday / Party / Weekend

About Chocolate Chip Ice Cream Cookies

Chocolate Chip Ice Cream Cookies combine homemade dark chocolate chip cookies with creamy vanilla ice cream to create a simple frozen dessert. The cookies are prepared in the Airfryer, giving them golden edges and a soft centre without requiring a conventional oven.

Making the Cookie Dough

The cookie dough begins with softened butter, brown sugar and caster sugar. Beating these ingredients together until pale and creamy creates a smooth base before the egg and vanilla are added.

Plain flour, bicarbonate of soda and salt are then folded through the mixture. Mix only until a soft dough forms, as excessive mixing is unnecessary once the flour has been incorporated.

Using Two Types of Sugar

Brown sugar and caster sugar each contribute something slightly different to the cookies. Brown sugar adds a deeper sweetness and helps create a softer texture, while caster sugar contributes to the lightly crisp exterior.

Using both gives the cookies enough structure to hold the ice cream while keeping the centres pleasantly soft.

Dark Chocolate Chips

Dark chocolate chips provide small pockets of rich chocolate throughout each cookie. Their slightly bitter character balances the sweetness of the cookie dough and vanilla ice cream.

Stir the chocolate chips through only after the dough has formed so they remain evenly distributed.

Shaping the Cookies

Divide the dough into 8 equal portions. Similar-sized portions are particularly useful for this recipe because each finished sandwich needs two cookies that are approximately the same size.

Leave enough room between the portions in the air fryer basket because the dough spreads considerably as it cooks.

Air Frying

The cookies cook at 160ยฐC for approximately 12 to 15 minutes. They should be golden on top with crisp, properly cooked bases.

Air fryer baskets vary in size, so cooking in batches may be necessary. Avoid placing the portions too close together or they can spread into one another.

Cooling the Cookies

Allow the cookies to cool completely before assembling the sandwiches. They become firmer as they cool, which makes them easier to handle and better able to support the ice cream.

Cooling is especially important because any residual warmth will immediately begin melting the vanilla ice cream.

Adding the Ice Cream

Place one scoop of vanilla ice cream onto the flat side of a cookie and top with a second cookie. Press gently until the ice cream spreads towards the edges without squeezing completely out of the sandwich.

Repeat with the remaining cookies to create four individual ice cream sandwiches.

Preparing Ahead

The cookies can be prepared up to 3 days in advance and stored in an airtight container. This makes the final assembly particularly quick when the dessert is needed.

The sandwiches can also be assembled ahead and frozen. Allow them to soften briefly before serving if the cookies become very firm in the freezer.

A Summer Dessert

The cold vanilla centre makes these cookie sandwiches particularly suitable for spring and summer. They are easy to serve individually and require no plates or elaborate presentation.

They also work well for a Birthday or Party because the individual portions can be prepared beforehand and kept frozen until required.

Simple Homemade Ice Cream Sandwiches

Chocolate Chip Ice Cream Cookies combine two familiar favourites in one dessert: freshly cooked chocolate chip cookies and vanilla ice cream. The contrast between dark chocolate, buttery cookie dough and cold creamy ice cream makes them an easy dessert with plenty of texture and flavour.

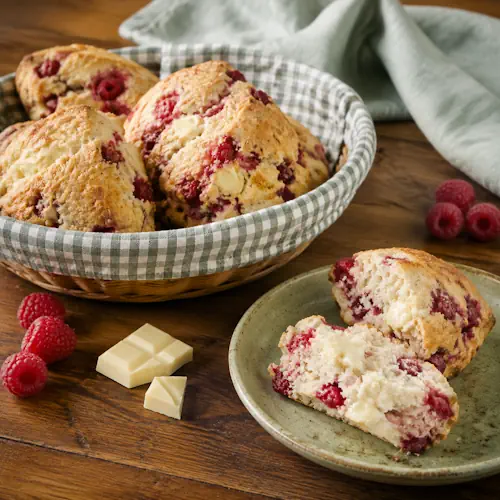
Raspberry White Chocolate Scones


Golden scones packed with raspberries and melting white chocolate.

Raspberry White Chocolate Scones

Soft air fryer scones filled with frozen raspberries and chunks of white chocolate. Lightly golden on the outside and tender inside, they combine sweet chocolate with fresh raspberry flavour.
Couverts4
Total time 40 minutes
estimated costs pp $1.40
Deel op Facebook Print Recipe

Equipment

Ingredients

Instructions

  • Place the flour, baking powder, caster sugar and salt in a bowl and mix well.
  • Using your fingertips, rub the cold butter into the dry ingredients until the mixture resembles breadcrumbs, or pulse the ingredients in a food processor.
  • Fold three-quarters of the white chocolate through the mixture.
  • Gradually stir the milk into the flour mixture, then use your hands to bring the dough together to form a soft dough.
  • Add an extra 2 to 3 teaspoons milk if needed.
  • Gently fold the frozen raspberries through the dough, working quickly so they do not fully defrost.
  • Preheat the air fryer to 180ยฐC.
  • Line the air fryer basket with baking paper trimmed to fit.
  • Turn the dough onto a lightly floured surface and pat into a 2 cm thick round.
  • Cut the dough into 8 to 10 triangles.
  • Arrange the scones slightly apart in the air fryer basket and cook in batches if necessary.
  • Air fry for 16 to 18 minutes, until golden.
  • Melt the remaining white chocolate in a bowl over simmering water or in 30-second bursts in the microwave on MEDIUM (50%) power.
  • Drizzle the melted white chocolate over the scones.

Notes & Wine Advice

Serving Suggestions

Serve the scones slightly warm once the white chocolate drizzle has started to set. They are particularly suitable for High Tea or as a sweet afternoon treat with tea or coffee.

Recipe Notes

Keep the butter cold and use the raspberries straight from the freezer. Work quickly once the berries are added so they remain intact and do not release too much juice into the dough.

Cooking Advice

Do not overwork the dough. Mix only until it comes together, then gently pat it into shape. Cook the scones in batches if necessary so there is enough room for the hot air to circulate.

Storage Advice

Store completely cooled scones in an airtight container for up to 2 days. They can be briefly warmed in the Airfryer before serving.

Wine Advice

The combination of raspberry and white chocolate works well with a fruity, gently sweet wine. Choose a suitable bottle from Renรฉ’s Wijnbeleving.

Nutrition values

Serving: 185 gr | Calories: 570 kcal | koolhydraten: 75 g | Eiwitten: 10 g | Vet: 26 g | Verzadigd vet: 16 g | Natrium: 720 mg | Suiker: 25 g
————————————————————————————————–
Course; Air fryer / Dessert
Cuisine; England
Season: Spring / Summer
Occasions Birthday / High Tea / Weekend

About Raspberry White Chocolate Scones

Raspberry White Chocolate Scones combine the soft, crumbly texture of homemade scones with tart raspberries and creamy white chocolate. They are cooked in the Airfryer, where the circulating heat gives them a lightly golden exterior while keeping the centres tender.

Raspberry and White Chocolate

Raspberry and white chocolate provide the main flavour combination. White chocolate brings sweetness and creaminess, while raspberries contribute a sharper fruity flavour that prevents the scones from tasting overly sweet.

Most of the chocolate is folded directly through the dough. The remaining chocolate is melted and drizzled over the cooked scones, giving them an additional sweet finish.

Using Frozen Raspberries

Frozen raspberries are particularly useful in this recipe because they are firmer than fresh berries when folded into the dough. This makes them less likely to break apart immediately and colour the entire mixture.

Keep them frozen until the moment they are needed. Once added, work quickly so the berries remain as cold as possible before cooking.

Keeping the Butter Cold

Cold butter is important for the texture of the scones. Rub the cubes into the flour mixture with your fingertips until the mixture resembles breadcrumbs.

A food processor can also be used for this stage. Whichever method you choose, avoid allowing the butter to become warm and greasy.

Adding the Milk

Add the milk gradually rather than pouring it all in at once. The aim is to create a soft dough that holds together without becoming wet or sticky.

If the mixture remains too dry, add another 2 to 3 teaspoons milk. Small adjustments are preferable because too much liquid can make the dough difficult to handle.

Handling the Dough

Scone dough benefits from minimal handling. Once the ingredients have come together, avoid kneading it like bread dough. Excessive handling can result in firmer, denser scones.

Turn the dough onto a lightly floured surface and gently pat it into a round approximately 2 cm thick.

Shaping the Scones

The dough is divided into 8 to 10 triangular portions. Try to keep the portions reasonably similar in size so they cook at approximately the same rate.

Handle each piece gently when transferring it to the air fryer basket, particularly because the frozen raspberries can make parts of the dough more delicate.

Cooking in the Air Fryer

Preheat the air fryer to 180ยฐC and line the basket with baking paper trimmed to fit. Arrange the scones slightly apart so the circulating hot air can reach their edges.

Air fry for approximately 16 to 18 minutes. Depending on the size of the basket, the scones may need to be cooked in several batches.

White Chocolate Drizzle

While the scones are cooking, gently melt the reserved white chocolate. This can be done over simmering water or in short intervals in the microwave.

Drizzle the melted chocolate over the cooked scones rather than completely coating them. This provides additional white chocolate flavour while leaving the golden surface visible.

Serving Ideas

These scones are particularly good slightly warm, when the white chocolate pieces inside are still soft. They can be served on their own because the fruit and chocolate already provide plenty of flavour.

They are also well suited to High Tea, a Birthday table or a relaxed weekend treat. Tea or coffee makes a natural accompaniment.

Storing the Scones

Allow the scones to cool completely before placing them in an airtight container. As with most homemade scones, their texture is at its best on the day they are cooked.

Raspberry White Chocolate Scones combine tart berries, creamy white chocolate and a tender homemade scone in a simple air fryer recipe. The contrast between the raspberries and sweet chocolate gives these scones enough flavour to enjoy without additional jam or cream.

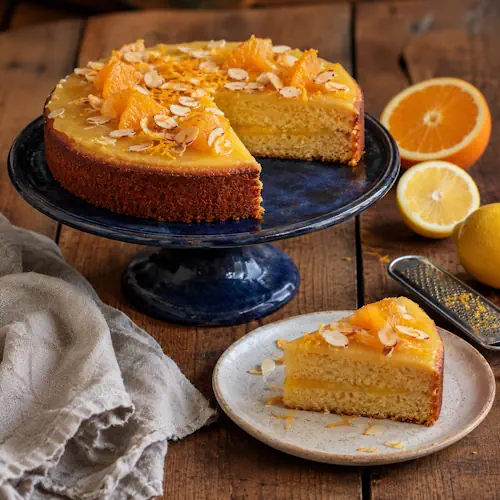
Orange Lemon Curd Cake


Almond cake with lemon curd, orange zest and toasted flaked almonds.

Orange Lemon Curd Cake

A moist air fryer cake flavoured with fresh orange zest, ground almonds and creamy lemon curd. Flaked almonds add a lightly toasted finish, while fresh lemon zest gives the cake a bright citrus touch.
Couverts4
Total time 1 hour 10 minutes
estimated costs pp $1.35
Deel op Facebook Print Recipe

Equipment

Ingredients

Instructions

  • Lightly grease a 1 litre loaf pan and line it with baking paper.
  • Preheat the air fryer to 160ยฐC.
  • Place the butter, caster sugar, eggs, natural yoghurt, self-raising flour, baking powder, ground almonds, orange zest, milk and 1 tablespoon lemon curd in a large bowl.
  • Whisk until smooth.
  • Spoon the batter into the prepared pan.
  • Dollop the remaining lemon curd over the top and swirl it gently through the batter.
  • Scatter over the flaked almonds.
  • Air fry for 55 minutes to 1 hour, until the cake is risen, golden and a skewer inserted into the centre comes out clean.
  • Leave to cool on a wire rack.
  • Scatter with fresh lemon zest before slicing.

Notes & Wine Advice

Serving Suggestions

Serve the cake at room temperature with tea or coffee. The combination of orange, lemon curd and almonds also makes it particularly suitable for High Tea or as a simple dessert.

Recipe Notes

Use a good-quality lemon curd for the strongest citrus flavour. Swirl the final spoonfuls gently through the surface rather than mixing them completely into the batter.

Cooking Advice

Check the cake towards the end of cooking because air fryers can vary in intensity. Insert a skewer into the centre; it should come out clean or with only a few moist crumbs attached.

Storage Advice

Allow the cake to cool completely before storing it in an airtight container. It will keep for up to 3 days. The cake can also be sliced before freezing so individual portions are easy to defrost.

Wine Advice

The sweet citrus flavours and almonds pair well with a fresh, aromatic dessert wine. Choose a suitable bottle from Renรฉ’s Wijnbeleving.

Nutrition values

Serving: 215 gr | Calories: 720 kcal | koolhydraten: 72 g | Eiwitten: 13 g | Vet: 45 g | Verzadigd vet: 23 g | Natrium: 390 mg | Suiker: 43 g
————————————————————————————————–
Course; Air fryer / Cake / Dessert
Cuisine; England
Season: All Seasons
Diets; Vegetarian

About Orange Lemon Curd Cake

Orange Lemon Curd Cake is a moist citrus cake combining fresh orange zest with tangy lemon curd and ground almonds. The batter is enriched with natural yoghurt and butter, while flaked almonds provide a lightly crisp finish. Cooking the cake in the Airfryer gives it a beautifully golden exterior while keeping the centre soft.

Orange and Lemon Together

Orange and lemon provide two different citrus characters in this cake. Orange zest contributes a fragrant sweetness, while lemon curd brings a sharper flavour and creamy texture.

Using zest rather than orange juice gives plenty of orange aroma without adding unnecessary liquid to the cake batter.

Using Lemon Curd

Part of the lemon curd is mixed directly into the batter, distributing its flavour throughout the cake. The remaining lemon curd is added to the surface and gently swirled through before cooking.

This creates small pockets of stronger lemon flavour rather than making the entire cake uniformly citrusy.

Ground Almonds

Ground almonds add richness and help create a moist crumb. Their mild nutty flavour works particularly well with both orange and lemon.

Flaked almonds are scattered over the surface before cooking, providing additional almond flavour and a contrasting texture.

Natural Yoghurt

Natural yoghurt adds moisture without making the batter excessively heavy. Its gentle acidity also complements the citrus flavours and helps balance the sweetness of the caster sugar and lemon curd.

Preparing the Batter

This is a straightforward cake because most of the ingredients can be combined in one bowl. Whisk the butter, sugar, eggs, yoghurt, flour, baking powder, ground almonds, orange zest, milk and part of the lemon curd until the mixture is smooth.

Avoid continuing to beat the mixture unnecessarily once everything is thoroughly combined.

Preparing the Loaf Pan

Grease the loaf pan lightly and line it with baking paper. The paper makes the finished cake easier to remove and protects the sides during the relatively long air frying time.

A loaf pan, 1 litre, is suitable for the quantity of batter used in this recipe.

Cooking in the Air Fryer

Air fry the cake at 160ยฐC for approximately 55 minutes to 1 hour. The moderate temperature gives the centre enough time to cook without allowing the outside to become too dark too quickly.

Air fryer models differ, so checking the cake near the end of cooking is more reliable than relying solely on the stated time.

Checking the Centre

The cake should be well risen and golden when ready. Insert a skewer into the thickest part of the centre. If wet batter remains attached, continue cooking for a little longer.

Remember that a skewer passing directly through a pocket of lemon curd may remain slightly moist even when the surrounding cake is properly cooked.

Cooling and Decorating

Allow the cake to cool before removing it from the pan. Once cooled, scatter fresh lemon zest over the surface for extra citrus aroma and a simple natural decoration.

The cake does not require icing because the lemon curd, orange zest and almonds already provide plenty of flavour.

Serving Ideas

Orange Lemon Curd Cake works well as a sweet afternoon treat, for High Tea or as a simple Dessert. Serve it plain or add a small spoonful of natural yoghurt or cream alongside.

The cake is particularly good with tea or coffee, and its loaf shape makes it easy to cut into neat individual slices.

Keeping the Cake Fresh

Once completely cool, store the cake in an airtight container. The yoghurt, ground almonds and lemon curd help the crumb remain moist, so the cake keeps well for several days.

Orange Lemon Curd Cake combines sweet orange, tangy lemon curd and almonds in a moist air fryer loaf. Its straightforward preparation and fresh citrus flavour make it suitable for everything from a relaxed weekend treat to a Birthday or High Tea table.

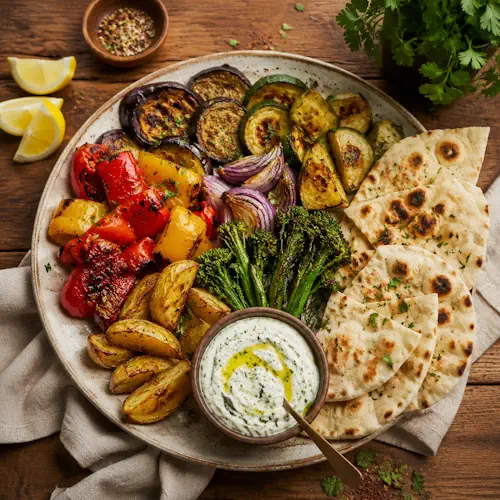
Vegetable & Flatbread Platter


Roasted vegetables, potato wedges, warm flatbreads and herbed yoghurt dip.

Vegetable & Flatbread Platter

A colourful sharing platter with crisp air-fried sugar snap peas, asparagus and baby carrots, served with toasted flatbreads and a creamy garlic, dill and wholegrain mustard yoghurt dip.
Couverts4
Total time 20 minutes
estimated costs pp $2.25
Deel op Facebook Print Recipe

Equipment

Ingredients

Instructions

  • Preheat the air fryer to 160ยฐC.
  • Combine 1 tablespoon mayonnaise with half the garlic and 1 tablespoon olive oil in a small bowl.
  • Season with sea salt flakes and freshly ground black pepper, then brush the mixture over the pitas.
  • Place the pitas in the air fryer basket and cook for 5 minutes, turning halfway through, until just golden.
  • Remove, cool and cut into 2 cm triangles.
  • Combine the remaining mayonnaise, garlic and dill with the yoghurt, mustard, capers, green onion and honey.
  • Season and transfer to a small serving bowl.
  • Preheat the air fryer to 180ยฐC.
  • Toss the sugar snap peas, asparagus, fennel wedges, radishes, baby carrots and the remaining olive oil together.
  • Air fry for 8 to 10 minutes, or until tender and lightly coloured.
  • Arrange the vegetables and toasted pita pieces on a platter.
  • Serve with the yoghurt dip and extra dill sprigs.

Notes & Wine Advice

Serving Suggestions

Arrange the warm vegetables and crisp flatbread pieces on a large platter with the yoghurt dip in the centre. This makes an easy sharing dish for lunch, a party or as an appetizer before a larger meal.

Recipe Notes

Keep the vegetable pieces reasonably similar in size so they cook evenly. The vegetables should remain slightly crisp rather than becoming completely soft.
Toast the flatbread separately from the vegetables. This allows it to become golden and crisp without absorbing moisture from the vegetables.

Cooking Advice

Do not overcrowd the air fryer basket. Cook the vegetables in batches if necessary so the circulating hot air can reach them evenly.

Storage Advice

Store leftover vegetables, flatbread and yoghurt dip separately in airtight containers in the refrigerator. Reheat the vegetables and flatbread briefly in the Airfryer and serve the dip chilled.

Wine Advice

A fresh Sauvignon Blanc pairs well with the green vegetables, dill and tangy yoghurt dip. Its freshness also works nicely with the capers and wholegrain mustard.

Nutrition values

Serving: 320 g | Calories: 425 kcal | koolhydraten: 53 g | Eiwitten: 13 g | Vet: 19 g | Verzadigd vet: 4 g | Natrium: 780 mg | Suiker: 13 g
————————————————————————————————–

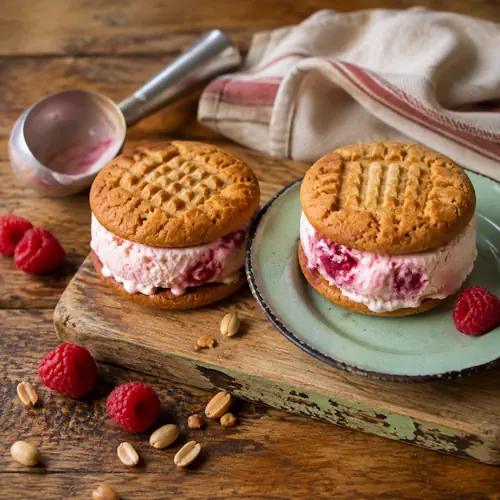
Raspberry Peanut Ice Cream Sandwiches


Peanut butter cookies filled with creamy raspberry ripple ice cream.

Raspberry Peanut Ice Cream Sandwiches

Air fryer peanut cookies filled with homemade raspberry ice cream. Fresh raspberries, lemon and condensed milk create a fruity frozen filling between soft, nutty cookies.
Couverts4
Total time 1 day 30 minutes
estimated costs pp $2.25
Deel op Facebook Print Recipe

Equipment

  • baking paper
  • blender or food processor
  • electric mixer
  • Freezer-safe container
  • Knife

Ingredients

For Cookies

Instructions

  • Place the raspberries, lemon juice, icing sugar and glucose, if using, in a food processor or blender. Process until smooth, then push the mixture through a fine sieve into a bowl.
  • Whisk the condensed milk, cream and vanilla for 5 minutes, or until thick.
  • Spoon the raspberry mixture into the cream mixture and ripple it through gently.
  • Transfer to a freezer-safe container and freeze overnight.
  • Preheat the air fryer to 160ยฐC.
  • Line the air fryer basket with baking paper trimmed to fit.
  • Combine the peanut butter, caster sugar, brown sugar and salt in a bowl.
  • Beat in the egg until a stiff dough forms.
  • Divide the dough into 12 portions and arrange them well spaced in the air fryer basket.
  • Press each portion lightly with the back of a fork.
  • Air fry for 12 to 15 minutes, until golden.
  • Remove from the air fryer and leave on a wire rack to cool completely.
  • Place a scoop of raspberry ice cream onto one cookie and top with a second cookie.
  • Repeat with the remaining cookies.
  • Serve immediately or freeze the assembled sandwiches for up to 3 months.

Notes & Wine Advice

Serving Suggestions

Serve the ice cream sandwiches straight from the freezer, allowing them to stand for a few minutes if the ice cream is very firm. Fresh raspberries make a simple accompaniment.

Recipe Notes

Ripple the raspberry mixture gently through the cream rather than mixing it completely. This creates visible raspberry swirls throughout the ice cream.
Make sure the peanut cookies are completely cool before adding the ice cream. Warm cookies will immediately soften the frozen filling.

Cooking Advice

Cook the cookies in batches if necessary so they have enough room to spread. Leave them to cool completely after air frying because they will firm as they cool.

Storage Advice

The assembled ice cream sandwiches can be stored in the freezer for up to 3 months. Wrap them individually or place them in an airtight freezer-safe container.

Wine Advice

The combination of raspberries, creamy ice cream and peanut butter works best with a fruity dessert wine. Choose a suitable bottle from Renรฉ’s Wijnbeleving.

Nutrition values

Serving: 310 g | Calories: 790 kcal | koolhydraten: 75 g | Eiwitten: 15 g | Vet: 51 g | Verzadigd vet: 27 g | Natrium: 240 mg | Suiker: 63 g
————————————————————————————————–
Course; Air fryer / Cookies / Dessert / Ice cream
Cuisine; Australian
Season: Spring / Summer
Occasions Birthday / Party / Weekend

About Raspberry Peanut Ice Cream Sandwiches

Raspberry Peanut Ice Cream Sandwiches combine homemade raspberry ripple ice cream with simple peanut butter cookies cooked in the Airfryer. The result combines creamy, fruity and nutty flavours with the contrast of cold ice cream and soft cookies.

Making the Raspberry Mixture

Frozen raspberries are blended with fresh lemon juice, icing sugar and optional liquid glucose until smooth. Passing the mixture through a fine sieve removes the raspberry seeds and creates a smoother fruit purรฉe.

The lemon juice provides acidity and helps balance the sweetness of the condensed milk and cream.

Preparing the Ice Cream

Condensed milk and thickened cream form the base of this simple homemade ice cream. They are whisked with vanilla until the mixture becomes thick before the raspberry purรฉe is added.

This method does not require an ice cream machine, making it particularly convenient for preparing at home.

Creating the Raspberry Ripple

Rather than completely mixing the raspberry purรฉe into the cream, spoon it over the mixture and gently ripple it through. This creates streaks of raspberry throughout the finished ice cream.

Transfer the mixture to a suitable container and freeze overnight so it becomes completely firm before assembling the sandwiches.

Simple Peanut Cookies

The cookies use peanut butter, sugar and egg to create a straightforward dough. The peanut flavour provides a rich, slightly salty contrast to the sweet and tangy raspberry filling.

The dough should be stiff enough to divide into individual portions before cooking.

Shaping the Cookies

Divide the dough into equal portions and arrange them well apart in the air fryer basket. Pressing the surface lightly with a fork flattens each portion and creates the characteristic pattern on top.

Keeping the cookies similar in size is particularly useful because pairs of equally sized cookies make the finished ice cream sandwiches easier to assemble.

Air Frying the Cookies

The cookies are cooked at 160ยฐC for approximately 12 to 15 minutes. They should be golden when removed from the air fryer.

Freshly cooked cookies may still feel slightly soft. Allow them to cool completely on a wire rack, where they will become firmer.

Assembling the Sandwiches

Place a generous scoop of raspberry ice cream on the flat side of one completely cooled cookie. Top with another cookie and press gently until the ice cream reaches towards the edges.

Work reasonably quickly during assembly so the ice cream does not become excessively soft.

Preparing Them Ahead

The sandwiches can be assembled in advance and returned to the freezer. Once firm, they can be wrapped individually or stored together in an airtight freezer-safe container.

This makes them particularly convenient for a Birthday or party because there is no last-minute cooking required.

Serving in Warmer Weather

The combination of fresh raspberry flavour and frozen cream makes these sandwiches particularly suitable for spring and summer. Take them from the freezer shortly before serving so the ice cream remains firm.

Raspberry and Peanut

Raspberry and peanut create an interesting balance of flavours. The fruit provides acidity and freshness, while peanut butter adds richness and a savoury nutty character.

Raspberry Peanut Ice Cream Sandwiches turn these contrasting flavours into a playful frozen dessert. With homemade raspberry ripple ice cream between air-fried peanut cookies, they can be prepared well ahead and kept frozen until needed.