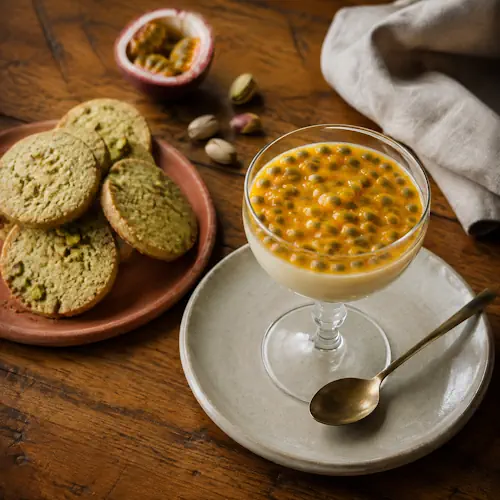
Passionfruit Pistachio Tartlets


Creamy passionfruit posset topped with fresh pulp and served with pistachio biscuits.

Passionfruit Pistachio Tartlets

Crisp pistachio biscuits filled with a smooth passionfruit cream and topped with fresh passionfruit pulp. These chilled tartlets combine sweet, tangy and nutty flavours in an elegant air fryer dessert.
Couverts4
Total time 4 hours 20 minutes
estimated costs pp $2.75
Deel op Facebook Print Recipe

Equipment

  • baking paper
  • electric mixer
  • Muffin pan, 12-hole
  • Rolling Pin
  • Saucepan

Ingredients

Passionfruit Cream

For Serving

  • Pulp from 3 passionfruit

Instructions

  • Measure 100 ml passionfruit pulp into a jug, reserving the remaining pulp.
  • Stir in the lime juice and set aside.
  • Combine the cream and caster sugar in a saucepan over low heat.
  • Stir for 2 minutes, until the sugar dissolves.
  • Increase to medium heat and bring to the boil.
  • Simmer for 2 minutes, remove from the heat and stir in the passionfruit mixture.
  • Divide between six 175 ml glasses.
  • Cool for 10 minutes, then refrigerate for at least 4 hours or overnight.
  • To make the biscuits, beat the butter and icing sugar for 1 minute, or until smooth.
  • Stir in the custard powder, flour, vanilla extract and pistachios to form a soft dough.
  • Roll the dough into 12 walnut-sized balls.
  • Arrange in the air fryer basket, spacing them apart and cooking in batches if needed.
  • Flatten slightly and press the centres with a fork.
  • Air fry at 160ยฐC for 10 to 12 minutes, until pale golden.
  • Leave to cool completely.
  • Store in an airtight container for up to 5 days.
  • Serve the chilled passionfruit cream with the pistachio biscuits and fresh passionfruit pulp.

Notes & Wine Advice

Serving Suggestions

Serve the passionfruit cream thoroughly chilled with the crisp pistachio biscuits and extra fresh passionfruit pulp. The biscuits can be served alongside or broken into pieces and scattered over the cream.

Recipe Notes

Allow at least 4 hours for the passionfruit cream to chill and set properly. For easier preparation, make the cream the evening before and refrigerate it overnight.
Allow the pistachio biscuits to cool completely before serving. They become firmer and crisper as they cool.

Cooking Advice

Cook the biscuits in batches if necessary so there is enough space for hot air to circulate around them. They should be pale golden rather than deeply browned.

Storage Advice

Store the pistachio biscuits in an airtight container for up to 5 days. Keep the passionfruit cream covered in the refrigerator and add the fresh passionfruit pulp immediately before serving.

Wine Advice

The sweet and tangy passionfruit flavours work best with a fresh dessert wine. Choose a suitable bottle from Renรฉ’s Wijnbeleving.

Nutrition values

Serving: 295 g | Calories: 725 kcal | koolhydraten: 65 g | Eiwitten: 9 g | Vet: 50 g | Verzadigd vet: 29 g | Natrium: 115 mg | Suiker: 47 g
————————————————————————————————–
Course; Air fryer / Dessert
Cuisine; Australia
Season: Spring / Summer

About Passionfruit Pistachio Tartlets

Passionfruit Pistachio Tartlets bring together a smooth chilled passionfruit cream and crisp homemade pistachio biscuits. Fresh passionfruit provides a bright tropical flavour, while lime adds extra acidity and the rich cream gives the dessert its luxurious texture. The biscuits are prepared separately in the Airfryer and served alongside the chilled cream.

Fresh Passionfruit

Passionfruit is the dominant flavour in this dessert. Its naturally sharp, aromatic pulp provides enough acidity to balance the richness of the cream and sweetness of the caster sugar.

Some of the pulp is incorporated into the cream mixture, while additional fresh passionfruit is reserved for serving. This gives the finished dessert both cooked and fresh passionfruit flavour.

Making the Passionfruit Cream

The cream and caster sugar are gently heated together until the sugar has dissolved. Once the mixture reaches the boil, it is simmered briefly before being removed from the heat.

The passionfruit and lime mixture is then stirred through. The acidity of the fruit helps create the characteristic set texture as the cream chills.

Allow Enough Chilling Time

The passionfruit cream needs at least 4 hours in the refrigerator. This chilling period is part of the recipe rather than optional resting time because the cream needs sufficient time to set.

Preparing the dessert the evening before serving is particularly convenient. Leaving it overnight gives the cream plenty of time to chill completely.

Making the Pistachio Biscuits

The accompanying biscuits are made from softened butter, icing sugar, plain flour, custard powder, vanilla and finely chopped pistachios. The mixture forms a soft dough that requires very little handling.

Finely chopping the pistachios distributes their nutty flavour throughout each biscuit while still leaving enough texture to contrast with the smooth passionfruit cream.

Shaping the Biscuits

Divide the dough into small walnut-sized balls and arrange them in the air fryer basket with space between each one. Flatten them slightly before pressing the centres with a fork.

Keeping the biscuits similar in size helps them cook evenly. Depending on the size of the air fryer, several batches may be required.

Air Frying

The biscuits cook at 160ยฐC for approximately 10 to 12 minutes. This moderate temperature allows them to cook through without becoming excessively dark.

They should be lightly golden when removed from the air fryer. Allow them to cool completely because their texture becomes firmer as they cool.

Passionfruit and Pistachio

The contrast between passionfruit and pistachio is central to the dessert. Passionfruit is bright, acidic and intensely fruity, while pistachios provide a richer, gently savoury nuttiness.

The crisp biscuits also provide an important textural contrast with the silky chilled cream.

Serving the Dessert

Serve the passionfruit cream directly from the refrigerator and finish each portion with fresh passionfruit pulp. Place the pistachio biscuits alongside so they remain crisp until eaten.

For a different presentation, crumble part of a biscuit over each serving immediately before bringing the dessert to the table.

Preparing Ahead

Both components are well suited to advance preparation. The passionfruit cream can chill overnight, while the biscuits can be prepared separately and stored in an airtight container.

Keep the biscuits away from the refrigerated cream until serving. Refrigeration and moisture can soften their crisp texture.

A Fresh Dessert for Warmer Months

The tropical acidity of passionfruit makes this dessert particularly appealing during spring and summer. Despite the rich cream, the fruit and lime keep the overall flavour fresh.

Passionfruit Pistachio Tartlets combine silky passionfruit cream, fresh tropical fruit and crisp nutty biscuits in one dessert. The components can be prepared ahead, making it a practical choice for a Birthday, party or relaxed family meal.
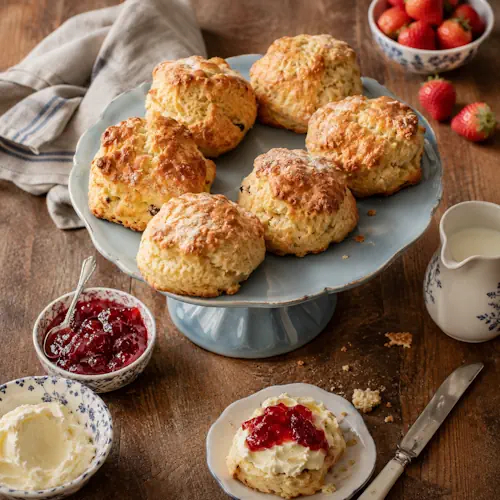
Buttermilk Air Fryer Scones


Golden homemade scones with strawberry jam, clotted cream and milk.

Buttermilk Air Fryer Scones

Soft and fluffy homemade scones made with buttermilk and cooked in the air fryer until lightly golden. Serve them warm with jam and whipped cream for a classic sweet treat.
Couverts4
Total time 25 minutes
estimated costs pp $0.85
Deel op Facebook Print Recipe

Equipment

Ingredients

Instructions

  • Preheat the air fryer to 180ยฐC.
  • Combine the flour, baking powder and sea salt flakes in a bowl.
  • Rub in the chilled butter until the mixture resembles fine breadcrumbs.
  • Stir in the caster sugar.
  • Combine the vanilla extract with the buttermilk or milk in a jug.
  • Gradually stir the liquid into the flour mixture to form a soft dough.
  • Turn the dough onto a lightly floured surface and bring it together.
  • Pat to about 4 to 5 cm thick.
  • Use a 4 cm cutter to cut out rounds, reshaping the dough scraps as needed.
  • Arrange the scones in the air fryer basket.
  • Brush the tops with milk.
  • Air fry for 14 to 18 minutes, until risen and golden.
  • Allow to cool slightly before serving with jam and whipped cream.
  • Store in an airtight container for up to 3 days.

Notes & Wine Advice

Serving Suggestions

Serve the scones slightly warm with jam and whipped cream. Split them just before serving so the centres remain soft and fresh.

Recipe Notes

Keep the butter chilled and handle the dough as little as possible. Overworking the dough can make the finished scones firmer and less fluffy.

Cooking Advice

Pat the dough to approximately 4 to 5 cm thick and press the cutter straight down without twisting. This helps the scones rise more evenly during air frying.

Storage Advice

Store cooled scones in an airtight container for up to 3 days. Warm them briefly in the Airfryer before serving.

Wine Advice

Wine is not essential with these scones. Tea or coffee is a more natural accompaniment, particularly when they are served with jam and cream.

Nutrition values

Serving: 120 g | Calories: 365 kcal | koolhydraten: 52 g | Eiwitten: 7 g | Vet: 15 g | Verzadigd vet: 9 g | Natrium: 460 mg | Suiker: 15 g
————————————————————————————————–
Cuisine; England / European
Season: All Seasons
Occasions Birthday / Breakfast / Weekend

About Buttermilk Air Fryer Scones

Buttermilk Air Fryer Scones are a quick version of traditional scones, with a soft interior and lightly golden exterior. The dough is made with self-raising flour, chilled butter, caster sugar and buttermilk, with a little vanilla adding gentle sweetness. Cooking them in the Airfryer means there is no need to heat a conventional oven.

Keeping the Scones Light

The key to a soft scone is minimal handling. Once the liquid has been added to the dry ingredients, mix only until a soft dough forms. Excessive kneading develops the flour and can produce a tougher texture.

The butter should also remain cold. Small pieces of chilled butter melt during cooking and contribute to the tender texture of the finished scones.

Using Buttermilk

Buttermilk gives the dough moisture and a subtle tang. It also works with the raising agents in the flour and baking powder to help create a light texture.

Regular milk can be used instead when buttermilk is unavailable, as suggested in the original recipe.

Shaping the Dough

Turn the dough onto a lightly floured work surface and gently bring it together. Rather than repeatedly rolling it, pat it to approximately 4 to 5 cm thick.

Use a 4 cm pastry cutter and press directly through the dough. Avoid twisting the cutter because this can compress the edges and interfere with an even rise.

Cooking in the Air Fryer

Arrange the scones in the basket with enough room for the hot air to circulate. Brush the tops lightly with milk before cooking to encourage a golden finish.

Air fry at 180ยฐC for approximately 14 to 18 minutes. They are ready when they have risen, developed a golden surface and are cooked through in the centre.

Serving with Jam and Cream

Freshly cooked scones are particularly good while still slightly warm. Split them and serve with your favourite jam and whipped cream.

The relatively simple scone itself provides a neutral base for the richer cream and sweet fruit jam, so there is no need for elaborate additional toppings.

Serving for Breakfast

These scones make an easy addition to a relaxed breakfast or weekend table. They can be prepared quickly and served directly from the air fryer while still warm.

They are also suitable for an afternoon treat with tea or coffee, especially when served with several different jams.

Preparing Ahead

Scones are at their best on the day they are made, but they can be prepared earlier and warmed briefly before serving. Avoid refrigerating them unnecessarily because this can make them dry more quickly.

Storing the Scones

Once completely cool, place leftover scones in an airtight container and keep them for up to 3 days. A brief reheating in the air fryer helps refresh their texture.

Buttermilk Air Fryer Scones offer a straightforward way to make a small batch of soft, fluffy scones without using a conventional oven. Served warm with jam and whipped cream, they make a simple breakfast, weekend treat or sweet addition to an afternoon table.

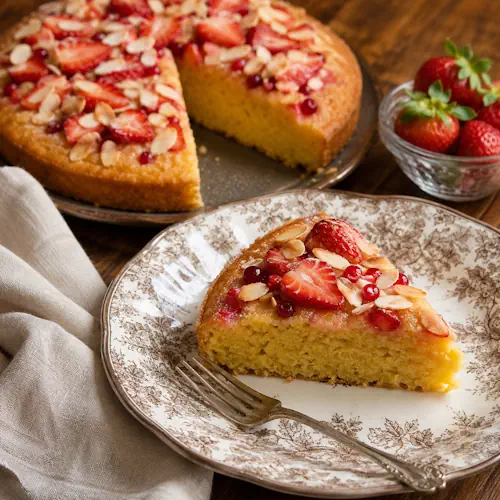
Strawberry Polenta Cake


Moist polenta cake with strawberries, redcurrants and toasted almonds.

Strawberry Polenta Cake

A moist air fryer cake made with fresh strawberries, fine polenta and ground almonds. Vanilla and almond extract add extra flavour, while the strawberries create a soft, fruity contrast to the rich almond crumb.
Couverts4
Total time 1 hour 5 minutes
estimated costs pp $1.75
Deel op Facebook Print Recipe

Equipment

Ingredients

Instructions

  • Lightly grease a 20 cm cake pan or ovenproof frying pan.
  • Preheat the air fryer to 160ยฐC.
  • Beat the softened butter, ยฝ cup caster sugar, vanilla and almond extract in a bowl for 5 minutes, until light and fluffy.
  • Add the eggs one at a time, mixing well after each addition.
  • Fold in the flour, fine polenta and ground almonds, then gently fold through half the diced strawberries.
  • Spoon the mixture into the prepared pan and smooth the surface.
  • Arrange the remaining strawberries over the top.
  • Air fry for 35 to 50 minutes, until golden, firm and cooked through.
  • Serve warm with ice cream or cream.

Notes & Wine Advice

Serving Suggestions

Serve Strawberry Polenta Cake warm or at room temperature with vanilla ice cream or lightly whipped cream. Fresh strawberries also make a simple finishing touch.

Recipe Notes

Use fine polenta rather than coarse polenta for a softer cake texture. Make sure the butter is properly softened before beating it with the caster sugar, vanilla and almond extract.
Fold the strawberries gently through the batter so they keep their shape and do not release too much juice before cooking.

Cooking Advice

Air fryers vary in intensity, so begin checking the cake after 35 minutes. The centre should be firm and completely cooked before the cake is removed from the air fryer.

Storage Advice

Allow the cake to cool completely before storing it in an airtight container in the refrigerator. Keep for up to 3 days and bring to room temperature or gently warm before serving.

Wine Advice

The fresh strawberries and almonds pair nicely with a fruity dessert wine. Choose a suitable bottle from Renรฉ’s Wijnbeleving.

Nutrition values

Serving: 225 g | Calories: 690 kcal | koolhydraten: 62 g | Eiwitten: 14 g | Vet: 45 g | Verzadigd vet: 22 g | Natrium: 390 mg | Suiker: 31 g
————————————————————————————————–
Course; Air fryer / Baking / Cake / Dessert
Cuisine; European
Season: Spring / Summer
Diets; Vegetarian

About Strawberry Polenta Cake

Strawberry Polenta Cake combines fresh strawberries, fine polenta and ground almonds in a moist, rich cake with plenty of texture. Vanilla and almond extract enhance the flavour of the fruit and nuts, while cooking the cake in the Airfryer gives it a golden surface without requiring a conventional oven.

Fresh Strawberries

Strawberries play an important role in both the flavour and texture of this cake. Some are folded through the batter, where they soften and release their juices during cooking, while the remaining strawberries are arranged over the top.

Choose ripe but reasonably firm strawberries. Very soft fruit can release too much liquid and make the surrounding cake mixture overly moist.

Why Use Polenta?

Fine polenta gives the cake a distinctive texture that is different from an ordinary sponge cake. It adds a gentle graininess while absorbing flavour and moisture from the butter, eggs and strawberries.

Fine polenta is preferable to a coarse variety because it creates a softer and more delicate finished crumb.

Ground Almonds

Ground almonds add richness and help keep the cake moist. Their nutty flavour works particularly well with strawberries and is reinforced by the small amount of almond extract in the batter.

Together, the polenta and almonds give the cake more texture and substance than a conventional fruit sponge.

Preparing the Batter

Begin by beating the softened butter with caster sugar, vanilla and almond extract for approximately 5 minutes. The mixture should become noticeably lighter and fluffier.

Add the eggs gradually, mixing thoroughly after each addition. This creates a smooth base before the flour, polenta and ground almonds are folded through.

Adding the Strawberries

Fold the diced strawberries gently through the finished batter. Avoid vigorous mixing because this can break down the fruit and release unnecessary moisture.

Once the batter is transferred to the prepared pan, arrange the remaining sliced strawberries over the surface before air frying.

Cooking in the Air Fryer

The cake is cooked at 160ยฐC for approximately 35 to 50 minutes. The moderate temperature allows the centre to cook through while reducing the chance of the surface becoming too dark.

Air fryers can differ considerably in cooking speed, so the cake should be checked during the final part of the cooking time rather than relying entirely on the clock.

Checking for Doneness

The cake should be golden and firm in the centre when ready. A skewer inserted into the centre should come out without wet cake batter attached.

If the surface is browning too quickly while the centre still needs additional cooking, protect the top loosely and continue cooking until the centre is done.

Serving Ideas

Strawberry Polenta Cake is particularly enjoyable while still slightly warm. Vanilla ice cream provides a cool and creamy contrast to the warm fruit and rich almond cake.

For a simpler dessert, serve slices with lightly whipped cream and additional fresh strawberries.

Spring and Summer Dessert

Fresh strawberries make this cake especially suitable for spring and summer, when the fruit is naturally associated with lighter desserts and seasonal baking.

It also works well for a Birthday, relaxed family gathering or weekend dessert because it can be prepared ahead and served without elaborate decoration.

Storage

Because the cake contains plenty of fresh strawberries, allow leftovers to cool completely before refrigerating them in an airtight container.

Strawberry Polenta Cake combines juicy strawberries, buttery cake, fine polenta and ground almonds in a rich air fryer dessert. The combination of fresh fruit, vanilla and almond gives the cake plenty of flavour, while the polenta creates its characteristic texture.

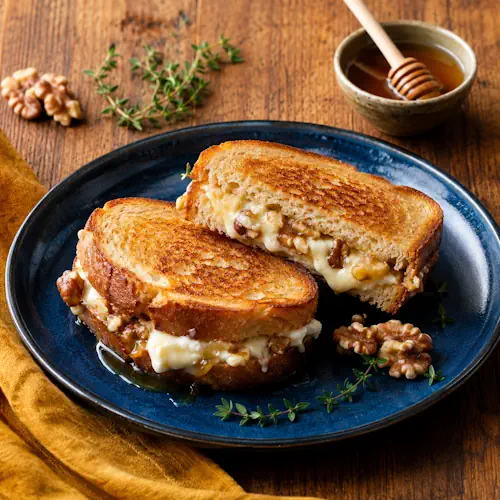
Tahini, Feta & Honey Toastie


Crispy toasties with feta, tahini, honey, walnuts and thyme.

Tahini, Feta & Honey Toastie

A crisp air fryer toastie filled with creamy tahini, salty feta, sweet honey and fresh parsley. The combination creates a rich, savoury-sweet sandwich with plenty of flavour and crunch.
Couverts4
Total time 15 minutes
estimated costs pp $1.65
Deel op Facebook Print Recipe

Equipment

Ingredients

Instructions

  • Preheat the air fryer to 190ยฐC.
  • Spread one side of each bread slice with softened butter.
  • Place 4 slices butter-side down and spread each with tahini.
  • Top with the crumbled feta, honey and parsley.
  • Season with salt and freshly ground black pepper.
  • Top with the remaining bread slices, butter-side up.
  • Air fry for 10 minutes, turning once, until golden and crunchy on the outside.
  • Serve immediately.

Notes & Wine Advice

Serving Suggestions

Serve the toasties immediately while the bread is crisp and the feta filling is warm. A fresh Salad makes a good accompaniment for lunch.

Recipe Notes

Tahini has a rich sesame flavour that works particularly well with salty feta and sweet honey. Spread it evenly over the bread so the flavour is distributed throughout the sandwich.

Cooking Advice

Butter the outside of the bread and turn the toasties halfway through cooking. This helps both sides become evenly crisp and golden in the air fryer.

Variations

Fresh parsley provides a light herbal contrast to the rich filling. Keep additional ingredients relatively dry so the bread remains crisp during cooking.

Wine Advice

A fresh white wine with good acidity complements the salty feta, creamy tahini and sweet honey. Choose a suitable bottle from Renรฉ’s Wijnbeleving.

Nutrition values

Serving: 185 g | Calories: 495 kcal | koolhydraten: 51 g | Eiwitten: 17 g | Vet: 26 g | Verzadigd vet: 11 g | Natrium: 890 mg | Suiker: 17 g
————————————————————————————————–

About Tahini, Feta & Honey Toastie

Tahini, Feta & Honey Toastie combines crisp buttery bread with creamy sesame tahini, salty feta, sweet honey and fresh parsley. Cooking the sandwich in the Airfryer gives the bread a crunchy golden exterior while gently warming the filling.

Sweet and Savoury Flavours

The main appeal of this toastie comes from the contrast between feta and honey. Feta contributes a distinctive salty and slightly tangy flavour, while honey provides sweetness that softens its sharper character.

Tahini adds another savoury layer with its rich sesame flavour, making the filling more substantial without requiring many ingredients.

Using Tahini

Tahini is a smooth paste made from sesame seeds. Its creamy consistency makes it particularly convenient for spreading directly onto bread.

A relatively thin layer is sufficient because tahini has a concentrated flavour. Spreading it evenly ensures that it combines with the feta and honey throughout the toastie.

Adding Feta

Crumbled feta is distributed over the tahini rather than placed in thick pieces. This makes the filling easier to eat and ensures that the cheese is spread evenly through the sandwich.

Unlike mozzarella or cheddar, feta does not need to become completely melted. Warming softens it slightly while preserving its characteristic crumbly texture.

Balancing with Honey

Honey provides an important contrast to the salty feta and earthy sesame flavour of the tahini. Only a modest amount is needed to give the sandwich a noticeable sweet element.

Distribute the honey evenly rather than concentrating it in one area, which helps maintain a consistent balance between sweet and savoury flavours.

Fresh Parsley

Finely chopped parsley brings freshness to the rich filling. Its clean herbal flavour prevents the combination of tahini, feta and honey from becoming overly heavy.

Chopping the parsley finely also makes it easier to distribute without creating large leaves that pull out of the sandwich when eaten.

Preparing the Bread

Softened butter is spread over the outside of each slice. During air frying, this helps the surface become crisp and evenly golden.

Keep the filling on the unbuttered sides so the butter remains exposed to the circulating hot air.

Cooking in the Air Fryer

The toasties cook at 190ยฐC for approximately 10 minutes. Turn them once during cooking so both sides become evenly crisp.

Different air fryers can brown bread at slightly different speeds, so check the sandwiches during the final few minutes and remove them when they are golden and crunchy.

Serving Ideas

This toastie makes a quick Lunch or savoury snack. Serve it immediately for the best contrast between crisp bread and the warm creamy filling.

A simple green salad, cucumber salad or fresh tomatoes provide a lighter accompaniment and work particularly well with the feta and tahini flavours.

Mediterranean Flavours

Feta, tahini, honey and parsley create a combination strongly associated with Mediterranean cooking. The salty cheese, sesame paste and honey provide plenty of flavour without requiring a complicated sauce or lengthy preparation.

The ingredients also provide contrasting textures, from crisp toasted bread to crumbly feta and smooth tahini.

A Quick Air Fryer Lunch

There is almost no preparation beyond assembling the sandwiches. None of the filling ingredients require precooking, making this particularly convenient when you want something warm without spending much time in the kitchen.

Tahini, Feta & Honey Toastie combines crisp bread with salty feta, creamy sesame tahini, sweet honey and fresh parsley. With just a few ingredients and a short cooking time, it delivers a distinctive sweet and savoury toasted sandwich suitable for lunch or a quick snack.

Cheese, Chilli & Mango Chutney Toastie


Golden toasties with melted cheddar, sweet mango chutney and red chilli.

Cheese, Chilli & Mango Chutney Toastie

A crisp air fryer toastie filled with melted cheese, sweet mango chutney, fresh chilli, coriander and green onion. Sweet, spicy and savoury flavours come together in a quick toasted sandwich.
Couverts4
Total time 15 minutes
estimated costs pp $1.40
Deel op Facebook Print Recipe

Equipment

Ingredients

Instructions

  • Preheat the air fryer to 190ยฐC.
  • Spread one side of each bread slice with softened butter.
  • Place 4 slices butter-side down and spread each with mango chutney.
  • Top with the grated cheese, jalapeรฑo chilli, coriander leaves and green onions.
  • Season with salt and freshly ground black pepper.
  • Top with the remaining bread slices, butter-side up.
  • Air fry for 10 minutes, turning once, until golden and crunchy on the outside and the cheese has melted in the centre.
  • Serve immediately.

Notes & Wine Advice

Serving Suggestions

Serve the toasties immediately while the bread is crisp and the cheese is hot and melted. A fresh salad makes a simple accompaniment for lunch.

Recipe Notes

Mango chutney provides both sweetness and gentle acidity, while jalapeรฑo chilli adds heat. Adjust the amount of chilli if you prefer a milder filling.

Cooking Advice

Butter the outside of the bread to encourage an evenly crisp and golden finish. Turn the toasties halfway through cooking so both sides brown evenly.

Variations

Keep additional fillings relatively dry and avoid using too much mango chutney, as excess moisture can soften the bread.

Wine Advice

A fresh, aromatic white wine works well with the sweet mango chutney, chilli and melted cheese. Choose a suitable bottle from Renรฉ’s Wijnbeleving.

Nutrition values

Serving: 180 gr | Calories: 465 kcal | koolhydraten: 48 g | Eiwitten: 18 g | Vet: 23 g | Verzadigd vet: 13 g | Natrium: 820 mg | Suiker: 13 g
————————————————————————————————–
Cuisine; European
Season: All Seasons
Occasions Family Dinner / Lunch / Weekend

About Cheese, Chilli & Mango Chutney Toastie

Cheese, Chilli & Mango Chutney Toastie combines crisp buttery bread with melted cheese, sweet mango chutney, spicy jalapeรฑo chilli, fresh coriander and green onion. Cooking the sandwich in the Airfryer gives the bread a crunchy golden exterior while quickly melting the cheese in the centre.

Sweet, Spicy and Savoury

The character of this toastie comes from the contrast between its main flavours. Tasty cheese provides richness and saltiness, mango chutney adds fruity sweetness and jalapeรฑo chilli brings a fresh spicy note.

Fresh coriander and green onion prevent the filling from becoming too rich and add a fresher flavour to each bite.

Using Mango Chutney

Mango chutney works particularly well in a toasted sandwich because its sweetness contrasts with salty melted cheese. Only a relatively thin layer is needed.

Using too much chutney can introduce excess moisture and make the inner surface of the bread soft, so spread it evenly rather than generously.

Choosing the Cheese

Grated tasty cheese melts quickly and distributes evenly throughout the sandwich. Its stronger flavour also stands up well to the sweetness of the chutney and heat of the chilli.

Spread the grated cheese across the entire slice rather than concentrating it in the centre. This gives the toastie a more consistent filling.

Adding Jalapeรฑo Chilli

Finely chopped jalapeรฑo chilli provides heat without creating large pieces in the filling. Distributing it evenly is particularly useful because every bite then receives a little chilli.

The amount can easily be adjusted according to preference. A smaller quantity creates a mild toastie, while additional chilli gives a noticeably hotter result.

Fresh Coriander and Green Onion

Coriander adds a fresh herbal flavour that works naturally with mango and chilli. Green onion provides a mild onion character without requiring additional cooking.

Both ingredients should be finely chopped so they spread easily through the melted cheese rather than falling out when the sandwich is cut.

Preparing the Bread

Softened butter is spread over the outside surfaces of the bread. This helps create the crisp golden crust that distinguishes a toastie from an ordinary warm sandwich.

Use enough butter to lightly cover the bread without making it greasy. An even coating produces the most consistent browning.

Cooking in the Air Fryer

At 190ยฐC, the toasties need approximately 10 minutes in the air fryer. Turning them halfway through allows both sides to receive direct heat and become evenly crisp.

Depending on the size of the basket, cooking in batches may be necessary. Avoid stacking or overlapping the sandwiches because this prevents the bread from browning properly.

Knowing When It Is Ready

The toastie is ready when both sides are golden and crisp and the cheese in the centre has completely melted. Check towards the end of cooking because different air fryers can brown bread at slightly different rates.

If the bread is already golden but the cheese needs a little longer, reduce the temperature slightly and continue cooking briefly.

Serving Ideas

Serve the toasties immediately for the best contrast between crunchy bread and melted filling. They make a quick Lunch or substantial savoury snack.

A simple green salad, sliced tomatoes or crisp vegetables provide a fresh contrast to the rich cheese and sweet chutney.

A Quick Air Fryer Toastie

With only a few minutes of preparation and around 10 minutes of cooking, this recipe is useful when you want a hot meal without much preparation. There are no ingredients that require precooking and the filling can be assembled directly on the bread.

Cheese, Chilli & Mango Chutney Toastie brings together crisp bread, melted cheese, fruity chutney, fresh herbs and chilli in a compact air fryer sandwich. The combination of sweetness, heat and savoury cheese makes it considerably more interesting than a basic cheese toastie while remaining just as easy to prepare.

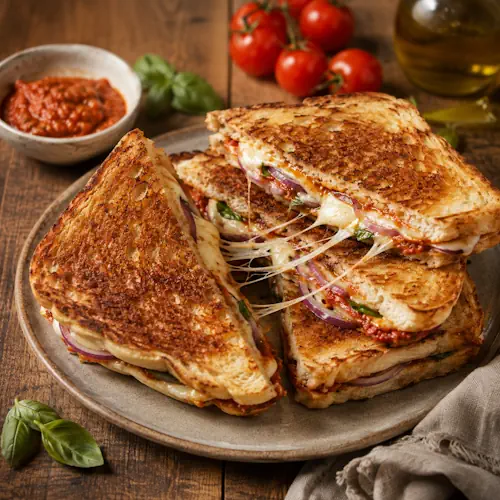
Pizza Toastie


Golden toasted sandwiches with tomato pesto, red onion, basil and melted mozzarella.

Pizza Toastie

A quick air fryer toastie filled with pizza sauce, mozzarella, salami and fresh basil. Crisp golden bread surrounds a hot, cheesy pizza-style filling for an easy lunch or snack.
Couverts4
Total time 10 minutes
estimated costs pp $1.75
Deel op Facebook Print Recipe

Equipment

Ingredients

Instructions

  • Preheat the air fryer to 190ยฐC.
  • Spread one side of each bread slice with softened butter.
  • Place 4 slices butter-side down and spread each with pizza sauce.
  • Scatter over the mozzarella and salami, then season with salt and freshly ground black pepper.
  • Add a few fresh basil leaves and top with the remaining bread slices, butter-side up.
  • Air fry for 10 minutes, turning once, until the sandwiches are golden and crunchy on the outside and the cheese has melted in the centre.
  • Serve hot with extra fresh basil leaves.

Notes & Wine Advice

Serving Suggestions

Serve the Pizza Toasties immediately while the bread is crisp and the mozzarella is still hot and melted. A simple green salad makes a fresh accompaniment for lunch.

Recipe Notes

Butter the outside of the bread rather than the inside. This helps the toasties develop an evenly crisp and golden surface in the air fryer.
Do not add too much pizza sauce because excess moisture can make the bread soggy. A thin, even layer gives plenty of tomato flavour without soaking the sandwich.

Cooking Advice

Turn the toasties halfway through cooking so both sides brown evenly. Air fryers vary, so check them towards the end of cooking and remove them once the bread is crisp and the cheese has completely melted.

Variations

The basic combination of pizza sauce, mozzarella and salami can be adapted with other pizza-style fillings. Keep additional ingredients relatively dry so the toasties remain crisp.

Wine Advice

A medium-bodied Italian red works well with the tomato sauce, salami and melted mozzarella. Choose a suitable wine from Renรฉ’s Wijnbeleving.

Nutrition values

Serving: 245 g | Calories: 590 kcal | koolhydraten: 49 g | Eiwitten: 27 g | Vet: 32 g | Verzadigd vet: 15 g | Natrium: 1350 mg | Suiker: 7 g
————————————————————————————————–
Cuisine; European / Italian
Season: All Seasons
Diets; Egg-Free / Nut Free
Occasions Family Dinner / Lunch / Weekend

About Pizza Toastie

Pizza Toastie combines two familiar favourites in one quick air fryer recipe. It has the crisp, buttery bread of a toasted sandwich with the tomato, mozzarella, salami and basil flavours associated with pizza. The result is a simple hot Lunch that takes only around 10 minutes to cook.

A Pizza-Inspired Toasted Sandwich

The filling is deliberately simple. Pizza sauce provides the tomato base, mozzarella gives the characteristic melted cheese texture and salami adds a salty, savoury flavour. Fresh basil finishes the combination with a fragrant herbal note.

Because all of these ingredients require very little cooking, they are particularly suitable for a fast toasted sandwich.

Choosing the Bread

Regular sliced bread works well because it becomes crisp quickly in the concentrated heat of the air fryer. Bread that is reasonably sturdy is preferable because it needs to hold the sauce and melted cheese without falling apart.

Spreading softened butter over the outside surfaces encourages even browning and gives the finished toastie a crisp texture.

Using Pizza Sauce

Pizza sauce gives the sandwich its recognisable tomato flavour. Spread it in a relatively thin layer rather than using a large quantity.

Too much sauce introduces excess moisture and can prevent the inner surface of the bread from becoming properly toasted.

Mozzarella for the Filling

Mozzarella is particularly suitable because it melts smoothly and provides the stretchy cheese texture expected from a pizza-style filling.

Distribute the mozzarella evenly so each part of the sandwich contains cheese. This also helps hold the other filling ingredients together once melted.

Adding Salami

Salami contributes savoury flavour and a little spice without requiring any preparation. Thin slices work best because they heat through quickly during the short air frying time.

Keeping the salami in an even layer also prevents the centre of the toastie from becoming excessively thick.

Fresh Basil

Fresh basil complements both tomato and mozzarella. Some leaves can be placed inside the sandwich, while additional basil can be added immediately before serving.

Adding some basil after cooking preserves its fresh aroma and provides a pleasant contrast with the hot filling.

Cooking in the Air Fryer

The Airfryer cooks the toasties quickly because hot air circulates directly around the bread. At 190ยฐC, approximately 10 minutes is enough to crisp the exterior and melt the mozzarella.

Turning the sandwiches halfway through cooking promotes even browning on both sides. Depending on the size of the basket, the toasties may need to be cooked in batches.

Serving the Toasties

Pizza Toasties are best served immediately. Once they sit for an extended period, steam from the hot filling gradually softens the crisp bread.

Serve them alone as a quick snack or add a green salad, tomatoes or fresh vegetables for a more substantial lunch.

Other Filling Ideas

The basic recipe can be treated much like a pizza. Different cheeses, cooked vegetables or other suitable pizza toppings can be added according to preference.

Avoid overfilling the sandwiches. A moderate amount of filling heats more evenly and makes the toasties considerably easier to turn in the air fryer.

A Fast Air Fryer Lunch

One of the main advantages of this recipe is speed. There is no dough to prepare and almost no ingredient preparation. Once assembled, the air fryer handles both toasting the bread and melting the filling.

Pizza Toastie delivers crisp buttery bread, melted mozzarella, tomato sauce, savoury salami and fresh basil in a compact sandwich. It is an easy option when you want pizza flavours without making an entire pizza from scratch.

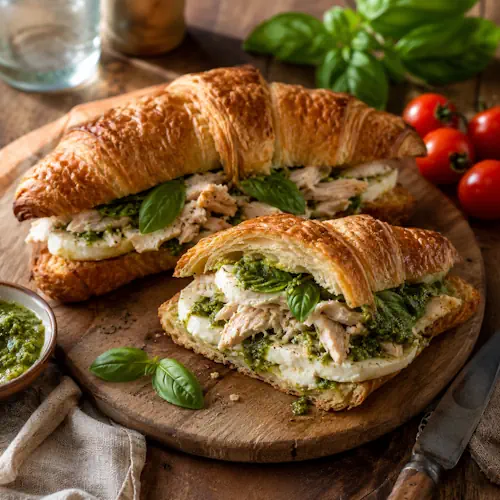
Chicken Pesto Croissants


Buttery croissants filled with shredded chicken, pesto, mozzarella and fresh basil.

Chicken Pesto Croissants

Warm flaky croissants filled with leftover roast chicken, basil pesto and melted cheese. A quick air fryer recipe that turns a few simple ingredients into an easy lunch or savoury snack.
Couverts2
Total time 10 minutes
estimated costs pp $2.35
Deel op Facebook Print Recipe

Equipment

Ingredients

Instructions

  • Preheat the air fryer to 170ยฐC.
  • Place the croissants in the air fryer basket and cook for 3 to 5 minutes, until warmed through.
  • Meanwhile, cook the streaky bacon until crisp, then roughly chop it.
  • Cut the warm croissants lengthways without slicing completely through.
  • Spread the pesto inside each croissant.
  • Divide the shredded chicken, grated cheese and crispy bacon between the croissants.
  • Season lightly with sea salt flakes and freshly ground black pepper.
  • Return the filled croissants to the air fryer briefly, until the cheese has melted.
  • Add baby rocket and serve immediately.

Notes & Wine Advice

Serving Suggestions

Serve the croissants immediately while the pastry is warm and flaky and the cheese is melted. Baby rocket adds freshness and makes them particularly suitable for Lunch.

Recipe Notes

This recipe is an easy way to use leftover roast chicken. Shred the chicken fairly finely so it distributes evenly through the croissants and warms quickly.

Cooking Advice

Watch the croissants carefully in the air fryer because the pastry can brown quickly. They only need enough time to warm through and become lightly crisp before filling.

Variations

The bacon is optional but adds a crisp, salty contrast to the chicken, pesto and cheese. Baby rocket can be added after heating so the leaves remain fresh.

Wine Advice

A fresh white wine pairs nicely with the chicken, pesto and buttery croissant. Choose a suitable wine from Renรฉ’s Wijnbeleving.

Nutrition values

Serving: 245 g | Calories: 610 kcal | koolhydraten: 32 g | Eiwitten: 36 g | Vet: 38 g | Verzadigd vet: 17 g | Natrium: 1180 mg | Suiker: 6 g
————————————————————————————————–
Cuisine; European / French
Season: All Seasons
Diets; Nut Free
Occasions Breakfast / Lunch / Weekend

About Chicken Pesto Croissants

Chicken Pesto Croissants are a quick savoury way to turn leftover roast chicken into a completely different meal. Warm, flaky croissants are filled with shredded chicken, basil pesto, melted cheese and optional crispy bacon, creating a rich and satisfying combination that takes only a few minutes in the Airfryer.

Using Leftover Roast Chicken

Leftover roast chicken is ideal for this recipe because it is already cooked and only needs reheating. Shredding the meat into smaller pieces helps it warm quickly and makes the filling easier to distribute through the croissants.

This is particularly useful when there is not enough chicken remaining for another complete dinner. Even a relatively small amount can become a substantial filling when combined with cheese and pesto.

Warming the Croissants

The croissants are first warmed in the air fryer at 170ยฐC for approximately 3 to 5 minutes. This refreshes the pastry and gives the outside a lightly crisp texture.

Keep an eye on them during cooking because croissants contain plenty of butter and can colour quickly in the concentrated heat of an air fryer.

Adding Basil Pesto

Basil pesto provides most of the seasoning and herbal flavour in the filling. A relatively small amount is sufficient because its combination of basil, garlic and cheese is concentrated.

Spread the pesto directly onto the cut surfaces of the warm croissants so its flavour is distributed throughout each serving.

Choosing the Cheese

Grated tasty cheese melts quickly and provides a rich savoury contrast to the chicken. Grating rather than slicing the cheese also helps it melt more evenly during the brief final heating.

The cheese should be melted without leaving the croissants in the air fryer long enough for the pastry to become overly dark.

Adding Crispy Bacon

Streaky bacon is an optional addition suggested with the recipe. Cooking it until crisp provides a contrasting texture and an additional salty, smoky flavour.

Chop the cooked bacon roughly and distribute it through the filling rather than placing it all in one layer.

Fresh Baby Rocket

Baby rocket provides a peppery freshness that balances the richer ingredients. Add it after the final heating so the leaves remain fresh rather than wilting completely.

The combination of warm chicken and cheese with cool rocket also gives the croissants a more interesting contrast in texture.

Assembling the Croissants

Slice each croissant lengthways without cutting completely through. This creates a pocket that holds the filling while keeping the croissant together.

Spread with pesto before adding the chicken, cheese and optional bacon. Return the filled croissants briefly to the air fryer just long enough to melt the cheese.

Serving Ideas

Chicken Pesto Croissants are substantial enough for lunch on their own, although a simple green salad makes a useful fresh accompaniment. They can also be served as part of a relaxed weekend breakfast or brunch.

For a lighter meal, serve half a filled croissant with a larger portion of salad or fresh vegetables.

Best Served Fresh

Filled croissants are at their best immediately after preparation. The contrast between crisp pastry, warm filling, melted cheese and fresh rocket gradually disappears as they cool.

If preparing the ingredients ahead, keep the chicken, cheese and other fillings refrigerated and assemble the croissants shortly before air frying.

A Quick Leftover Meal

The main advantage of this recipe is its simplicity. The chicken is already cooked, the pesto needs no preparation and the croissants require only a few minutes of heating.

Chicken Pesto Croissants combine flaky pastry with savoury chicken, aromatic pesto and melted cheese in a fast and practical meal. Optional bacon adds extra crunch and baby rocket provides freshness, making these filled croissants an easy way to give leftover roast chicken a second outing.

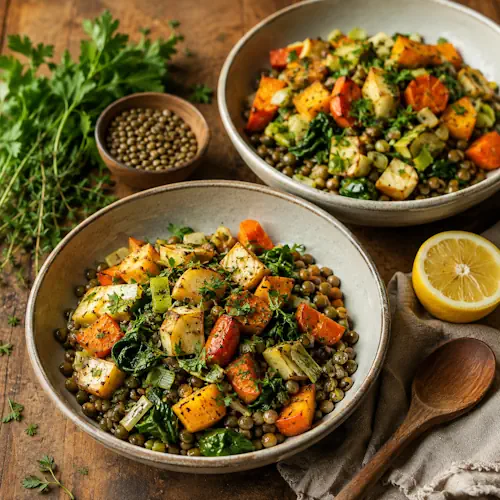
Herb & Root Vegetable Lentil Bowl


Green lentils with roasted root vegetables, spinach, leeks and fresh herbs.

Herb & Root Vegetable Lentil Bowl

A hearty bowl of harissa-roasted root vegetables and baby spinach served with a creamy lentil, yoghurt and coriander mixture. Fresh herbs, lemon and toasted almonds add flavour and texture.
Couverts4
Total time 35 minutes
estimated costs pp $1.75
Deel op Facebook Print Recipe

Equipment

Ingredients

Instructions

  • Toss the root vegetables with the harissa paste and ยฝ tablespoon canola oil. Season with sea salt flakes and freshly ground black pepper.
  • Preheat the air fryer to 180ยฐC.
  • Air fry the vegetables for 20 to 25 minutes.
  • Add the spinach and 1 tablespoon water during the last 5 minutes of cooking.
  • Place the remaining 2ยฝ tablespoons canola oil, herbs, garlic, nuts and lemon zest in a blender or food processor and blend until smooth.
  • Stir through the lemon zest and juice.
  • Stir the lentils into the mixture and combine with a little water.
  • Toss the roasted vegetables and spinach with the lentils.
  • Serve with the herb yoghurt.

Notes & Wine Advice

Serving Suggestions

Serve the lentil bowl warm with the herb yoghurt spooned over the roasted vegetables. It makes a substantial Lunch or light main meal.

Recipe Notes

This recipe is designed to use leftover roasted root vegetables. Carrots and parsnips work particularly well, but a mixture of available root vegetables can be used.
Add the baby spinach only during the final few minutes so it wilts without becoming overcooked.

Cooking Advice

Cut larger leftover vegetables into similar-sized chunks before air frying. This helps them heat evenly and gives the harissa-coated surfaces time to become lightly caramelised.

Storage Advice

Store leftover lentils and vegetables in an airtight container in the refrigerator for up to 2 days. Keep the herb yoghurt separately and add it after reheating the vegetables.

Wine Advice

The earthy lentils, sweet root vegetables and spicy harissa work well with a fresh, fruity wine. Choose a suitable bottle from Renรฉ’s Wijnbeleving.

Nutrition values

Serving: 350 g440 | Calories: 440 kcal | koolhydraten: 52 g | Eiwitten: 17 g | Vet: 20 g | Verzadigd vet: 4 g | Natrium: 420 mg | Suiker: 13 g
————————————————————————————————–

About Herb & Root Vegetable Lentil Bowl

Herb & Root Vegetable Lentil Bowl turns leftover roasted vegetables into a substantial meal with lentils, baby spinach and a fresh herb yoghurt. Harissa adds warmth to the vegetables, while coriander, mint, lemon and toasted nuts bring freshness and texture to the finished dish.

Using Leftover Root Vegetables

The recipe starts with approximately 600 g of leftover root vegetables. Carrots and parsnips are suggested, although other roasted root vegetables can be included depending on what you have available.

Using leftovers makes this a practical recipe for reducing food waste. Because the vegetables are already cooked, the air fryer mainly reheats them while adding extra colour and flavour.

Adding Harissa

Harissa paste provides chilli heat and aromatic spice. Tossing it directly with the vegetables before air frying ensures the flavour is spread evenly rather than concentrated in only a few areas.

The amount is moderate, giving the vegetables warmth without overwhelming their natural sweetness.

Air Frying the Vegetables

The vegetables are cooked in the Airfryer at 180ยฐC. The circulating heat helps the outside become lightly caramelised while the centres heat through.

Baby spinach is added towards the end with a little water. The moisture creates enough steam to wilt the leaves without requiring a separate pan.

Lentils for a More Substantial Bowl

Canned lentils make the dish considerably more filling while requiring almost no additional preparation. Rinse and drain them thoroughly before adding them to the bowl.

Lentils provide a soft, earthy contrast to the sweeter roasted vegetables and fresh herb flavours.

Fresh Coriander and Mint

Coriander and mint give the dish a fresh herbal character. Their brightness is particularly useful against the earthy lentils and warming harissa.

The herbs are blended with garlic, toasted nuts and lemon to create the flavour base for the yoghurt accompaniment.

Using Toasted Nuts

Toasting the nuts before using them deepens their flavour. Allow them to cool before blending so they do not unnecessarily warm the fresh herbs.

The nuts also add richness and texture to an otherwise vegetable- and lentil-based dish.

Lemon for Freshness

Both lemon zest and juice are used to provide acidity and freshness. The zest contributes concentrated citrus aroma, while the juice balances the richer yoghurt, nuts and oil.

This acidity is particularly effective with harissa because it keeps the finished bowl tasting fresh rather than heavy.

Serving the Lentil Bowl

Combine the lentils with the roasted vegetables and wilted spinach, then serve the herb yoghurt alongside or spooned over the top.

The result works well as a Main Course without requiring meat or fish. It can also be divided into smaller portions for lunch.

Preparing Ahead

The herb yoghurt can be prepared ahead and kept refrigerated. The lentils can also be rinsed and drained in advance.

Reheat the vegetables shortly before serving and combine the components at the last moment for the best contrast between the warm vegetables and fresh yoghurt.

Storage

Store the vegetable and lentil mixture separately from the herb yoghurt whenever possible. Refrigerate both promptly in covered containers.

Herb & Root Vegetable Lentil Bowl combines leftover roasted vegetables with earthy lentils, fresh herbs, creamy yoghurt and warming harissa. It is a useful way to turn leftovers into a completely different meal while adding plenty of flavour with only a short period of additional cooking.

Loaded Chicken Nachos


Crispy tortilla chips with shredded chicken, melted cheddar, salsa, jalapeรฑos and sour cream.

Loaded Chicken Nachos

Quick air fryer nachos topped with leftover roast chicken, melted tasty cheese, salsa, sour cream, jalapeรฑos and fresh coriander. A simple way to turn leftover chicken into a hot, crispy sharing dish.
Couverts4
Total time 25 minutes
estimated costs pp $2.10
Deel op Facebook Print Recipe

Equipment

Ingredients

Instructions

  • Preheat the air fryer to 200ยฐC.
  • Combine the shredded chicken, fajita seasoning and lime juice, if using, in a bowl.
  • Line the air fryer basket with baking paper.
  • Arrange half the tortilla chips in the basket.
  • Spoon over half the chicken mixture, half the salsa, half the cheese and half the green onions.
  • Repeat the layers with the remaining ingredients.
  • Air fry for 8 to 10 minutes, until the cheese is melted and bubbling.
  • Use the baking paper to carefully lift the nachos onto a serving platter.
  • Spoon over the sour cream and scatter with pickled jalapeรฑos and fresh coriander.
  • Serve immediately.

Notes & Wine Advice

Serving Suggestions

Serve the nachos immediately while the tortilla chips are still crisp and the cheese is hot and melted. They work particularly well as an Appetizer or informal sharing dish.

Recipe Notes

Layering the tortilla chips, chicken, salsa and cheese rather than placing everything on top helps distribute the toppings throughout the nachos. Keep the sour cream, jalapeรฑos and coriander until after air frying.

Using Leftover Chicken

Cold leftover roast chicken works perfectly for this recipe. Shred it into small pieces so it heats quickly and spreads evenly across the tortilla chips.

Cooking Advice

Watch the nachos during the final few minutes because tortilla chips can brown quickly in an air fryer. The nachos are ready as soon as the cheese has melted and is bubbling.

Wine Advice

A fresh, fruity wine works best with the salty tortilla chips, melted cheese and spicy jalapeรฑos. Choose a suitable bottle from Renรฉ’s Wijnbeleving.

Nutrition values

Serving: 225 g | Calories: 575 kcal | koolhydraten: 45 g | Eiwitten: 31 g | Vet: 31 g | Verzadigd vet: 13 g | Natrium: 920 mg | Suiker: 5 g
————————————————————————————————–

About Loaded Chicken Nachos

Loaded Chicken Nachos are a quick way to transform leftover roast chicken into a hot and satisfying sharing dish. Lightly salted tortilla chips are layered with seasoned chicken, salsa, grated cheese and green onions before being cooked in the Airfryer. Sour cream, pickled jalapeรฑos and fresh coriander are added after cooking for a combination of creamy, spicy and fresh flavours.

Using Leftover Roast Chicken

This recipe is particularly useful when there is a small amount of roast chicken left from another meal. Shredding the meat allows it to spread evenly through the nachos and means every layer gets some chicken.

Because the chicken is already cooked, it only needs to be heated through. This keeps the total cooking time short and prevents the meat from drying out.

Seasoning the Chicken

Fajita seasoning adds a mixture of warm spices without requiring several individual seasonings. Only a small amount is needed because the salsa, cheese and jalapeรฑos already contribute plenty of flavour.

Tossing the seasoning directly with the shredded chicken distributes it more evenly than simply sprinkling it over the finished nachos.

Choosing the Tortilla Chips

Lightly salted tortilla chips provide the crisp foundation for the dish. Sturdy chips work particularly well because they are better able to support the chicken, salsa and melted cheese.

Avoid using too much salsa between the layers. Excess liquid can soften the tortilla chips before they have a chance to become hot and crisp.

Building the Layers

Start with half the tortilla chips and add half the chicken, salsa, cheese and green onions. Repeat the process with the remaining ingredients.

Layering rather than simply piling everything on top means there is melted cheese and seasoned chicken throughout the dish rather than only across the surface.

Cooking Nachos in the Air Fryer

The strong circulating heat of the air fryer melts the cheese quickly and warms the chicken while keeping the exposed tortilla chips crisp. The nachos need only around 8 to 10 minutes at 200ยฐC.

Using baking paper makes it considerably easier to transfer the finished nachos from the basket to a serving platter without leaving half the toppings behind.

Adding the Cold Toppings

Sour cream, pickled jalapeรฑos and fresh coriander are added after cooking. Keeping these ingredients cold provides a useful contrast with the hot cheese and chicken.

The sour cream also softens the heat from the jalapeรฑos, while coriander adds freshness to the rich cheese and seasoned chicken.

Adjusting the Heat

Pickled jalapeรฑos provide most of the chilli heat in the finished dish. Their quantity can easily be adjusted according to preference.

For a milder version, use fewer jalapeรฑos or serve them separately so everyone can add their own. For more heat, add extra jalapeรฑos immediately before serving.

Serving Ideas

These nachos are designed for sharing and are best placed in the centre of the table while still hot. They work well for an informal lunch, party or relaxed Main Course when served with additional side dishes.

Extra salsa, guacamole or sour cream can be served alongside for dipping. A fresh tomato or avocado salad also provides a lighter contrast to the cheese and tortilla chips.

Perfect for Cinco de Mayo

The Mexican-inspired flavours of tortilla chips, salsa, jalapeรฑos and seasoned chicken make these nachos particularly suitable for Cinco de Mayo. They are easy to share and can be served alongside other Mexican-style dishes as part of a larger spread.

Serving Immediately

Nachos do not improve by waiting. Once salsa, melted cheese and sour cream are combined with the tortilla chips, the chips gradually lose their crispness.

Have the cold toppings ready before the nachos finish cooking so they can be added immediately and the dish can go straight to the table.

Loaded Chicken Nachos combine crisp tortilla chips, seasoned leftover chicken, bubbling cheese, salsa, cooling sour cream and spicy jalapeรฑos in a quick air fryer dish. With only a few minutes of cooking, they are an easy way to give leftover roast chicken an entirely different second life.

Sweet Potato & Caramelised Onion Rolls


Golden puff pastry rolls with sweet potato, spinach, feta and caramelised onions.

Sweet Potato & Caramelised Onion Rolls

Golden puff pastry rolls filled with mashed sweet potato, caramelised red onion, harissa and tomato paste. Black sesame seeds add a crisp, nutty finish to these savoury air fryer rolls.
Couverts4
Total time 45 minutes
estimated costs pp $1.45
Deel op Facebook Print Recipe

Equipment

Ingredients

Instructions

  • Preheat the air fryer to 200ยฐC.
  • Pierce the sweet potatoes all over with a fork and microwave on HIGH for 8 minutes, until soft in the centre. Leave to cool for 10 minutes.
  • Heat 2 tablespoons olive oil in a frying pan. Add the onions, season and air fry or cook for 5 minutes. Add the garlic, harissa and tomato paste and cook for another 2 minutes.
  • Transfer the onion mixture to a bowl.
  • Scoop the flesh from the sweet potatoes and add it to the onion mixture with the coriander. Season and mash until mostly smooth.
  • Place a sheet of baking paper on the work surface. Spoon half the filling along the centre of one pastry piece.
  • Shape the filling into a long log. Brush the pastry edge lightly with water, fold over the filling and press to seal. Crimp the edges with a fork.
  • Repeat with the remaining filling and pastry.
  • Cut each roll into 7 cm pieces.
  • Arrange the rolls in the air fryer basket, brush with milk and sprinkle with black sesame seeds.
  • Score the tops lightly.
  • Air fry for 20 to 30 minutes, until golden and cooked through.
  • Cool slightly before serving.
  • Store leftovers in the refrigerator for up to 3 days.

Notes & Wine Advice

Serving Suggestions

Serve the rolls warm or at room temperature. They work well as an Appetizer, savoury snack or part of a sharing platter with a fresh salad or yoghurt-based dip.

Recipe Notes

Allow the sweet potatoes to cool slightly before scooping out the flesh. Mash the filling until mostly smooth while leaving a little texture from the caramelised onion and coriander.
Keep the puff pastry chilled until you are ready to fill it. Warm pastry becomes soft and difficult to seal, while cool pastry produces a better rise and crisper layers.

Cooking Advice

Seal and crimp the pastry edges firmly so the filling stays inside during cooking. Lightly scoring the tops allows steam to escape while the pastry becomes crisp and golden.

Storage Advice

Store cooled rolls in an airtight container in the refrigerator for up to 3 days. Reheat them in the Airfryer until thoroughly hot and crisp.

Wine Advice

The sweet potato, caramelised onion and spicy harissa work well with a fruity white wine. Choose a suitable wine from Renรฉ’s Wijnbeleving.

Nutrition values

Serving: 225 g | Calories: 485 kcal | koolhydraten: 61 g | Eiwitten: 8 g | Vet: 24 g | Verzadigd vet: 8 g | Natrium: 470 mg | Suiker: 13 g
————————————————————————————————–

About Sweet Potato & Caramelised Onion Rolls

Sweet Potato & Caramelised Onion Rolls combine crisp puff pastry with a soft, savoury filling of sweet potato, red onion, garlic, harissa, tomato paste and fresh coriander. Cooked in the Airfryer, the pastry becomes golden and flaky while the filling stays moist and full of flavour.

Preparing the Sweet Potatoes

The sweet potatoes form the main body of the filling. Piercing them before microwaving allows steam to escape and helps them cook evenly.

Once completely soft, leave them to cool briefly before scooping the flesh from the skins. The cooked flesh should mash easily without requiring additional liquid.

Caramelising the Red Onions

Red onions contribute both sweetness and savoury depth. Cooking them gently in olive oil softens their texture and concentrates their natural sugars.

Garlic, harissa and tomato paste are added towards the end of cooking. This allows their flavours to develop without burning the garlic or making the harissa bitter.

Adding Harissa

Harissa gives the filling warmth and complexity. Its chilli and spice flavours provide an effective contrast with the naturally sweet potato and caramelised onion.

Two tablespoons create a noticeable spicy character. The amount can be reduced when a milder filling is preferred.

Fresh Coriander

Fresh coriander is mixed through the filling after cooking. Adding it at this stage preserves more of its fresh herbal flavour.

The coriander also provides a bright contrast to the richer flavours of sweet potato, caramelised onion and tomato paste.

Preparing the Puff Pastry

Thawed puff pastry makes these rolls relatively quick to assemble. Keep the pastry cool while working because chilled layers expand more effectively during cooking.

The filling is placed in a long line along the centre before the pastry is folded over and sealed. Pressing and crimping the seam firmly helps prevent it from opening in the air fryer.

Shaping the Rolls

Once the long pastry rolls have been formed, cut them into approximately 7 cm pieces. Keeping the pieces similar in size helps them cook at the same rate.

A light brushing of milk encourages browning, while black sesame seeds provide additional flavour, texture and contrast against the golden pastry.

Cooking in the Air Fryer

Arrange the rolls with enough room around them for the circulating hot air to reach the pastry. Depending on the size of the basket, cooking in batches may be necessary.

The rolls need approximately 20 to 30 minutes. They are ready when the pastry is puffed, deeply golden and completely cooked around the filling.

Serving Ideas

These savoury rolls can be served warm or at room temperature, making them particularly convenient for lunch, picnics and parties. Serve them alone or with a fresh salad and a cooling yoghurt dip.

They can also be included on a larger platter with other pastries, vegetables and dips for an informal shared meal.

Preparing Ahead

The sweet potato and onion filling can be prepared ahead and refrigerated once completely cool. Assemble the pastry rolls shortly before cooking for the best texture.

If the pastry becomes soft during assembly, place the prepared rolls in the refrigerator briefly before transferring them to the air fryer.

Storage and Reheating

Leftover rolls can be stored in the refrigerator for up to 3 days. Allow them to cool completely before transferring them to an airtight container.

Reheat in the air fryer rather than the microwave when possible. The circulating dry heat helps restore the flaky texture of the pastry.

Sweet Potato & Caramelised Onion Rolls combine sweet, spicy and savoury flavours inside crisp golden pastry. The harissa adds warmth, coriander brings freshness and black sesame seeds provide a simple finishing touch, creating versatile rolls that work equally well as a snack, appetizer or part of a shared meal.