Restaurant-Style Japanese Ginger Dressing

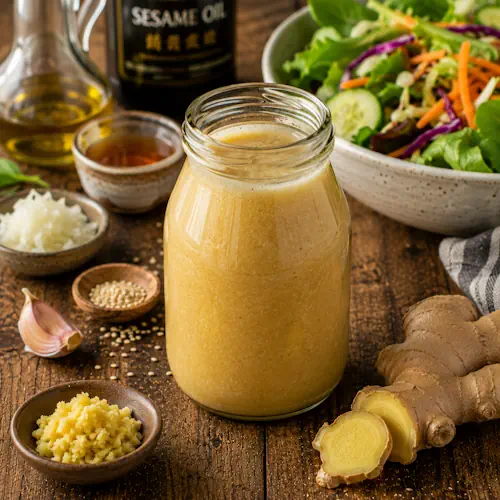
Japanese Ginger Dressing served in a glass bowl with a fresh green salad on a wooden table.

Restaurant-Style Japanese Ginger Dressing

A fresh Japanese-inspired dressing made with ginger, garlic, sesame oil, apple cider vinegar, lemon juice, and honey. Serve it with salads, vegetables, chicken, or seafood.
Couverts4 servings
Preparation 15 minutes
Chilling Time 30 minutes
Total time 45 minutes
estimated costs pp $0.55
Deel op Facebook Print Recipe

Equipment

  • blender
  • Glass jar
  • Measuring cups
  • Measuring spoons
  • Microplane Grater

Ingredients

Instructions

  • Peel and finely grate the fresh ginger.
  • Finely grate the onion.
  • Add the apple cider vinegar, canola oil, water, onion, salt, garlic, ginger, lemon juice, sesame oil, and honey to a blender.
  • Blend until the dressing is smooth and creamy.
  • Taste and adjust the salt or lemon juice if necessary.
  • Pour the dressing into a clean glass jar.
  • Cover and refrigerate for at least 30 minutes.
  • Shake the jar thoroughly before each use.

Notes & Wine Advice

Serving Suggestions

Serve the dressing over green salads, cabbage slaw, rice bowls, grilled vegetables, chicken, shrimp, or seafood. It can also be used as a dipping sauce for cucumber, carrots, bell peppers, or spring rolls.

Recipe Notes

Chilling the dressing for at least 30 minutes allows the ginger, garlic, and sesame flavors to combine. Natural separation is normal, so shake the jar thoroughly before every use.

Variations

Add extra ginger for a sharper flavor or another teaspoon of honey for additional sweetness. A small amount of white miso can provide more savory depth, although this will change the dietary classifications.

Wine Advice

A chilled Riesling complements the fresh ginger and citrus without overpowering the dressing. A crisp Pinot Grigio is another suitable choice for salads served with this dressing.

Nutrition values

Calories: 90 kcal | koolhydraten: 3 g | Eiwitten: 0 g | Vet: 9 g | Verzadigd vet: 1 g | Natrium: 150 mg | Suiker: 2 g
————————————————————————————————–

About Japanese Ginger Dressing

Japanese ginger dressing combines fresh ginger, garlic, sesame oil, apple cider vinegar, lemon juice, and honey in a light but flavorful sauce. The ginger supplies clean warmth, vinegar and lemon provide acidity, and sesame oil adds a toasted, nutty aroma. Blending the ingredients creates a smooth consistency that coats salad leaves evenly without becoming excessively thick.

This Japanese ginger dressing can be prepared in approximately 15 minutes and requires no cooking. Chilling it before serving allows the sharper ingredients to soften and combine. It is an easy way to add restaurant-inspired flavor to simple salads, vegetables, chicken, seafood, and rice bowls. Browse our dressing recipes and Japanese recipes for more homemade options.

Balancing Ginger, Sesame and Acidity

The balance between fresh ginger and acidity gives this ginger sesame dressing its distinctive character. Ginger should be freshly grated so its juice and aromatic oils blend throughout the mixture. A microplane grater produces a fine texture and prevents large fibrous pieces from remaining in the finished dressing.

Apple cider vinegar provides a rounded acidity, while lemon juice adds a brighter citrus note. Honey softens both ingredients without making the dressing noticeably sweet. Sesame oil has a strong flavor, so one tablespoon is enough to provide depth without dominating the ginger.

Canola oil creates a neutral base for the ginger sesame dressing. Its mild flavor allows the garlic, citrus, and sesame to remain noticeable. Avoid strongly flavored vegetable oils because they may compete with the other ingredients.

Making Japanese Ginger Dressing

Add all the ingredients to a blender and process them until the mixture looks smooth and lightly creamy. Blending breaks down the ginger, garlic, and onion while temporarily combining the oil and water-based ingredients. Scrape down the blender when necessary so no pieces remain around the sides.

Taste the Japanese ginger dressing before chilling it. Add a small amount of lemon juice when it needs more brightness or another teaspoon of honey when the acidity feels too sharp. Extra ginger can be added for more warmth, but it is best to make small adjustments because its flavor becomes stronger while resting.

Fresh ginger and garlic are central to this recipe. Visit our Spices & Seasoning recipes for more ideas about using aromatic ingredients in sauces, marinades, and homemade blends.

Ways to Serve This Fresh Dressing

This ginger sesame dressing works especially well with crisp lettuce, shredded cabbage, carrots, cucumber, radishes, and spring onions. Its acidity refreshes leafy salads, while the sesame oil provides enough richness to make simple vegetables feel more substantial.

Use it as a finishing sauce for grilled chicken, salmon, shrimp, tofu, or roasted vegetables. It can also be spooned over rice bowls or noodles. For additional combinations, explore our salad recipes and sauce recipes.

When using the dressing as a marinade, keep a separate portion for serving. Dressing that has touched raw meat, poultry, or seafood should not be reused unless it is thoroughly cooked first.

Storing Japanese Ginger Dressing

Transfer the dressing to a clean glass jar or airtight container immediately after blending. Refrigerate it for at least 30 minutes before serving and use it within one week. Natural separation occurs because the recipe does not contain a commercial emulsifier.

Shake the container vigorously before each use. Discard the dressing if it develops an unusual odor, visible mold, unexpected bubbling, or a significant change in texture. Do not leave it at room temperature for extended periods.

For additional storage guidance, consult the FDA safe food-handling information. With fresh aromatics, lively acidity, and toasted sesame flavor, this ginger sesame dressing is a versatile homemade condiment for salads and everyday meals.
Teppanyaki Chicken Fried Rice

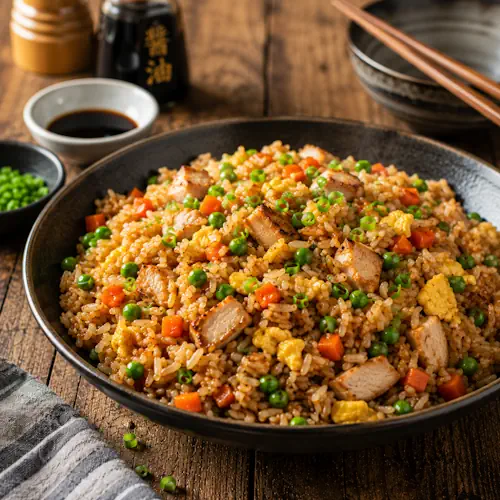
Teppanyaki Chicken Fried Rice served in a bowl with fluffy eggs, vegetables, grilled chicken, and sliced green onions.

Teppanyaki Chicken Fried Rice

Teppanyaki Chicken Fried Rice is a quick and flavorful Japanese-inspired rice dish made with day-old rice, crisp vegetables, fluffy scrambled eggs, and savory seasonings. Inspired by traditional teppanyaki restaurants, this easy recipe delivers authentic restaurant-style flavor in just 25 minutes. Serve it as a delicious side dish or enjoy it as a light main course.
Couverts4 servings
Preparation 15 minutes
Preparation time:10 minutes
Total time 25 minutes
estimated costs pp $2.65 per person
Deel op Facebook Print Recipe

Equipment

Ingredients

Instructions

  • Heat 1 tablespoon of vegetable oil in a large skillet or wok over medium-high heat.
  • Add the beaten eggs and scramble until just cooked.
  • Transfer the eggs to a plate.
  • Add the remaining vegetable oil and butter to the pan.
  • Cook the onion, carrots, and peas for about 3 minutes until slightly tender.
  • Add the cooked rice and break up any clumps while stir-frying.
  • Cook for 2 minutes.
  • Stir in the grilled chicken if using.
  • Return the scrambled eggs to the pan.
  • Add the soy sauce, sesame oil, garlic powder, salt, and black pepper.
  • Toss everything together until evenly coated.
  • Cook for another 2 to 3 minutes until thoroughly heated.
  • Sprinkle with the sliced green onions.
  • Serve immediately.

Notes & Wine Advice

Recipe Notes

Day-old rice produces the best texture because the grains remain separate during stir-frying.
Cook over high heat and keep the ingredients moving to develop authentic teppanyaki flavor.
Add shrimp, steak, tofu, or extra vegetables to create your own variation.
Serve with yum yum sauce or Japanese ginger sauce for a complete restaurant-style meal.

Wine Advice

A chilled Sauvignon Blanc pairs beautifully with the savory flavors without overpowering the dish.
For a traditional Japanese pairing, serve with a well-chilled Sake.

Nutrition values

Calories: 320 kcal | koolhydraten: 45 g | Eiwitten: 10 g | Vet: 10 g | Verzadigd vet: 3 g | Natrium: 610 mg | Suiker: 2 g
————————————————————————————————–
Cuisine; Japanese
Season: All Seasons
Diets; Halal / Hindu / Kosher / Nut Free
Occasions Family Dinner / Kids / Weekend

About This Recipe

Teppanyaki Chicken Fried Rice is a quick and satisfying Japanese-inspired dish that recreates the flavors of a traditional teppanyaki restaurant. Day-old rice, tender vegetables, fluffy scrambled eggs, soy sauce, butter, and sesame oil come together in a hot wok to create a delicious combination of savory flavors and lightly toasted rice. Whether you serve it as a hearty side dish or an easy main course, this recipe is ready in only 25 minutes and is perfect for busy weeknights.

Why You’ll Love This Recipe

This Japanese fried rice recipe is easy to prepare and uses simple ingredients that are often already in your kitchen. Day-old rice creates the ideal texture because the grains stay firm while stir-frying. You can easily customize the recipe by adding grilled chicken, shrimp, steak, tofu, or extra vegetables. If you enjoy Japanese-inspired meals, be sure to browse our Japanese Recipes, Rice Recipes, Stir-Fry Recipes, Side Dish Recipes, and Dinner Recipes.

Cooking Teppanyaki Chicken Fried Rice

Teppanyaki Chicken Fried Rice develops its signature flavor by cooking everything over high heat. Scramble the eggs first, then stir-fry the vegetables before adding the rice. Finally, combine the soy sauce, butter, sesame oil, seasonings, chicken, and eggs so every grain becomes evenly coated. This simple cooking method creates the lightly toasted flavor that makes hibachi-style fried rice so popular.

Serving Suggestions

This Japanese fried rice pairs wonderfully with grilled chicken, steak, shrimp, salmon, vegetables, or tofu. Serve it with yum yum sauce, Japanese ginger sauce, or a crisp green salad for a complete restaurant-style meal. It is perfect for a Family Dinner, a Kids meal, or a relaxed Weekend dinner.

Storage Tips

Store leftover Teppanyaki Chicken Fried Rice in an airtight container in the refrigerator for up to three days. Reheat it in a hot skillet with a splash of oil to restore the best texture. Individual portions also freeze well for up to three months, making this recipe an excellent option for meal prep. For safe food storage recommendations, visit the FDA Food Safety website.

Teppanyaki Chicken Fried Rice combines simple ingredients, authentic Japanese-inspired flavors, and quick preparation into a recipe you’ll enjoy making again and again.


Ultimate Fudge Chunk Ice Cream

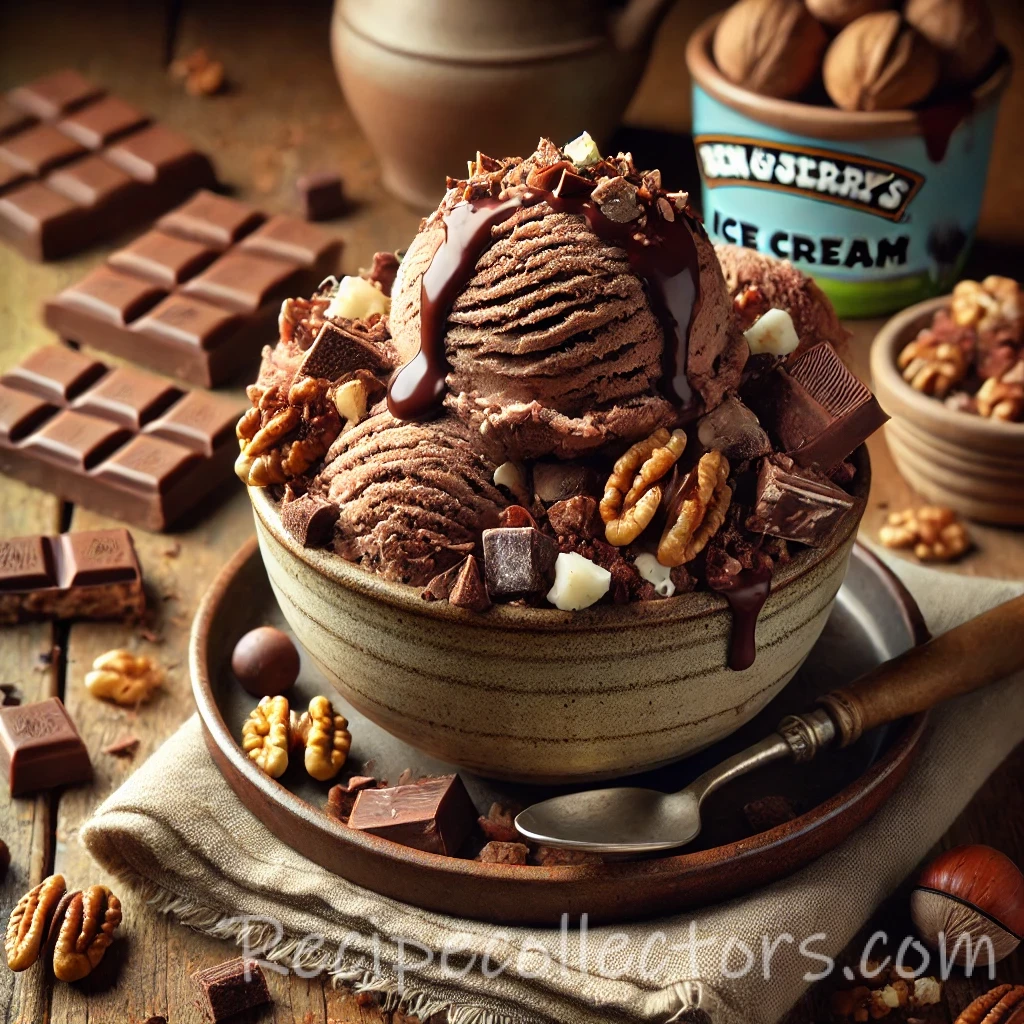
Ultimate Fudge Chunk Ice Cream with dark chocolate, white chocolate, pecans, walnuts, and chocolate-covered almonds.

Ultimate Fudge Chunk Ice Cream

Ultimate Fudge Chunk Ice Cream is an indulgent homemade chocolate ice cream packed with dark and white chocolate chunks, crunchy pecans, walnuts, and chocolate-covered almonds. Rich, creamy, and loaded with texture, it’s the perfect frozen dessert for serious chocolate lovers.
Couverts4 servings
Preparation 20 minutes
freezing time 5 hours
Total time 5 hours 20 minutes
estimated costs pp $3.95 per person
Deel op Facebook Print Recipe

Equipment

  • Ice cream maker or freezer-safe container
  • Large mixing bowl
  • Measuring cups
  • Rubber spatula
  • Whisk

Ingredients

Instructions

  • Whisk together the heavy cream, whole milk, sugar, cocoa powder, and vanilla extract until completely smooth.
  • For the ice cream maker method, pour the mixture into the machine and churn according to the manufacturer’s instructions.
  • For the no-churn method, pour the mixture into a freezer-safe container and freeze for about 4 hours, stirring well every hour.
  • Fold in the dark chocolate chunks, white chocolate chunks, pecans, walnuts, and chocolate-covered almonds once the mixture has thickened.
  • Return the ice cream to the freezer for about 1 hour or until firm.
  • Scoop into bowls or cones and serve immediately.

Notes & Wine Advice

Recipe Notes

For the creamiest texture, chill the ice cream base in the refrigerator for at least one hour before churning.
Use high-quality dark chocolate for the richest flavor and satisfying chocolate chunks.
Allow the ice cream to stand at room temperature for 5 to 10 minutes before scooping.
Store in an airtight freezer container for up to two weeks for the best texture and flavor.

Wine Advice

A glass of Ruby Port pairs beautifully with the rich chocolate flavors and crunchy nuts.
For an indulgent after-dinner treat, serve with a chilled Espresso Martini, whose coffee notes enhance the cocoa perfectly.

Nutrition values

Calories: 450 kcal | koolhydraten: 45 g | Eiwitten: 6 g | Vet: 28 g | Verzadigd vet: 15 g | Natrium: 65 mg | Suiker: 36 g
————————————————————————————————–

About This Recipe

Ultimate Fudge Chunk Ice Cream is a rich homemade frozen dessert inspired by one of America’s most beloved chocolate ice creams. Every scoop is filled with creamy chocolate ice cream, generous chunks of dark and white chocolate, crunchy pecans, walnuts, and chocolate-covered almonds. Whether you use an ice cream maker or the no-churn method, this recipe delivers an indulgent treat that’s perfect for chocolate lovers all year round.

Why You’ll Love This Chocolate Ice Cream

This chocolate ice cream combines a silky cocoa base with layers of crunchy nuts and generous chocolate chunks for an irresistible texture. Unlike many homemade ice creams, this version stays rich and creamy while offering plenty of bite in every spoonful. If you enjoy frozen desserts, you’ll also love our Ice Cream Recipes, Chocolate Recipes, Dessert Recipes, Treat Recipes, and Summer Recipes.

Rich Ingredients for Ultimate Fudge Chunk Ice Cream

Ultimate Fudge Chunk Ice Cream starts with heavy cream, whole milk, cocoa powder, and vanilla to create an exceptionally smooth base. Dark chocolate chunks add intense cocoa flavor, while white chocolate provides creamy sweetness. Pecans, walnuts, and chocolate-covered almonds create the signature crunchy texture that makes every scoop exciting.

Serving Suggestions

This chocolate ice cream is delicious served in waffle cones, crisp bowls, or alongside warm brownies and chocolate cake. Add whipped cream, chocolate sauce, toasted nuts, or extra chocolate shavings for an even more indulgent dessert. It’s also perfect for a Party Food, a fun Kids celebration, or a relaxed Weekend treat.

Storage Tips

Store Ultimate Fudge Chunk Ice Cream in an airtight freezer container for up to two weeks. Place a sheet of baking paper or plastic wrap directly on the surface before sealing to help prevent ice crystals from forming. Let the ice cream soften at room temperature for several minutes before scooping. For food safety guidance, visit the FDA Food Safety website.

Whether you’re making dessert for a family gathering or simply treating yourself to something special, Ultimate Fudge Chunk Ice Cream delivers creamy texture, rich chocolate flavor, and plenty of crunchy surprises in every scoop.


Giant Chocolate Chip Cookies

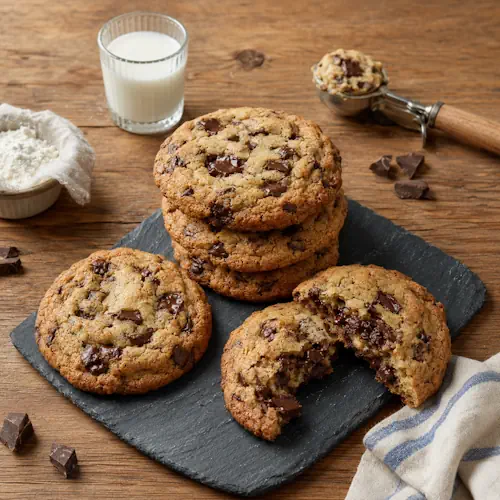
Giant chocolate chip cookies with golden edges and melted chocolate chunks

Giant Chocolate Chip Cookies

Giant Chocolate Chip Cookies have crisp golden edges, soft chewy centres, and generous pockets of melted semisweet chocolate. These oversized bakery-style cookies are perfect for dessert, parties, gifts, or homemade ice cream sandwiches.
Couverts12 servings
Preparation 15 minutes
Preparation time:15 minutes
$0.85 20 minutes
estimated costs pp $0.85
Deel op Facebook Print Recipe

Equipment

  • Baking sheet
  • Cooling rack
  • Hand mixer
  • Large mixing bowl
  • Measuring Cup, ยผ-Cup
  • Measuring cups
  • Measuring spoons
  • medium mixing bowl
  • Parchment paper
  • Silicone spatula
  • Whisk

Ingredients

For the Butter Mixture

For the Dry Ingredients

For the Chocolate Filling

Instructions

Prepare the Butter Mixture

  • Preheat the oven to 350ยฐF (175ยฐC).
  • Line a baking sheet with parchment paper.
  • Place the softened butter, granulated sugar, and brown sugar in a large mixing bowl.
  • Beat with a hand mixer until light and fluffy.
  • Add the first egg.
  • Beat until completely incorporated.
  • Add the second egg.
  • Beat again until smooth.
  • Mix in the vanilla extract.

Prepare the Dry Ingredients

  • Place the flour, baking soda, and kosher salt in a medium mixing bowl.
  • Whisk until evenly combined.
  • Gradually add the dry ingredients to the butter mixture.
  • Mix on low speed until just combined.
  • Do not overmix the dough.

Add the Chocolate Filling

  • Add the semisweet chocolate chunks.
  • Fold them gently into the dough with a silicone spatula.
  • Continue folding until the chocolate is evenly distributed.
  • Shape and Bake the Cookies
  • Scoop ยผ-cup portions of dough onto the prepared baking sheet.
  • Leave at least 3 inches between the portions.
  • Bake the cookies in batches for 15 minutes until the edges are golden and the centres remain soft.
  • Remove the baking sheet from the oven.
  • Let the cookies cool on the baking sheet for 5 minutes.
  • Transfer them carefully to a cooling rack.
  • Let the cookies cool for another 15 minutes before serving.

Notes & Wine Advice

Serving Suggestions

Serve the cookies slightly warm with milk, coffee, hot chocolate, or vanilla ice cream. Sandwich a scoop of ice cream between two cookies for an indulgent dessert. Smaller pieces also make a rich addition to a dessert platter.

Recipe Notes

Use butter that is softened but not melted. Properly softened butter traps air when creamed with the sugars, helping the cookies remain thick and tender. Leave enough space between the dough portions because these oversized cookies spread during baking.

Variations

Replace some of the semisweet chocolate with milk chocolate, dark chocolate, white chocolate, or chopped nuts. Add espresso powder, orange zest, cinnamon, or flaky sea salt. Divide the dough into smaller portions when standard-sized cookies are preferred and shorten the baking time accordingly.

Storage

Store completely cooled cookies in an airtight container at room temperature for up to five days. Freeze baked cookies for up to two months. Portioned unbaked dough can also be frozen and baked directly from frozen with several additional minutes of cooking time.

Wine Advice

A small glass of Banyuls complements the semisweet chocolate and buttery dough. A lightly sparkling Moscato dโ€™Asti is a fresher alternative when serving the cookies with ice cream.

Nutrition values

Serving: 1 giant cookie | Calories: 470 kcal | koolhydraten: 63 g | Eiwitten: 6 g | Vet: 24 g | Verzadigd vet: 14 g | Natrium: 210 mg | Suiker: 43 g
————————————————————————————————–

About Giant Chocolate Chip Cookies

Giant Chocolate Chip Cookies combine crisp golden edges with thick, chewy centres and generous pieces of melted semisweet chocolate. These bakery-style chocolate cookies are inspired by the oversized treats served in premium bakeries and ice cream shops. Each portion uses approximately ยผ cup of dough, creating a substantial cookie that can be served alone or transformed into an ice cream sandwich.

The recipe uses both granulated and brown sugar. Granulated sugar supports spreading and crisp edges, while brown sugar contributes moisture, caramel flavour, and a softer centre. Balancing the two produces a cookie that remains tender without becoming cakey.

Preparing Giant Chocolate Chip Cookies

Begin with properly softened butter. It should yield when pressed gently but should not look shiny, greasy, or partially melted. Butter that is too cold will not combine smoothly with the sugars, while melted butter can cause the cookies to spread excessively.

Cream the butter with both sugars until the mixture becomes lighter in colour and slightly fluffy. This process incorporates tiny pockets of air into the dough. Add the eggs individually and mix well after each addition so the fat and liquid remain evenly combined.

Vanilla enhances the butter, brown sugar, and chocolate without dominating them. Pure vanilla extract gives the cleanest flavour, although vanilla bean paste can be used in the same quantity.

Mixing the Bakery-Style Chocolate Cookies

Whisk the flour, baking soda, and salt in a separate bowl before adding them to the wet ingredients. This distributes the baking soda evenly and reduces the chance of salty or bitter patches in the finished cookies.

Add the dry mixture gradually and stop mixing as soon as no visible flour remains. Excessive mixing develops more gluten, which can make the cookies firm and tough rather than tender and chewy.

Fold in the chocolate chunks by hand. Large chunks create noticeable pools of melted chocolate and provide the bakery-style appearance associated with oversized cookies. Semisweet chocolate balances the sweet dough, but dark or milk chocolate can be substituted.

Shaping and Baking the Dough

Measure ยผ-cup portions so the cookies bake at approximately the same rate. Place only a few portions on each baking sheet and leave at least 3 inches between them. Crowding the sheet can cause the cookies to merge as they spread.

Bake until the edges are golden but the centres still appear slightly soft. The cookies continue cooking from residual heat while they rest on the baking sheet. Waiting 5 minutes before moving them prevents the soft centres from breaking.

Transfer the cookies to a cooling rack after they have firmed sufficiently. Air circulating beneath the rack prevents the bases from becoming damp and allows the texture to settle.

Serving Ideas and Variations

Serve the cookies warm with milk, coffee, or hot chocolate. For dessert, place vanilla ice cream between two cookies or crumble one over a sundae. They also pair well with our Chocolate White Chocolate Banana Bread on a generous chocolate dessert table.

Chopped walnuts, pecans, hazelnuts, white chocolate, or dark chocolate can replace part of the semisweet chocolate. Espresso powder intensifies the cocoa flavour, while flaky sea salt provides contrast to the sweet dough.

Storage and Food Safety

Allow the cookies to cool completely before placing them in an airtight container. Store them at room temperature for up to five days or freeze them for up to two months. Frozen dough portions can be baked without thawing, although they may require several additional minutes.

Raw cookie dough contains uncooked eggs and flour and should not be eaten. Follow current FDA safe food-handling guidance when preparing dough and storing eggs, flour, and baked goods.

With crisp edges, chewy centres, and plenty of melted chocolate, Giant Chocolate Chip Cookies deliver the texture and flavour expected from an oversized bakery treat.


Cherry and Chocolate Chunk Bliss Ice Cream

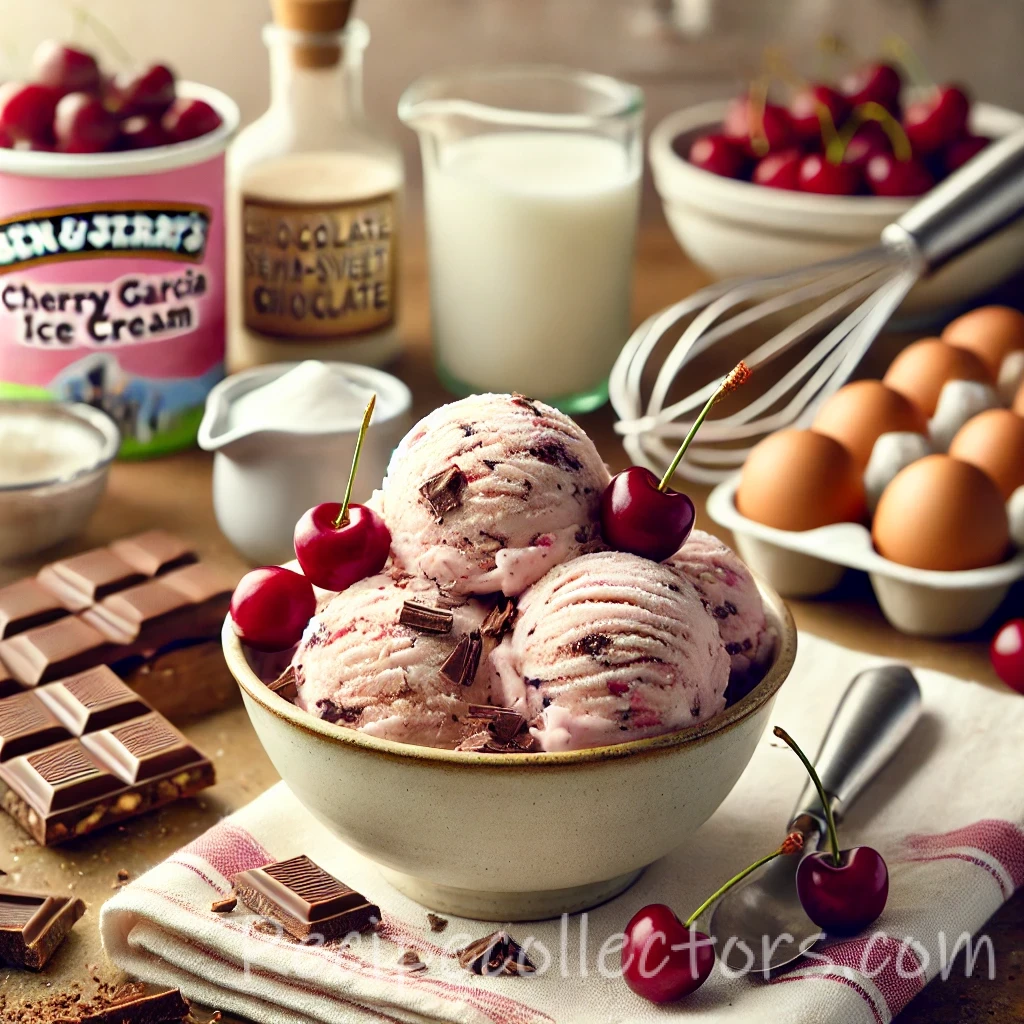
A close-up of a scoop of homemade cherry chocolate ice cream in a white porcelain bowl

Homemade Cherry Garcia-Style Ice Cream

This homemade version of Cherry Garcia Ice Cream is creamy, loaded with sweet cherries and rich chocolate chunks, and bursting with classic flavors. A perfect frozen treat!
Couverts6 servings
Preparation 20 minutes
Preparation time:40 minutes
freezing time 4 hours
Total time 5 hours
estimated costs pp $3.50
Deel op Facebook Print Recipe

Equipment

  • Ice cream maker (or freezer-safe container for no-churn method)
  • Mixing bowls
  • spatula
  • Whisk

Ingredients

Instructions

  • In a mixing bowl, whisk together heavy cream, milk, sugar, and vanilla extract until sugar dissolves.
  • Stir in the chopped cherries and chocolate chunks.
  • Churn method: Pour the mixture into an ice cream maker and follow the manufacturer’s instructions.
  • No-churn method: Pour the mixture into a freezer-safe container, cover, and freeze for about 4 hours, stirring every hour to break up ice crystals.
  • Once the ice cream reaches a scoopable consistency, serve and enjoy!

Notes & Wine Advice

Recipe Notes

  • Serving Tip: Serve in a waffle cone or alongside warm brownies for an indulgent dessert.
  • Storage: Store any leftover ice cream in an airtight container in the freezer for up to two weeks. Keep a layer of plastic wrap pressed directly against the surface to prevent ice crystals from forming.
  • Cherry Prep: Ensure the cherries are thoroughly pitted before chopping to avoid any unpleasant surprises while enjoying your frozen treat.

Wine Advice

Pairs well with a sweet dessert wine like Port, or a light Rose, complementing the cherry and chocolate flavors perfectly.

Nutrition values

Calories: 310 kcal | koolhydraten: 35 g | Eiwitten: 4 g | Vet: 18 g | Verzadigd vet: 11 g | Natrium: 0.05 mg | Suiker: 31 g
————————————————————————————————–

About This Recipe

There is nothing quite like making your own frozen treats at home, and this creamy cherry chocolate ice cream is the ultimate crowd-pleaser. Inspired by the famous parlor classic, this recipe combines a rich, smooth dairy base with sweet fresh fruit and premium dark chocolate chunks. It satisfies your sweet tooth while keeping the ingredients simple, wholesome, and completely customizable.

Making ice cream from scratch is incredibly straightforward. Whether you own an electric machine or prefer a simpler hand-churned method, this recipe delivers an exceptional texture every single time. By focusing on high-quality ingredients, you elevate a simple afternoon project into a gourmet experience. It easily rivals any premium brand you can buy at the grocery store.

Perfecting Your Homemade Cherry Chocolate Ice Cream

The secret to a perfect scoopable consistency lies in the balance of fats and sugars. Using heavy cream and whole milk ensures a dense, velvety mouthfeel without feeling overly heavy. When preparing your fresh cherries, add a small splash of lemon juice to enhance the vibrant fruit flavor. This cuts through the richness of the dairy and makes the fruit notes truly sing.

For the best results, chop your dark chocolate chunks into varying sizes. Small flakes melt slightly on your tongue, while larger chunks provide a satisfying, signature crunch throughout the scoop. If you look for technical guidance on dairy pasteurization or food safety standards regarding home freezing, you can check out the official guidelines provided by the FDA. These resources ensure your kitchen practices align with modern safety protocols.

When you want to expand your dessert repertoire, discover more inspired flavor combinations on Icecream. Sharing these culinary creations with friends and family is half the fun of cooking from scratch. Having a reliable source for inspiration makes planning your next kitchen venture seamless and exciting.

Once you prepare and chill your mixture, transfer it to your freezer container or churning bowl. Within a few hours, you will enjoy a spectacular, deep flavor profile. This proves why this combination remains an absolute classic. Indulge in a generous scoop of this smooth cherry chocolate ice cream on a warm afternoon, and enjoy the pure satisfaction of a perfectly crafted homemade dessert.


BB Kingโ€™s Inspired Smoky BBQ Ribs

smoky BBQ ribs combine tender baby back ribs, rich homemade barbecue sauce, smoky spices, and slow cooking into a classic comfort food recipe packed with deep barbecue flavor. The ribs become incredibly tender while the sauce caramelizes beautifully during the final grilling stage.

This barbecue rib recipe remains popular because slow baking creates juicy fall-apart pork while the smoky homemade sauce adds sweet tangy richness. The combination of smoked paprika, Worcestershire sauce, Dijon mustard, and brown sugar creates bold layered barbecue flavor.

Smoky BBQ ribs with rich homemade sauce

The popularity of smoky BBQ ribs continues to grow because the low-and-slow cooking process creates tender juicy meat while preserving rich smoky flavor throughout the ribs. Wrapping the pork tightly in foil also helps lock in moisture during baking.

Another reason this barbecue ribs recipe works so well is the balance between smoky spice rub flavor and glossy homemade sauce. Cayenne pepper adds gentle heat while apple cider vinegar brightens the sweet barbecue richness.

Slow cooking keeps the ribs juicy and tender

The long baking time gives these smoky pork ribs their signature fall-off-the-bone texture. Baking the ribs slowly at low heat helps break down the connective tissue while keeping the pork moist and flavorful.

If you enjoy rich barbecue pork recipes, you may also like our Applewood Smoked BBQ Ribs, another smoky rib recipe packed with tender barbecue flavor.

Texture plays an important role in this recipe. The ribs stay juicy and tender inside while the barbecue sauce becomes sticky and caramelized around the outside during grilling.

Basting the ribs repeatedly during the final grilling stage creates glossy smoky coating while adding deeper barbecue flavor with every layer of sauce.

Perfect barbecue pork recipe for cookouts

These smoky BBQ ribs work perfectly for backyard cookouts, family gatherings, summer parties, and weekend barbecue dinners because the tender pork and rich sauce create classic comfort food flavor everyone enjoys.

The ribs pair beautifully with coleslaw, baked beans, cornbread, roasted potatoes, corn on the cob, fries, pickles, or macaroni salad for a complete barbecue feast.

Proper food handling remains important whenever preparing pork and barbecue marinades. Pork should always stay refrigerated before cooking and should be cooked thoroughly before serving. For additional meat preparation and barbecue safety guidance, visit the FDA.

Ultimately, smoky BBQ ribs deliver tender pork texture, sticky caramelized sauce, rich smoky flavor, and comforting slow-cooked barbecue character in a satisfying recipe perfect for barbecue lovers.

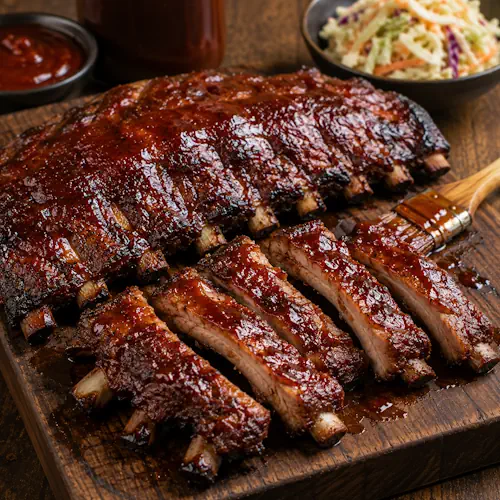
smoky BBQ ribs served on a rustic wooden table with tender barbecue baby back ribs

Smoky BBQ Baby Back Ribs

Tender slow-cooked pork ribs coated in rich smoky homemade barbecue sauce.
Couverts4 servings
Preparation 15 minutes
Preparation time:3 hours 30 minutes
Resting Time 5 minutes
Total time 3 hours 50 minutes
estimated costs pp $9.95 per person
Deel op Facebook Print Recipe

Equipment

  • aluminum foil
  • Baking sheet
  • Grill or oven
  • Mixing bowl
  • Saucepan

Ingredients

For the ribs

  • 2 racks baby back ribs
  • 1 tablespoon salt
  • 1 tablespoon black pepper
  • 1 tablespoon smoked paprika
  • 1 teaspoon garlic powder
  • 1 teaspoon onion powder
  • 1 teaspoon cayenne pepper
  • 1 teaspoon dried oregano

For the sauce

  • 1 cup ketchup
  • 1/2 cup apple cider vinegar
  • 1/4 cup brown sugar
  • 2 tablespoons Worcestershire sauce
  • 2 tablespoons Dijon mustard
  • 1 teaspoon smoked paprika
  • 1/2 teaspoon black pepper
  • 1/2 teaspoon salt
  • 1/2 teaspoon cayenne pepper
  • 1 teaspoon liquid smoke

Instructions

  • Preheat the oven to 300ยฐF.
  • Combine the salt, pepper, paprika, garlic powder, onion powder, cayenne pepper, and oregano in a bowl.
  • Rub the seasoning mixture evenly over both racks of ribs.
  • Wrap the ribs tightly in aluminum foil.
  • Place onto a baking sheet and bake for 3 hours until tender.
  • Meanwhile combine all sauce ingredients in a saucepan over medium heat.
  • Stir well and simmer for 10 to 15 minutes until thickened.
  • Remove the ribs from the oven and carefully unwrap.
  • Brush generously with the barbecue sauce.
  • Grill over medium heat for 5 to 10 minutes while flipping and basting with more sauce until caramelized.
  • Rest the ribs for 5 minutes before slicing and serving.

Notes & Wine Advice

Notes

Wrapping the ribs tightly in foil helps create tender juicy texture during the long baking process.

Serve Tip

Serve these ribs with coleslaw, baked beans, cornbread, fries, or roasted corn for a complete barbecue meal.

Variations

Add honey, bourbon, chipotle powder, garlic butter, or extra cayenne for deeper smoky richness and spice.

Wine Advice

A bold Zinfandel pairs beautifully with the smoky sauce and tender pork ribs.

Nutrition values

Calories: 580 kcal | koolhydraten: 25 g | Eiwitten: 45 g | Vet: 35 g | Verzadigd vet: 12 g | Natrium: 920 mg | Suiker: 20 g
————————————————————————————————–
Cuisine; American
Season: Summer
Occasions Game Day / Summerpartys

All-Purpose Dry Spice Rub

dry spice rub combines smoked paprika, garlic powder, onion powder, herbs, chili spices, and brown sugar into a versatile seasoning blend packed with smoky savory flavor. This homemade barbecue rub creates rich flavor on meats, vegetables, poultry, and grilled dishes with very little effort.

This all-purpose seasoning recipe remains popular because the spice blend works beautifully for grilling, roasting, smoking, and slow cooking. The balance between smoky paprika, savory herbs, mild sweetness, and gentle heat creates deep flavor without overpowering the food.

Dry spice rub creates smoky barbecue flavor

The popularity of dry spice rub recipes continues to grow because homemade seasoning blends allow better control over flavor, heat, sweetness, and salt levels. Smoked paprika, chili powder, cayenne pepper, and garlic powder combine to create rich barbecue character.

Another reason this barbecue seasoning recipe works so well is the balance between savory spices and mild sweetness. Brown sugar helps caramelize meats beautifully while oregano and thyme add fresh herbal depth throughout the blend.

Homemade barbecue seasoning works on many dishes

This smoky seasoning blend works beautifully on beef, pork, chicken, seafood, roasted vegetables, potatoes, burgers, ribs, and grilled meats. The spices coat food evenly while creating flavorful crust during cooking.

If you enjoy homemade barbecue seasonings, you may also like our Cajun Spice Mix, another flavorful spice blend packed with smoky savory richness.

Texture plays an important role in this recipe. The combination of fine spices and dried herbs creates even coating while allowing the seasoning to stick well to meats and vegetables before cooking.

Storing the spice mixture inside an airtight container also helps preserve the smoky aroma and rich seasoning flavor for several months.

Perfect seasoning blend for grilling and roasting

This dry spice rub recipe works perfectly for barbecue cooking, smoking, roasting, grilling, meal prep, and outdoor cookouts because it adds deep smoky flavor quickly and easily.

The seasoning pairs beautifully with steaks, pork chops, chicken wings, roasted potatoes, grilled vegetables, ribs, burgers, seafood, or oven-roasted meats.

Proper food handling remains important whenever preparing spice blends and seasoning raw meats. Store spices properly in airtight containers and always use clean utensils while seasoning food. For additional food preparation and safety guidance, visit the FDA.

Ultimately, dry spice rub delivers smoky barbecue richness, savory herbal flavor, gentle heat, and versatile homemade seasoning character in an easy recipe perfect for grilling and roasting.

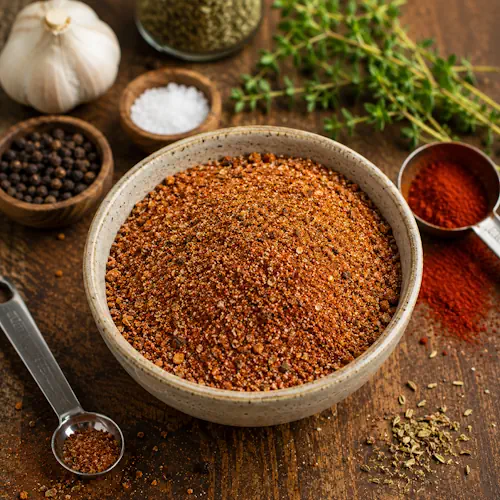
dry spice rub served on a rustic wooden table with smoky barbecue seasoning and herbs

Smoky All-Purpose Dry Spice Rub

Homemade smoky barbecue seasoning blend for meats, vegetables, and grilling recipes.
Couverts4 servings
Preparation 5 minutes
Total time 5 minutes
estimated costs pp $0.40 per person
Deel op Facebook Print Recipe

Equipment

  • airtight container
  • Measuring spoons
  • Mixing bowl

Ingredients

Instructions

  • Combine all ingredients in a mixing bowl.
  • Mix thoroughly until evenly combined.
  • Transfer the seasoning blend to an airtight container.
  • Store in a cool dry place for up to 6 months.
  • Use the spice rub on meats, poultry, seafood, or vegetables before grilling, roasting, or smoking.

Notes & Wine Advice

Notes

Allowing the seasoning to rest on meats for at least 30 minutes creates deeper barbecue flavor.

Serve Tip

Use this spice rub on ribs, chicken, pork chops, roasted potatoes, burgers, or grilled vegetables.

Variations

Add cumin, chipotle powder, coffee powder, cinnamon, or extra cayenne for deeper smoky richness and heat.

Wine Advice

A bold Shiraz pairs beautifully with the smoky spices and savory barbecue flavors.

Nutrition values

Calories: 10 kcal | koolhydraten: 2 g | Eiwitten: 0 g | Vet: 0 g | Verzadigd vet: 0 g | Natrium: 290 mg | Suiker: 1 g
————————————————————————————————–

Cherry and Chocolate Chunk Bliss Ice Cream

Homemade Irish Cream Liqueur served over ice in a glass with a bottle of creamy Irish whiskey liqueur.

Cherry and Chocolate Chunk Bliss Ice Cream

This homemade version of Cherry Garcia Ice Cream is creamy, loaded with sweet cherries and rich chocolate chunks, and bursting with classic flavors. A perfect frozen treat!
Couverts6 Servings 6 servings
Preparation 20 minutes
Preparation time:40 minutes
Total time 10 minutes
estimated costs pp $3.50
Deel op Facebook Print Recipe

Equipment

  • Ice cream maker (or freezer-safe container for no-churn method)
  • Mixing bowls
  • spatula
  • Whisk

Ingredients

Instructions

  • In a mixing bowl, whisk together heavy cream, milk, sugar, and vanilla extract until sugar dissolves.
  • Stir in the chopped cherries and chocolate chunks.
  • Churn method: Pour the mixture into an ice cream maker and follow the manufacturer’s instructions.
  • No-churn method: Pour the mixture into a freezer-safe container, cover, and freeze for about 4 hours, stirring every hour to break up ice crystals.
  • Once the ice cream reaches a scoopable consistency, serve and enjoy!

Notes & Wine Advice

Recipe Notes

  • Serving Tip: Serve in a waffle cone or alongside warm brownies for an indulgent dessert.
  • Storage: Store any leftover ice cream in an airtight container in the freezer for up to two weeks. Keep a layer of plastic wrap pressed directly against the surface to prevent ice crystals from forming.
  • Cherry Prep: Ensure the cherries are thoroughly pitted before chopping to avoid any unpleasant surprises while enjoying your frozen treat.

Wine Advice

Pairs well with a sweet dessert wine like Port, or a light Rose, complementing the cherry and chocolate flavors perfectly.

Nutrition values

Calories: 310 kcal | koolhydraten: 35 g | Eiwitten: 4 g | Vet: 18 g | Verzadigd vet: 11 g | Natrium: 0.05 mg | Suiker: 31 g
————————————————————————————————–

There is nothing quite like making your own frozen treats at home, and this cherry and chocolate chunk bliss ice cream is the ultimate crowd-pleaser. Inspired by the famous parlor classic, this recipe combines a rich, smooth dairy base with the natural sweetness of fresh fruit and the deep indulgence of premium dark chocolate. It is a luxurious combination that satisfies your sweet tooth while keeping the ingredients simple, wholesome, and completely customizable to your personal preferences.

Making ice cream from scratch might sound intimidating, but it is incredibly straightforward. Whether you own a traditional electric ice cream machine or prefer a simpler hand-churned method, this cherry and chocolate chunk bliss ice cream delivers an exceptional texture every single time. By focusing on high-quality ingredients, you elevate a simple afternoon project into a gourmet experience that easily rivals any premium brand you can buy at the grocery store.

Perfecting Your Cherry and Chocolate Chunk Bliss Ice Cream

The secret to achieving that perfect scoopable consistency lies in the balance of fats and sugars. Using a combination of heavy cream and whole milk ensures a dense, velvety mouthfeel without feeling overly heavy. When preparing your fresh cherries, a small splash of lemon juice is added to enhance the vibrant fruit flavor, cutting through the richness of the dairy and making the cherry notes truly sing against the dark chocolate pieces.

For the best visual and structural results, it is highly recommended to chop your dark chocolate chunks into varying sizes. Small flakes will melt slightly on your tongue, while larger chunks provide that satisfying, signature crunch. If you are looking for more technical guidance on dairy pasteurization or food safety standards regarding home freezing, you can check out the official guidelines provided by the FDA to ensure your kitchen practices are perfectly aligned with modern safety protocols.

When you are ready to expand your dessert repertoire or want to discover more inspired flavor combinations, be sure to explore the vast collection of sweet and savory guides available on Icecream. Sharing these culinary creations with friends and family is half the fun of cooking from scratch, and having a reliable source for inspiration makes planning your next kitchen venture seamless and exciting.

Once your mixture is fully prepared and chilled, simply transfer it to your freezer container or churning bowl. Within a few hours, you will be rewarded with a spectacular, deep flavor profile that proves why this combination remains an absolute classic. Indulge in a generous scoop of this cherry and chocolate chunk bliss ice cream on a warm afternoon, and enjoy the pure satisfaction of a perfectly crafted homemade dessert.


Homemade Baby Ruth Candy Bars

Baby Ruth Candy Bars with nougat caramel roasted peanuts and milk chocolate on a rustic wooden board.

Homemade Baby Ruth Candy Bars

These Homemade Baby Ruth Candy Bars combine fluffy nougat, creamy caramel, crunchy roasted peanuts, and a rich milk chocolate coating into an irresistible homemade candy treat. They’re perfect for holidays, gift-giving, parties, or satisfying any sweet tooth with a classic candy bar made from scratch.
Couverts16 bars
Preparation 15 minutes
Preparation time:10 minutes
estimated costs pp $0.75 per bar
Deel op Facebook Print Recipe

Equipment

  • 8×8-inch baking pan
  • Candy thermometer
  • Measuring cups
  • microwave-safe bowl
  • Mixing bowls
  • Parchment paper
  • Saucepan
  • spatula
  • Whisk

Ingredients

For the Nougat Layer

For the Caramel Peanut Layer

For the Chocolate Coating

Instructions

  • Line an 8×8-inch baking pan with parchment paper.
  • In a saucepan, combine the granulated sugar, corn syrup, and water over medium heat.
  • Stir until the sugar dissolves and continue cooking until the syrup reaches 260ยฐF (127ยฐC) on a candy thermometer.
  • Beat the egg white until stiff peaks form.
  • Slowly pour the hot syrup into the egg white while beating continuously.
  • Add the vanilla extract and continue beating until thick and glossy.
  • Spread the nougat evenly into the prepared pan.
  • In a microwave-safe bowl, melt the caramel candies with the heavy cream in 30-second intervals, stirring after each interval until smooth.
  • Fold the roasted peanuts into the caramel mixture.
  • Spread the caramel peanut mixture evenly over the nougat.
  • Refrigerate for about 30 minutes until firm.
  • Cut into 16 bars.
  • Melt the milk chocolate chips with the coconut oil in 30-second microwave intervals, stirring until smooth.
  • Dip each candy bar into the melted chocolate until completely coated.
  • Place the coated bars onto parchment paper.
  • Allow the chocolate to set completely before serving.

Notes & Wine Advice

## Recipe Notes

Recipe Notes

Use fresh roasted peanuts for the best crunch and flavor.
Allow the bars to chill completely before dipping them in chocolate to help them hold their shape.
Store the candy bars in an airtight container in the refrigerator for up to one week.
For cleaner slices, warm your knife under hot water and dry it before cutting.

Wine Advice

A Ruby Port complements the rich caramel, peanuts, and chocolate beautifully.
A sweet dessert wine or a glass of cold milk also pairs wonderfully with these homemade candy bars.

Nutrition values

Calories: 220 kcal | koolhydraten: 30 g | Eiwitten: 4 g | Vet: 10 g | Verzadigd vet: 5 g | Natrium: 0.2 mg | Suiker: 22 g
————————————————————————————————–

About This Recipe

Baby Ruth Candy Bars are a fun homemade version of the classic American candy bar, with soft nougat, creamy caramel, roasted peanuts, and a smooth milk chocolate coating. This recipe gives you the same rich, nutty, chewy bite, but made fresh in your own kitchen.

Why Baby Ruth Candy Bars Work So Well

The base of these candy bars starts with a light nougat layer. It gives the bars their soft texture and balances the sweetness of the caramel. A candy thermometer helps the sugar syrup reach the right stage, so the nougat sets properly without becoming too hard.

The caramel peanut layer adds the classic crunch and chew that makes Baby Ruth Candy Bars so recognizable. Roasted peanuts bring a salty, nutty flavor that keeps the bars from tasting too sweet. The caramel holds everything together and creates that sticky candy-shop texture.

After chilling, the bars are cut and dipped in melted milk chocolate. This final layer gives them their familiar finish and makes them look like proper homemade candy bars. Coconut oil or shortening helps the chocolate melt smoothly and coat each bar evenly.

These homemade candy bars are ideal for holidays, gift boxes, parties, bake sales, movie nights, and dessert trays. You can serve them chilled for a firmer bite or at room temperature for a softer caramel texture.

If you enjoy homemade sweets, browse our Candy Recipes collection for more chocolate, caramel, and sweet treat ideas.

For official information about safe food handling and storing homemade sweets, visit the FDA Food Safety website.

With nougat, caramel, peanuts, and chocolate in every bite, Baby Ruth Candy Bars are a rich homemade treat that feels nostalgic, indulgent, and perfect for anyone who loves classic candy.


Homemade Mall Pretzels

Homemade Mall Pretzels with coarse salt fresh from the oven on a rustic wooden serving board.

Homemade Mall Pretzels

These Homemade Mall Pretzels are soft, chewy, buttery, and beautifully golden with the classic flavor everyone loves. They’re easy to make at home and can be finished with coarse salt for a traditional snack or coated in cinnamon sugar for a sweet treat. Perfect for parties, movie nights, or simply enjoying warm from the oven.
Couverts12 pretzels
Preparation 1 hour 20 minutes
Preparation time:8 minutes
Total time 1 hour 28 minutes
estimated costs pp $0.65 per pretzel
Deel op Facebook Print Recipe

Equipment

  • Baking sheets
  • Grease for baking sheets
  • Measuring cups
  • Mixing bowls
  • Pastry brush
  • Shallow bowls
  • Whisk

Ingredients

Instructions

  • Sprinkle the yeast over the warm water in a large mixing bowl and stir until dissolved.
  • Add the brown sugar and salt and stir well.
  • Mix in the bread flour and all-purpose flour.
  • Knead the dough until smooth and elastic.
  • Cover and let the dough rise for at least 30 minutes.
  • Meanwhile, combine the 2 cups of warm water with the baking soda in a shallow bowl and stir until dissolved.
  • Divide the dough into 12 equal portions.
  • Roll each portion into a rope about ยฝ inch thick.
  • Shape each rope into a traditional pretzel.
  • Dip each pretzel into the baking soda solution.
  • Place the pretzels on lightly greased baking sheets.
  • Allow the shaped pretzels to rise again for about 15 minutes.
  • Bake in a preheated 450ยฐF (230ยฐC) oven for approximately 10 minutes or until golden brown.
  • Brush the hot pretzels generously with melted butter.
  • For salted pretzels, sprinkle immediately with coarse salt.
  • For cinnamon sugar pretzels, dip the buttered pretzels into a mixture of cinnamon and sugar until completely coated.
  • Serve warm.

Notes & Wine Advice

## Recipe Notes

Recipe Notes

For the softest pretzels, do not overbake them. Remove them as soon as they become deep golden brown.
Brush the pretzels with melted butter immediately after baking so the toppings stick perfectly.
Try different toppings such as coarse salt, cinnamon sugar, grated Parmesan cheese, garlic butter, or everything bagel seasoning.
These pretzels taste best fresh but can be reheated for a few minutes in the oven.

Wine Advice

A dry Riesling complements both the buttery dough and the salty topping beautifully.
If you prefer beer, a light lager is a classic pairing with warm homemade pretzels.

Nutrition values

Calories: 235 kcal | koolhydraten: 42 g | Eiwitten: 6 g | Vet: 5 g | Verzadigd vet: 2.5 g | Natrium: 0.9 mg | Suiker: 4 g
————————————————————————————————–

About This Recipe

Homemade Mall Pretzels let you recreate the famous warm, soft pretzels from your favorite mall bakery right in your own kitchen. These buttery pretzels have a chewy interior, a beautifully golden crust, and the unmistakable flavor that has made them a favorite snack for generations. Whether you prefer them sprinkled with coarse salt or coated in cinnamon sugar, this recipe delivers authentic bakery-style results with simple pantry ingredients.

Why Homemade Mall Pretzels Are So Popular

The secret to these pretzels is the combination of bread flour and all-purpose flour. Bread flour provides the chewy texture that makes a great pretzel, while all-purpose flour keeps the dough soft and easy to work with. Before baking, each pretzel is dipped into a baking soda solution. This traditional step creates the characteristic golden-brown crust, rich flavor, and glossy appearance that make homemade pretzels so recognizable.

Making Homemade Mall Pretzels is surprisingly simple. After a short kneading and rising time, the dough becomes smooth, elastic, and easy to shape into classic pretzel twists. Even if you’ve never baked pretzels before, this recipe is beginner-friendly and produces reliable results every time.

One of the biggest advantages of this recipe is its versatility. The classic version is brushed with melted butter and finished with coarse salt. If you prefer something sweeter, coat the warm buttered pretzels in cinnamon sugar for a bakery-style treat. Other delicious toppings include garlic butter, grated Parmesan cheese, shredded cheddar, everything bagel seasoning, or a drizzle of icing.

These Homemade Mall Pretzels are perfect for family gatherings, movie nights, parties, game days, picnics, or simply serving warm as an afternoon snack. They pair wonderfully with cheese sauce, honey mustard, spicy mustard, chocolate sauce, or cream cheese dip, making them suitable for both sweet and savory occasions.

If you enjoy baking fresh bread and snacks, you’ll also love exploring our Bread Recipes collection for even more inspiration.

For official information about food safety and baking ingredients, visit the FDA Food Safety website.

Once you bake your first batch, you’ll discover how easy it is to recreate this bakery favorite at home. Soft, buttery, golden, and endlessly customizable, these Homemade Mall Pretzels are guaranteed to become one of your favorite homemade baked treats.