Goat Cheese Spinach Frittata

Tomato and spinach frittata with goat cheese on a rustic wooden table.

Goat Cheese Spinach Frittata

A light air-fryer frittata with fresh spinach, spring onion, creamy goat cheese and ripe tomato. It is an easy low-carb breakfast or brunch for four.
Couverts4
Preparation 10 minutes
Preparation time:16 minutes
Resting Time 5 minutes
estimated costs pp $1.85
Deel op Facebook Print Recipe

Equipment

  • Cake Barrel, 7-inch
  • Cooling rack
  • Mixing bowl
  • Whisk

Ingredients

Instructions

  • Preheat the air fryer to 160ยฐC (320ยฐF) for 3 minutes.
  • Lightly coat a 7-inch cake barrel with olive oil cooking spray.
  • Crack the eggs into a mixing bowl.
  • Add the salt and black pepper.
  • Whisk until evenly combined.
  • Stir in the chopped spinach, diced spring onion and crumbled goat cheese.
  • Pour the mixture into the prepared cake barrel.
  • Arrange the tomato slices over the top.
  • Place the cake barrel in the air-fryer basket.
  • Air-fry at 160ยฐC (320ยฐF) for 14 to 16 minutes.
  • Check that the center has set and reached at least 71ยฐC (160ยฐF).
  • Remove the cake barrel from the air fryer.
  • Place it on a cooling rack and let the frittata rest for 5 minutes.
  • Carefully loosen the edges and remove the frittata from the barrel.
  • Cut into 4 equal portions.
  • Serve warm.

Notes & Wine Advice

Serving Suggestions

Serve this frittata as a light breakfast, relaxed brunch or simple main course. Add avocado, grilled mushrooms or a green salad when you want a more substantial meal.

Recipe Notes

The source listed spring onion as an ingredient but referred to shallot in the instructions. This corrected version uses the spring onion specified in the ingredient list.
Five eggs make four light portions. For larger appetites, serve the frittata with toast, roasted potatoes or a salad. Use a 7-inch cake barrel that fits inside the air-fryer basket with room for air circulation.

Dietary Information

This recipe suits gluten-free, high-protein, keto, low-carb, low-sugar, nut-free, pescatarian and soy-free diets when suitable certified ingredients are used.
It can fit a vegetarian diet when the goat cheese uses vegetarian rennet. The recipe contains egg and dairy, so it is not suitable for vegan, egg-free, dairy-free or lactose-free diets.

Nutrition Information

The nutrition estimate includes one-quarter of the complete frittata. Goat cheese provides much of the protein and fat, while the vegetables add very few calories. Sodium varies by goat cheese brand and the amount of salt added.

Variations

Replace goat cheese with feta, ricotta or shredded mozzarella. Add chopped herbs such as basil, parsley or dill. Sautรฉ mushrooms or courgette first if using them, because raw vegetables can release water while the frittata cooks.

Storage

Cool leftovers promptly and refrigerate them in a covered container for up to 3 days. Reheat individual portions in the air fryer at 160ยฐC (320ยฐF) for 3 to 4 minutes, or enjoy them cold for lunch.

Wine Advice

For a leisurely brunch, pair this frittata with chilled Prosecco. Its fresh bubbles and acidity cut through the creamy goat cheese while complementing the tomato and spinach. Serve at approximately 7โ€“9ยฐC.

Nutrition values

Calories: 200 kcal | koolhydraten: 3 g | Eiwitten: 14 g | Vet: 15 g | Verzadigd vet: 8 g | Natrium: 430 mg | Suiker: 2 g
————————————————————————————————–

Goat Cheese Frittata in the Air Fryer

This goat cheese frittata combines eggs, fresh spinach, spring onion and tomato in a light meal that works well for breakfast, brunch or lunch. The air fryer cooks the eggs gently in a compact cake barrel, while the goat cheese adds a creamy, tangy contrast to the mild vegetables.

The recipe uses five eggs for four light portions. It is enough for a simple breakfast, especially when served with avocado or a salad. For larger appetites, add toast, roasted potatoes or fresh fruit alongside the frittata.

Why Use the Air Fryer?

An air fryer provides steady circulating heat around the cake barrel, so there is no need to warm a large oven for one small dish. A 7-inch barrel is a practical size for a five-egg mixture and fits many medium or large air-fryer baskets.

Preheat the appliance for 3 minutes at 160ยฐC or 320ยฐF. The moderate temperature gives the egg mixture time to set without overbrowning the top. Higher heat may cook the edges too fast and leave the center soft or wet.

Cooking time varies with the air fryer, cake barrel material and exact depth of the egg mixture. Start checking after 14 minutes. The finished frittata should look set in the center and reach at least 71ยฐC or 160ยฐF.

Preparing the Vegetables

Roughly chop the baby spinach before stirring it into the beaten eggs. Small pieces distribute more evenly and make the finished portions easier to cut. Fresh spinach wilts quickly during cooking, so there is no need to sautรฉ it first.

Finely dice the spring onion to prevent large pieces from overpowering the soft eggs. The original instructions referred to a shallot, even though the ingredient list specified spring onion. This version uses spring onion consistently.

Core and slice the tomato thinly, then pat the slices dry. Tomatoes naturally contain a lot of moisture. Drying them lightly keeps excess liquid from collecting on the surface of the frittata as it cooks.

Choosing and Serving the Cheese

Crumbled goat cheese melts into soft pockets rather than forming a smooth cheese layer. Its tangy flavor works especially well with spinach and tomato. For a milder result, use feta, ricotta or mozzarella instead.

This spinach and tomato frittata tastes best after resting for 5 minutes. The rest gives the egg structure time to firm up, making it easier to remove from the barrel and slice neatly. Run a silicone spatula around the edge before lifting it out.

Serve it with avocado, grilled mushrooms or a crisp green salad. For more egg-based meal ideas, try the Morning Egg Cups. The BLT Frittata adds bacon and Cheddar, while Divorced Eggs offer a more colorful Mexican-style breakfast.

Dietary Information and Storage

When made with appropriate certified ingredients, the recipe can suit gluten-free, high-protein, keto, low-carb, low-sugar, nut-free, pescatarian and soy-free diets.

The dish can also fit a vegetarian diet when you choose goat cheese made with vegetarian rennet. It contains egg and dairy, so it does not suit vegan, egg-free, dairy-free or lactose-free diets. Always check cheese labels if dietary requirements are strict.

Cool leftover portions promptly and refrigerate them in a covered container for up to 3 days. Reheat individual slices in the air fryer at 160ยฐC or 320ยฐF for 3 to 4 minutes. Follow the FDA safe food-handling guidance for safe cooling, storage and reheating practices.

Wine Pairing

For a relaxed brunch, serve this frittata with chilled Prosecco. Its bubbles and fresh acidity balance the creamy cheese and egg, while the light fruitiness complements the tomato. Serve it at approximately 7โ€“9ยฐC.

Easy to prepare, light enough for morning and satisfying enough for lunch, this goat cheese frittata is a reliable air-fryer recipe for any day of the week.
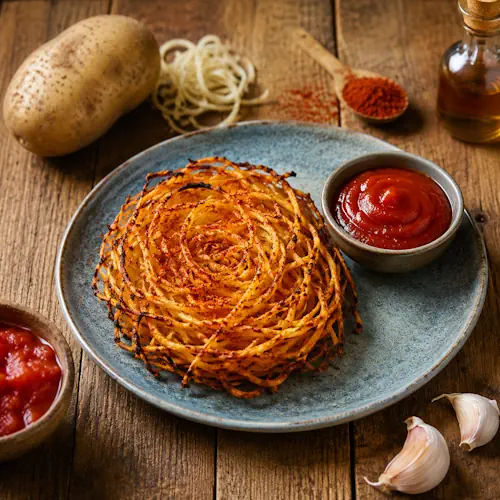
Smoky Spiral Potato Nests

Spicy paprika spiralized potato nest with homemade tomato ketchup on a rustic wooden table.

Smoky Spiral Potato Nests

Crispy spiralized potato nests seasoned with smoked paprika and garlic, served with a tangy homemade tomato ketchup. This air-fryer snack takes inspiration from the bold flavors of Spanish patatas bravas.
Couverts4
Preparation 20 minutes
Preparation time:30 minutes
estimated costs pp $0.85
Deel op Facebook Print Recipe

Equipment

Instructions

  • Spiralize the potatoes into long, thin strands.
  • If you do not have a spiralizer, cut the potatoes into โ…›-inch-thick matchsticks.
  • Place the potato strands in a large colander.
  • Rinse them under cold running water until the water runs clear.
  • Spread the strands over a double layer of paper towels.
  • Pat them completely dry.
  • Transfer the potatoes to a large mixing bowl.
  • Add the vegetable oil, smoked paprika, garlic powder, salt and black pepper.
  • Toss until evenly coated.
  • Divide the potatoes into 4 equal portions.
  • Loosely shape each portion into a nest.
  • Preheat the air fryer to 200ยฐC (400ยฐF) for 3 minutes.
  • Arrange 2 nests in the basket without overcrowding.
  • Air-fry for approximately 15 minutes.
  • Carefully turn the nests halfway through cooking.
  • Cook until the strands are browned and crisp.
  • Transfer the cooked nests to a plate.
  • Repeat with the remaining 2 nests.
  • Combine the crushed tomatoes, apple cider vinegar, brown sugar, vegan Worcestershire sauce and hot sauce in a blender.
  • Blend until smooth.
  • Pour the mixture into a small saucepan.
  • Simmer over medium heat for 3 to 5 minutes or until reduced by approximately half.
  • Transfer the ketchup to a serving bowl and allow it to cool slightly.
  • Serve 1 hot potato nest per person with the spicy tomato ketchup.

Notes & Wine Advice

Serving Suggestions

Serve the nests as a crispy appetizer, flavorful potato side dish or shareable snack. They pair well with grilled vegetables, burgers or a fresh green salad.

Recipe Notes

This recipe closely resembles the previously prepared Spicy Potato Nests recipe. Check whether both versions are needed before publishing to avoid near-duplicate content.
Drying the rinsed potatoes thoroughly is essential. Remaining water creates steam and prevents the strands from becoming crisp. Shape the nests loosely so hot air can circulate through them.
The cooking time allows for two batches. If all four nests fit inside the basket without touching, they may cook in one batch and the cooking time can be reduced to approximately 15 minutes.

Dietary Information

Standard Worcestershire sauce commonly contains anchovies and is therefore not suitable for vegan or vegetarian diets. This corrected version specifically uses vegan Worcestershire sauce.
Use certified products when preparing the dish for gluten-free, soy-free, nut-free or wheat-free diets. Worcestershire sauce and hot sauce ingredients vary between brands.

Nutrition Information

The nutrition estimate includes one-quarter of the potato mixture and one-quarter of the ketchup. The original estimate of 250 calories was too low after scaling the recipe to four servings and accounting for all four tablespoons of oil.

Variations

Use sweet potatoes for a sweeter version, although they may become slightly less crisp. Mild smoked paprika can replace hot paprika. Add cayenne pepper for extra heat or dried oregano for a more aromatic flavor.

Storage

The nests taste best immediately after cooking. Refrigerate leftovers in a covered container for up to 3 days and reheat them at 190ยฐC (375ยฐF) for 4 to 6 minutes. Store the ketchup separately in the refrigerator for up to 5 days.

Wine Advice

A lightly off-dry Riesling balances the smoked paprika, vinegar and hot sauce. A chilled Rosรฉ also works well with the crisp potatoes and sweet tomato ketchup. Serve either wine at approximately 8โ€“10ยฐC.

Nutrition values

Serving: 1 potato nest with ketchup | Calories: 300 kcal | koolhydraten: 43 g | Eiwitten: 4 g | Vet: 14 g | Verzadigd vet: 1 g | Natrium: 470 mg | Suiker: 9 g
————————————————————————————————–

Spiral Potato Nests for a Crisp Air-Fryer Snack

These spiral potato nests transform simple russet potatoes into crisp, paprika-coated portions with plenty of texture. Each nest is served with a quick homemade tomato ketchup that balances smoky spice, vinegar and a touch of sweetness. The result is a shareable air-fryer snack inspired by the flavors of Spanish patatas bravas.

Spiralizing gives the potatoes more exposed edges than standard wedges or cubes. Those thin strands become crisp more easily, while the loosely formed nest keeps the presentation distinct. A spiralizer works best, but thin hand-cut matchsticks provide a practical alternative when needed.

Why Rinsing and Drying Matter

Rinse the potato strands in a colander under cold running water until the water appears clear. This step removes surface starch, which can otherwise make the potatoes stick together and soften during cooking. The rinse also helps separate the strands so the hot air can reach more of their surface.

Drying is equally important. Spread the potatoes over a double layer of paper towels and pat them thoroughly dry before adding oil and spices. Water creates steam in the air fryer, and steam is the enemy of a crisp potato nest.

Once dry, coat the strands evenly with vegetable oil, hot smoked paprika, garlic powder, salt and black pepper. The oil carries the spices across the potatoes and helps them brown. Use mild smoked paprika if you prefer warmth and smokiness without much heat.

Shaping and Air-Frying the Nests

Divide the seasoned potatoes into four equal portions and loosely shape each one into a nest. Do not compress the strands into a tight bundle. Leaving small gaps allows the circulating air to crisp the inside as well as the outside.

Most medium air fryers require two batches of two nests. This recipeโ€™s 30-minute cooking time includes both batches. A larger appliance may hold all four nests without crowding, in which case they may finish in about 15 minutes. Turn them carefully halfway through so they brown evenly without breaking apart.

The finished nests should appear browned and feel crisp around the edges. Serve them immediately for the best texture. For another air-fryer potato dish, try these Tangy Salt & Vinegar Smashed Potatoes. The Best-Dressed Stuffed Potatoes make a more substantial option for a casual meal.

A Quick Tomato Ketchup

The ketchup uses crushed tomatoes, apple cider vinegar, dark brown sugar, vegan Worcestershire sauce and mild hot sauce. Blending the ingredients first creates a smooth texture, while a brief simmer concentrates the flavor. The sauce does not need a long cooking time because the tomatoes are already canned and cooked.

Use vegan Worcestershire sauce deliberately. Traditional Worcestershire sauce often contains anchovies, so it does not suit vegan or vegetarian diets. This small ingredient choice keeps the recipe aligned with its dietary classification without sacrificing the sweet-salty depth that the sauce contributes.

The ketchup also works with fries, roasted vegetables and tortilla chips. Serve it alongside Tortilla Chips & Special Guacamole when building a snack platter for a party or movie night.

Dietary Information and Safe Storage

When you select suitable certified ingredients, this recipe fits dairy-free, egg-free, gluten-free, lactose-free, nut-free, soy-free, vegan, vegetarian and wheat-free diets.

Always read the labels on Worcestershire sauce, hot sauce and smoked paprika. Some brands add wheat, soy or other allergens. For more general information about cooling, refrigerating and reheating food safely, follow the FDA safe food-handling guidance.

The nests are at their best straight from the air fryer. Refrigerate leftovers in a covered container for up to 3 days and reheat them at 190ยฐC or 375ยฐF for 4 to 6 minutes. Keep the ketchup separately refrigerated for up to 5 days.

Wine Pairing

The smoky paprika and tangy ketchup pair well with a lightly off-dry Riesling. Its fruit and acidity soften the heat and vinegar. A chilled Rosรฉ is another refreshing choice for a casual snack or barbecue.

With good drying, loose shaping and a hot basket, these spiral potato nests deliver the crisp edges and smoky flavor that make them hard to stop eating.


Chipotle Orange Steak Tacos

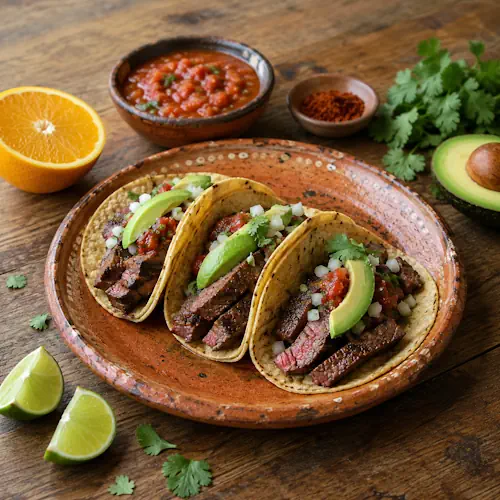
Chipotle carne asada tacos with avocado, onion, cilantro and salsa on a rustic wooden table.

Chipotle Orange Steak Tacos

Air-fried flank steak coated with smoky chipotle, chili powder and fresh orange zest, then thinly sliced and served in warm corn tortillas with avocado, onion, cilantro and salsa.
Couverts4 servings
Preparation 15 minutes
Preparation time:12 minutes
Resting Time 10 minutes
estimated costs pp $3.85
Deel op Facebook Print Recipe

Equipment

Ingredients

For the Tacos

Instructions

  • Remove the steak from the refrigerator approximately 20 minutes before cooking.
  • Combine the chili powder, chipotle chile powder, garlic powder, salt and orange zest in a small bowl.
  • Pat the steak dry with paper towels.
  • Rub the spice mixture evenly over both sides of the steak.
  • Drizzle the vegetable oil over the steak and turn it until evenly coated.
  • Preheat the air fryer to 200ยฐC (400ยฐF) for 3 minutes.
  • Place the steak in the air-fryer basket without folding or overcrowding it.
  • Air-fry for approximately 8 to 12 minutes, turning halfway through.
  • Check the thickest part with an instant-read thermometer.
  • Cook until the steak reaches at least 63ยฐC (145ยฐF).
  • Transfer the steak to a clean cutting board.
  • Let it rest for 10 minutes.
  • Warm the corn tortillas according to the package directions.
  • Slice the steak thinly across the grain.
  • Divide the steak among the tortillas.
  • Top with avocado, white onion, cilantro and salsa.
  • Serve 2 tacos per person with lime wedges.

Notes & Wine Advice

Serving Suggestions

Serve these tacos with lime wedges, salsa and a fresh cabbage salad. For a larger main course, add black beans, grilled corn or Mexican-style rice.

Recipe Notes

The original recipe did not specify quantities for the tortillas or toppings. Eight tortillas, one avocado, half an onion, cilantro and salsa have been added to create four measurable servings and support a more realistic nutrition estimate.
Slice the steak across the grain after resting. Cutting across the visible muscle fibers shortens them and makes flank steak noticeably more tender. If the steak is too large to lie flat in the basket, cut it into two pieces rather than folding it.

Food Safety

The source instructed cooking the steak to medium-rare but did not provide a temperature. For food safety, cook whole-cut beef to at least 63ยฐC (145ยฐF) and allow it to rest before slicing. Cooking time varies with the steakโ€™s thickness, starting temperature and the air-fryer model, so use a thermometer rather than relying only on time.

Dietary Information

This recipe can suit dairy-free, egg-free, gluten-free, high-protein, lactose-free, nut-free, soy-free and wheat-free

Nutrition Information

The nutrition estimate includes two corn tortillas, one-quarter of the steak and proportional amounts of avocado, onion, cilantro, salsa and oil. Sodium varies according to the salsa, tortillas and amount of seasoning that remains on the cooked steak.

Variations

Skirt steak can replace flank steak, although thinner pieces may cook more quickly. For less heat, reduce the chipotle powder to 1 teaspoon. For extra freshness, add shredded cabbage, chopped tomato or pickled red onion.

Storage

Refrigerate the steak and toppings separately within 2 hours of cooking. Store the steak in a covered container for up to 3 days and reheat it to 74ยฐC (165ยฐF). Assemble the tacos immediately before serving so the tortillas do not become soggy.

Wine Advice

Pair the smoky chipotle steak with a fruit-forward Tempranillo. Its ripe red-fruit flavors, moderate acidity and subtle spice complement the toasted chili and orange zest without overwhelming the tacos. Serve at approximately 15โ€“17ยฐC.

Nutrition values

Serving: 2 tacos | Calories: 430 kcal | koolhydraten: 34 g | Eiwitten: 29 g | Vet: 21 g | Verzadigd vet: 6 g | Natrium: 720 mg | Suiker: 3 g
————————————————————————————————–

Chipotle Steak Tacos from the Air Fryer

These chipotle steak tacos combine smoky seasoning, fresh orange zest and tender slices of air-fried flank steak. Corn tortillas, avocado, onion, cilantro and salsa complete each serving. The recipe captures the character of carne asada without requiring an outdoor grill or a lengthy liquid marinade.

Traditional carne asada often uses citrus juice to flavor and tenderize the beef. This version uses finely grated orange zest instead. The zest adds concentrated citrus aroma without leaving excess moisture on the steak, allowing the air fryer to brown its seasoned exterior more effectively.

Choosing and Preparing the Steak

Flank steak works well because it has a pronounced beef flavor and cooks quickly. Skirt steak makes a suitable alternative, although its thinner and less even shape may shorten the cooking time. Whichever cut you choose, it must fit inside the basket without folding.

Remove the steak from the refrigerator approximately 20 minutes before cooking. This takes away some of the chill without leaving the raw meat at room temperature unnecessarily. Pat the surface dry before adding the spice rub so the seasoning adheres properly.

Mix the chili powder, chipotle powder, garlic powder, salt and orange zest before rubbing them onto the beef. Adding the oil afterward helps distribute the spices and promotes browning. Chipotle chile powder brings noticeable heat, so reduce it from two teaspoons to one when cooking for people who prefer milder tacos.

Air-Frying and Slicing Correctly

Preheat the air fryer to 200ยฐC or 400ยฐF. Place the steak flat in the basket and turn it halfway through cooking. A one-pound flank steak measuring approximately ยพ inch thick will usually require 8 to 12 minutes, but appliance performance and meat thickness can change that range.

Use an instant-read thermometer in the thickest section. Cook whole-cut beef to at least 63ยฐC or 145ยฐF, then let it rest before slicing. The FDA safe food-handling guidance provides further advice about preventing cross-contamination and storing cooked meat safely.

Resting the steak for 10 minutes allows its juices to redistribute. Cutting it immediately can cause moisture to escape onto the board. Once rested, examine the direction of the muscle fibers and slice thinly across them. This shortens the fibers and makes naturally firm flank steak easier to chew.

Building a Balanced Taco

Warm the corn tortillas shortly before serving so they remain flexible. Divide the sliced steak evenly and add avocado, diced white onion, cilantro and salsa. Lime wedges contribute acidity and allow everyone to adjust the tacos at the table.

Serve these orange-spiced beef tacos with Tortilla Chips with Special Guacamole for a generous party meal. For alternative fillings, try the Jamaican-Style Fish Tacos. The Mexican Chicken Pizza provides another option built around spicy Mexican-inspired flavors.

Dietary Information and Variations

When prepared with suitable certified ingredients, the recipe can fit dairy-free, egg-free, gluten-free, high-protein, lactose-free, nut-free, soy-free and wheat-free

Check tortillas, salsa and seasoning blends carefully because some products contain wheat, milk, soy or traces of nuts. Corn tortillas are not automatically certified gluten-free, particularly when manufacturers process them alongside wheat products.

For a lower-carbohydrate version, replace the tortillas with crisp lettuce leaves. You can also serve the sliced steak over salad greens or cauliflower rice. Add shredded cabbage for crunch, pickled onion for acidity or sliced jalapeรฑo for additional heat.

Storage and Wine Pairing

Refrigerate cooked steak within 2 hours and store it separately from the tortillas and fresh toppings. Use it within 3 days. Reheat only the amount required and bring it to 74ยฐC or 165ยฐF. Assemble the tacos after reheating to prevent the tortillas from becoming damp.

A fruit-forward Tempranillo complements the smoky chili, orange zest and grilled character of the beef. Its red-fruit flavors and moderate acidity also work well with salsa and lime. Serve the wine slightly cool at approximately 15โ€“17ยฐC.

With its dry citrus spice rub, quick cooking method and fresh toppings, these chipotle steak tacos deliver bold flavor without needing a grill or several hours of marinating.


BLT Frittata

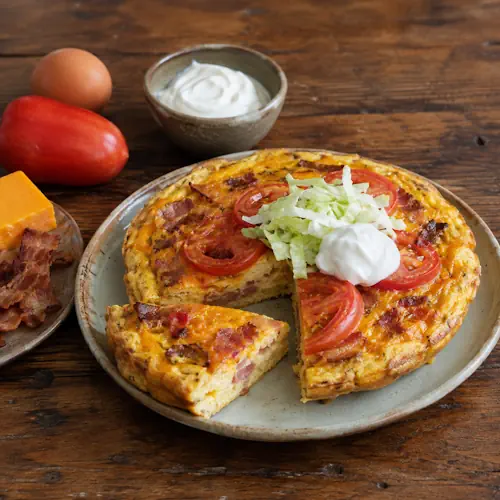
BLT frittata with bacon, cheddar, tomato, lettuce and sour cream on a rustic wooden table.

Bacon-Tomato Breakfast Frittata

A fluffy air-fryer frittata filled with smoky bacon and Cheddar, topped with juicy tomato, crisp lettuce and cool sour cream. It combines the familiar flavors of a BLT in a filling, low-carb breakfast.
Couverts4 servings
Preparation 15 minutes
Preparation time:18 minutes
Resting Time 5 minutes
estimated costs pp $2.10
Deel op Facebook Print Recipe

Equipment

  • Cake Barrel, 7-inch
  • Cooling rack
  • Mixing bowl
  • Whisk

Instructions

  • Preheat the air fryer to 160ยฐC (320ยฐF) for 3 minutes.
  • Lightly coat a 7-inch cake barrel with olive oil cooking spray.
  • Crack the eggs into a mixing bowl.
  • Add the salt and black pepper.
  • Whisk until evenly combined.
  • Fold in the diced bacon and shredded Cheddar.
  • Pour the egg mixture into the prepared cake barrel.
  • Arrange the tomato slices over the egg mixture.
  • Place the cake barrel in the air-fryer basket.
  • Air-fry at 160ยฐC (320ยฐF) for 16 to 18 minutes.
  • Check that the center has set and reached at least 71ยฐC (160ยฐF).
  • Remove the cake barrel from the air fryer.
  • Place it on a cooling rack and let the frittata rest for 5 minutes.
  • Carefully loosen the edges and remove the frittata from the barrel.
  • Cut it into 4 equal portions.
  • Top each portion with shredded lettuce and sour cream.
  • Serve warm.

Notes & Wine Advice

Serving Suggestions

Serve this frittata with avocado, grilled mushrooms or a simple cucumber salad. It works well as a substantial breakfast, relaxed brunch or light main course.

Recipe Notes

The quantities have been adjusted to provide four complete servings. Use a 7-inch cake barrel that fits comfortably inside the air fryer. Cooking time may vary according to the depth of the barrel and the power of the appliance.
Add the lettuce only after cooking. Heating it with the eggs would make it limp and watery. Pat the tomato slices dry before arranging them on the frittata to prevent excess moisture around the center.

Dietary Information

This recipe may suit gluten-free, high-protein, keto, low-carb, low-sugar, nut-free and soy-free diets when appropriately certified ingredients are used. Check bacon, shredded cheese, sour cream and cooking spray for gluten, added sugar, nuts or soy-derived additives. The recipe contains egg and cowโ€™s milk.

Nutrition Information

The values cover one-quarter of the complete frittata with lettuce and sour cream. Bacon and Cheddar make the dish relatively high in saturated fat and sodium. Exact values depend heavily on the brands and thickness of the bacon slices.

Variations

Replace the bacon with turkey bacon or cooked ham. Add chopped chives, spinach, mushrooms or spring onions to the egg mixture. Greek yogurt can replace the sour cream for a lighter topping with slightly more protein.

Storage

Store the cooked frittata without the lettuce topping. Refrigerate it in a covered container for up to 3 days. Keep the lettuce and sour cream separately. Reheat individual portions in the air fryer at 160ยฐC (320ยฐF) for 3 to 4 minutes.

Wine Advice

For brunch, pair this frittata with a fresh, lightly oaked Chardonnay. Its acidity balances the bacon, Cheddar and sour cream without overpowering the eggs and tomato. Serve chilled at approximately 9โ€“11ยฐC.

Nutrition values

Calories: 340 kcal | koolhydraten: 5 g | Eiwitten: 25 g | Vet: 25 g | Verzadigd vet: 10 g | Natrium: 680 mg | Suiker: 3 g
————————————————————————————————–

Air Fryer BLT Frittata for Breakfast

This air fryer BLT frittata turns bacon, lettuce and tomato into a filling breakfast with eggs and melted Cheddar. The frittata cooks gently inside a cake barrel, while the fresh lettuce and sour cream go on after baking. That contrast creates a warm, savory base with a cool and crisp topping.

The recipe provides four complete servings and works particularly well for breakfast, brunch or lunch. Each portion contains approximately two eggs, making it more substantial than a small snack-sized frittata. You can serve it on its own or add avocado, grilled mushrooms or a simple cucumber salad.

Why the Air Fryer Works Well

An air fryer surrounds the cake barrel with circulating heat, helping the frittata cook evenly without requiring a full-size oven. A 7-inch barrel should fit most medium or large appliances, but always check the available basket dimensions before filling the pan.

Preheating the appliance helps the eggs begin cooking as soon as the barrel enters the basket. Keep the temperature at 160ยฐC or 320ยฐF. Higher temperatures can brown the outside too quickly while leaving the center undercooked.

The precise cooking time depends on the air fryer, the material of the barrel and the depth of the egg mixture. Begin checking after 16 minutes. The center should appear set and should not release liquid when gently pressed.

Preparing the Ingredients Correctly

Cook the bacon before adding it to the eggs. Drain very fatty slices on kitchen paper and dice them into small pieces. This distributes the bacon evenly and prevents excess grease from collecting at the bottom of the frittata.

Pat the tomato slices dry before arranging them on top. Tomatoes contain considerable moisture, which can slow down cooking in the center. Thin, evenly cut slices provide flavor without making the eggs watery.

Add the shredded iceberg lettuce only when serving. Cooking lettuce with the eggs would remove its characteristic crunch. Sour cream also belongs on the finished portions rather than inside the hot air fryer.

Safe Cooking and Easy Serving

Cook the eggs until the center reaches at least 71ยฐC or 160ยฐF. Use a clean food thermometer to check the thickest section without touching the bottom of the pan. The FDA safe food-handling guidance offers additional information about preparing and storing cooked egg dishes.

Let the frittata rest for 5 minutes before removing it from the barrel. This short pause allows the eggs to firm up, making the dish easier to release and slice. Run a thin silicone spatula around the edge if any sections remain attached.

For another satisfying morning dish, try the Maple-Bacon Oven Pancake. The Morning Egg Cups provide a smaller portable alternative, while Divorced Eggs combine fried eggs with tortillas, beans and contrasting Mexican sauces.

Variations and Dietary Considerations

This bacon tomato frittata can accommodate several variations. Replace regular bacon with turkey bacon or cooked ham. Chopped chives, spring onions, spinach or sautรฉed mushrooms also work well. Avoid adding large amounts of raw vegetables because they may release too much liquid during cooking.

The recipe can fit gluten-free, high-protein, keto, low-carb, low-sugar and nut-free eating patterns. Always check bacon, cheese, sour cream and cooking spray for unexpected allergens or added sugar. The dish contains egg and cowโ€™s milk, so it does not qualify as egg-free, dairy-free, lactose-free or vegan.

Storage and Wine Pairing

Refrigerate leftover frittata without the lettuce or sour cream in a covered container for up to 3 days. Store the toppings separately so they remain fresh. Reheat individual portions at 160ยฐC or 320ยฐF for 3 to 4 minutes. The frittata can also be served cold, provided it has remained properly refrigerated.

For a leisurely brunch, serve it with a lightly oaked Chardonnay. Fresh acidity cuts through the bacon, cheese and sour cream, while the wineโ€™s rounded texture complements the eggs. Serve it chilled at approximately 9โ€“11ยฐC.

With its crisp topping, savory filling and straightforward cooking method, this air fryer BLT frittata offers an easy way to enjoy familiar BLT flavors without bread.


Bacon-Cheddar Egg Cups

Morning egg cups with bacon and melted cheddar, served with eggs, cream and cheese on a rustic wooden table.

Bacon-Cheddar Egg Cups

Fluffy air-fryer egg cups filled with smoky bacon, melted Cheddar and a touch of cream. These protein-rich breakfast bites are easy to prepare and ideal for busy mornings or brunch.
Couverts4
Preparation 10 minutes
Preparation time:18 minutes
estimated costs pp $1.60
Deel op Facebook Print Recipe

Equipment

  • Mixing bowl
  • Silicone Muffin Cups, 8
  • Whisk

Instructions

  • Preheat the air fryer to 180ยฐC (350ยฐF) for 3 minutes.
  • Lightly coat 8 silicone muffin cups with olive oil cooking spray.
  • Crack the eggs into a mixing bowl.
  • Add the thickened cream, salt and black pepper.
  • Whisk until the mixture looks smooth and evenly combined.
  • Fold in the diced bacon and shredded Cheddar.
  • Divide the mixture evenly among the prepared muffin cups, filling each approximately three-quarters full.
  • Arrange 4 muffin cups in the air-fryer basket, leaving space around them for air circulation.
  • Air-fry at 180ยฐC (350ยฐF) for approximately 8 to 10 minutes.
  • Check that the centers have set and reached at least 71ยฐC (160ยฐF).
  • Transfer the cooked egg cups to a serving plate.
  • Repeat with the remaining 4 cups.
  • Allow the egg cups to rest for 2 minutes before serving.
  • Serve 2 egg cups per person.

Notes & Wine Advice

Serving Suggestions

Serve these egg cups warm with sliced avocado, grilled tomatoes or a simple green salad. They also work well as a portable breakfast or protein-rich snack.

Recipe Notes

The source recipe did not state a serving yield. The quantities have therefore been adjusted to make eight egg cups, providing two cups for each of four servings. Air-fryer sizes vary, so begin checking the centers after 8 minutes. Do not overfill the silicone cups because the eggs expand as they cook.
The original description mentioned onion and capsicum, but neither appeared in the ingredient list. If desired, add up to ยผ cup of finely diced onion or capsicum. Sautรฉ firm vegetables briefly before adding them so the egg cups do not become watery.

Dietary Information

The recipe can fit gluten-free, keto, low-carb, low-sugar, high-protein, nut-free and soy-free diets when suitable certified bacon, cream, cheese and cooking spray are used. Check packaged products carefully because bacon and cooking sprays may contain gluten, sugar or soy-derived ingredients. This recipe contains egg and cowโ€™s milk.

Nutrition Information

The nutrition estimate covers two egg cups and includes the eggs, cream, bacon and Cheddar. The original recipe provided no nutrition information. Actual sodium and fat levels will vary considerably according to the bacon and cheese brands used.

Variations

Replace the bacon with cooked turkey bacon for a lighter version. Add chopped spinach, mushrooms, spring onions or capsicum for extra vegetables. A pinch of smoked paprika or chili flakes adds more warmth without substantially increasing the carbohydrates.

Storage

Cool leftovers promptly and refrigerate them in a covered container for up to 3 days. Reheat the egg cups in the air fryer at 160ยฐC (320ยฐF) for 3 to 4 minutes, or until thoroughly hot. Freeze cooled cups individually for up to 2 months and thaw them overnight in the refrigerator.

Wine Advice

For brunch, pair the egg cups with a lightly oaked Chardonnay. Its fresh acidity balances the bacon and cream, while its rounded texture complements the melted Cheddar. Serve chilled at approximately 9โ€“11ยฐC.

Nutrition values

Serving: 2 egg cups | Calories: 270 kcal | koolhydraten: 2 g | Eiwitten: 20 g | Vet: 21 g | Verzadigd vet: 9 g | Natrium: 320 mg | Suiker: 1 g
————————————————————————————————–

Bacon Egg Cups for an Easy Air-Fryer Breakfast

Bacon egg cups combine fluffy eggs, smoky bacon, melted Cheddar and a small amount of cream in one convenient breakfast. The air fryer cooks them quickly while the individual silicone cups make portioning simple. Serve two cups per person for a satisfying morning meal that works equally well for a relaxed weekend breakfast, a brunch table or advance meal preparation.

This recipe makes eight cups and provides four servings. The source recipe used three eggs but did not specify a serving yield. Increasing the quantities creates portions that feel more realistic as a complete breakfast. The mixture remains simple, with no flour, breadcrumbs or unnecessary fillers.

Why Silicone Cups Work Best

Individual silicone muffin cups fit easily inside most air-fryer baskets. They also release the cooked eggs more cleanly than rigid metal molds. Lightly coating each cup with oil helps prevent sticking around the edges.

Leave space between the cups so hot air can circulate properly. A medium air fryer will usually hold four cups at a time, which means the recipe cooks in two batches. Larger appliances may accommodate all eight, but avoid overcrowding simply to save a few minutes.

The eggs expand during cooking, so fill each mold no more than three-quarters full. Begin checking after 8 minutes. The centers should appear set rather than wet, although they may remain slightly soft because they continue cooking briefly after removal.

Getting the Texture Right

Whisk the eggs and cream until the mixture has an even color, but avoid beating in excessive air. Too much air can cause the cups to rise dramatically and then collapse. Thickened cream creates a softer texture, while the Cheddar contributes richness and helps the cups hold together.

Dice the cooked bacon into small pieces so every serving contains an even amount. Very fatty bacon should drain briefly on kitchen paper before it enters the egg mixture. This prevents excess grease from collecting at the bottom of the molds.

Cook the egg mixture until its center reaches at least 71ยฐC or 160ยฐF. Use clean utensils and refrigerate leftovers promptly. The FDA food-handling guidance provides additional advice about preparing, storing and reheating egg dishes safely.

Serving and Variation Ideas

Serve these cheesy breakfast bites with avocado, grilled tomatoes, mushrooms or a fresh green salad. For another portable morning option, try the Maple-Bacon Oven Pancake. If you prefer a meat-free breakfast, the Divorced Eggs offer a colorful combination of eggs, beans and two Mexican sauces.

The original description mentioned onion and capsicum, but the source ingredient list omitted both. You can add up to ยผ cup of finely diced vegetables without changing the structure significantly. Sautรฉ vegetables that release moisture, such as mushrooms or spinach, before folding them into the eggs.

Turkey bacon makes a lighter alternative, while chopped ham gives the cups a milder flavor. Replace Cheddar with Gouda, mozzarella or crumbled feta if preferred. A pinch of smoked paprika, cayenne pepper or chopped chives can add flavor without adding many carbohydrates.

Dietary Considerations and Storage

The basic recipe can suit gluten-free, keto, low-carb, low-sugar, high-protein and nut-free diets. These classifications depend on the packaged ingredients. Check bacon, shredded cheese and cooking spray for gluten, sugar, nuts or soy-derived additives before applying allergen-related labels.

The recipe contains egg and cowโ€™s milk, so it does not suit egg-free, dairy-free, lactose-free or vegan diets. People following strict keto diets should select bacon without added sugar. Those limiting sodium can use reduced-sodium bacon and reduce or omit the added salt.

Cool leftovers and refrigerate them in a covered container for up to 3 days. Reheat the cups in the air fryer at 160ยฐC or 320ยฐF for 3 to 4 minutes. They can also be frozen individually for up to 2 months. Thaw them overnight in the refrigerator before reheating. For another make-ahead option, browse the siteโ€™s egg recipes.

A Fresh Wine Pairing

If serving these cups at brunch, choose a lightly oaked Chardonnay. Its acidity cuts through the bacon, cream and cheese, while its rounded character complements the soft eggs. Serve it chilled at approximately 9โ€“11ยฐC.

With straightforward preparation, realistic portions and several easy variations, bacon egg cups provide a practical breakfast that tastes freshly made even when prepared ahead.


Spicy Buffalo Egg Cups

Six golden Buffalo Chicken Egg Cups with shredded chicken, melted cheddar and buffalo sauce on a rustic wooden table.

Spicy Buffalo Egg Cups

Portable air-fried egg cups filled with cooked chicken, Cheddar cheese and tangy buffalo sauce. A practical way to transform leftover chicken into breakfast or a protein-rich snack.
Couverts4 servings
Preparation 10 minutes
Preparation time:21 minutes
Cooling 5 minutes
estimated costs pp $1.55
Deel op Facebook Print Recipe

Equipment

  • Measuring spoons
  • Mixing bowl
  • Silicone muffin cups
  • Whisk

Instructions

  • Preheat the air fryer to 180ยฐC (356ยฐF) for 3 minutes.
  • Lightly grease six silicone muffin cups with olive oil.
  • Crack the eggs into a mixing bowl.
  • Add the heavy cream and buffalo wing sauce.
  • Whisk until completely combined.
  • Stir in the shredded Cheddar cheese and cooked chicken.
  • Divide the egg mixture evenly among the six prepared muffin cups.
  • Place three muffin cups in the air-fryer basket.
  • Air-fry at 180ยฐC (356ยฐF) for approximately 9 minutes.
  • Check that the centres have set and reached an internal temperature of 71ยฐC (160ยฐF).
  • Transfer the cooked egg cups to a serving plate.
  • Cook the remaining three egg cups for approximately 9 minutes.
  • Allow the egg cups to cool for 5 minutes.
  • Carefully remove them from the silicone cups.
  • Serve warm.

Notes & Wine Advice

<h3>Serving Suggestions</h3>
<p>Serve the egg cups warm with celery sticks, sliced cucumber or a green salad. Add extra buffalo sauce separately for anyone who prefers more heat.</p>
<h3>Recipe Notes</h3>
<p>The recipe produces six small egg cups divided among four servings. One serving therefore contains approximately one and a half egg cups.</p>
<p>Only three silicone cups cook at a time, so two separate 9-minute batches are required. Including the 3-minute preheating period, the total air-fryer time is approximately 21 minutes.</p>
<p>Use chicken that has already been fully cooked. The egg cups should reach an internal temperature of 71ยฐC (160ยฐF) before being removed from the air fryer.</p>
<h3>Dietary Information</h3>
<p>This recipe contains egg and cowโ€™s milk. Buffalo wing sauce may contain wheat, gluten, soy or other allergens depending on the brand.</p>
<p>Classify the recipe as gluten-free and wheat-free only when using certified suitable buffalo sauce and spices. It can suit high-protein, ketogenic, low-carbohydrate, low-sugar and nut-free diets when all packaged ingredients meet those requirements.</p>
<h3>Nutrition Information</h3>
<p>The nutritional estimate includes the eggs, heavy cream, Cheddar cheese, chicken, buffalo sauce and a small amount of olive oil divided into four servings.</p>
<p>Sodium varies considerably between buffalo sauce and cheese brands. Choosing a lower-sodium sauce will reduce the sodium content of each serving.</p>
<h3>Variations</h3>
<p>Replace Cheddar with Monterey Jack, mozzarella or blue cheese. Add finely chopped celery, spring onion or parsley. For milder cups, reduce the buffalo sauce and replace it with an equal amount of tomato sauce.</p>
<h3>Storage</h3>
<p>Refrigerate cooked egg cups within 2 hours and consume them within 3 days. Reheat until their centres reach 74ยฐC (165ยฐF). Freeze them for up to 1 month if required, although the eggs may become slightly softer after thawing.</p>
<h3>Wine Advice</h3>
<p>Pair these spicy egg cups with a lightly off-dry <a href=”https://www.reneswijnbeleving.nl/webshop/witte-wijn?ep%5B553407974%5D%5Bpage%5D=0&amp;ep%5B553407974%5D%5Bsort%5D=&amp;ep%5B553407974%5D%5Bfilter%5D%5BDruif%5D%5B0%5D=Riesling”>Riesling</a> or a crisp <a href=”https://www.reneswijnbeleving.nl/webshop/witte-wijn?ep%5B553407974%5D%5Bpage%5D=0&amp;ep%5B553407974%5D%5Bsort%5D=&amp;ep%5B553407974%5D%5Bfilter%5D%5BDruif%5D%5B0%5D=Sauvignon%20Blanc”>Sauvignon Blanc</a>. Riesling softens the chilli heat, while Sauvignon Blanc balances the richness of the eggs and Cheddar.</p>

Nutrition values

Calories: 130 kcal | koolhydraten: 1 g | Eiwitten: 9 g | Vet: 10 g | Verzadigd vet: 4 g | Natrium: 350 mg | Suiker: 1 g
————————————————————————————————–

About Buffalo Egg Cups

Buffalo egg cups combine eggs, cooked chicken, Cheddar cheese and spicy buffalo sauce in convenient individual portions. They offer a useful way to transform a small amount of leftover chicken into a warm breakfast, brunch dish or protein-rich snack.

The mixture cooks in reusable silicone muffin cups inside the air fryer. Because the cups contain no pastry, bread or potatoes, they remain very low in carbohydrates. Their compact size also makes them convenient for meal preparation and grab-and-go breakfasts.

Using leftover cooked chicken

Fully cooked chicken breast works best because it is lean and easy to shred. Cut or shred it finely so it spreads evenly through the egg mixture. Large pieces may sink to the bottom or make the cooked cups difficult to remove from their moulds.

Only one-quarter cup of chicken is required, making this recipe practical when there is not enough leftover meat for a complete meal. More ideas for using cooked poultry are available in the chicken recipe collection.

Refrigerated leftover chicken should still be within its safe storage period. Do not use chicken that has remained at room temperature for more than two hours or shows any signs of spoilage.

Preparing a balanced filling

Whisk the eggs, cream and buffalo sauce thoroughly before adding the chicken and cheese. This distributes the sauce evenly and prevents individual cups from becoming much hotter than others.

Cheddar adds richness and helps the cups hold together. Finely shredded cheese melts more evenly than thick pieces. A mature Cheddar produces a stronger flavour, while mild Cheddar allows the buffalo sauce to remain more noticeable.

Lightly grease the silicone cups even when they are described as non-stick. This helps the egg cups release cleanly. Leave some room at the top because the egg mixture expands as it cooks.

Cooking the spicy chicken egg cups

The original method fits three cups in the air fryer at one time. Since the mixture makes six cups, you need two separate 9-minute batches. Together with the 3-minute preheating period, the realistic air-fryer cooking time is approximately 21 minutes.

Air-fryer temperatures can vary, so check the first batch after about 8 minutes. The centres should appear set and should not release liquid when pressed gently. Check that the egg mixture reaches an internal temperature of 71ยฐC before serving.

The U.S. Food and Drug Administration provides further guidance about selecting, refrigerating and safely cooking eggs. Keep the prepared egg mixture refrigerated if it cannot be cooked immediately.

Serving ideas and flavour variations

Serve the cups with celery sticks, cucumber, cherry tomatoes or a green salad. Celery provides a fresh contrast that suits the familiar buffalo-style flavour. Extra sauce can be offered separately rather than adding too much to the egg mixture.

Monterey Jack or mozzarella can replace the Cheddar. Blue cheese creates a stronger buffalo-inspired flavour, although it increases the sodium content. Chopped spring onion, parsley or finely diced celery can also be added.

For milder egg cups, replace half the buffalo sauce with tomato sauce. For additional heat, add cayenne pepper or a small amount of finely chopped jalapeรฑo.

Dietary considerations

The recipe contains egg and cowโ€™s milk. Buffalo sauce can contain wheat, gluten or soy depending on the brand. Always inspect the ingredient label before classifying the finished recipe as gluten-free, wheat-free or soy-free.

When made with suitable packaged products, these cups can fit gluten-free, wheat-free, nut-free, ketogenic, high-protein, low-carbohydrate and low-sugar diets. Use certified halal chicken and suitable cheese if preparing the recipe for a halal diet.

Storage and reheating

Allow the cooked cups to cool briefly before refrigerating them. Place them in a covered container within two hours and consume them within three days. Reheat only the required portion until its centre reaches 74ยฐC.

The cups can be frozen for up to one month. Thaw them overnight in the refrigerator before reheating. Their texture may become slightly softer, but their flavour will remain suitable for breakfast or a quick snack.

With their spicy filling and convenient size, buffalo egg cups provide an easy way to use leftover chicken without turning it into another sandwich.


Home โ€บ Breakfast โ€บ Chicken โ€บ Buffalo Egg Cups

Gruyรจre Egg Cups

Gruyรจre egg cups with cream and nutmeg cooked in silicone cups in the air fryer

Gruyรจre Egg Cups

Light and fluffy air-fried egg cups made with cream, nutmeg and melted Gruyรจre cheese. A convenient low-carbohydrate option for breakfast, brunch or meal preparation.
Couverts4 servings
Preparation 10 minutes
Preparation time:21 minutes
Cooling 5 minutes
estimated costs pp $1.40
Deel op Facebook Print Recipe

Equipment

  • Measuring spoons
  • Mixing bowl
  • Silicone muffin cups
  • Whisk

Instructions

  • Preheat the air fryer to 180ยฐC (356ยฐF) for 3 minutes.
  • Lightly grease six silicone muffin cups with olive oil.
  • Crack the eggs into a mixing bowl.
  • Add the heavy cream, salt, black pepper and nutmeg.
  • Whisk until the eggs and cream are completely combined.
  • Stir in the shredded Gruyรจre cheese.
  • Divide the egg mixture evenly among the six prepared muffin cups.
  • Place three muffin cups in the air-fryer basket.
  • Air-fry at 180ยฐC (356ยฐF) for approximately 9 minutes.
  • Check that the centres have set and reached an internal temperature of 71ยฐC (160ยฐF).
  • Transfer the cooked egg cups to a serving plate.
  • Cook the remaining three egg cups for approximately 9 minutes.
  • Allow the egg cups to cool for 5 minutes.
  • Carefully remove them from the silicone cups.
  • Serve warm.

Notes & Wine Advice

Serving Suggestions

Serve the egg cups warm with a green salad, sliced tomatoes or fresh fruit. For a larger breakfast, add toasted bread or roasted potatoes.

Recipe Notes

The recipe produces six small egg cups divided among four servings. One serving therefore contains approximately one and a half egg cups.
The cups must cook in two batches when only three fit inside the air fryer. This makes the total active air-fryer time approximately 18 minutes, plus 3 minutes for preheating.
Cooking times vary between air-fryer models and according to the size of the silicone cups. The centres should be fully set and reach 71ยฐC (160ยฐF).

Dietary Information

This recipe contains egg and cowโ€™s milk. Gruyรจre may use animal-derived rennet, so choose cheese labelled suitable for vegetarians when necessary.
The recipe is naturally low in carbohydrates and sugar. It can suit gluten-free, wheat-free, nut-free and soy-free diets when all packaged ingredients meet those requirements. Check the cream, cheese and cooking oil for allergen and cross-contamination warnings.

Nutrition Information

The nutritional estimate includes the complete egg mixture, Gruyรจre, cream and a small amount of olive oil divided into four servings. Exact values vary according to the cream and cheese used.
The original claim that the recipe contains no carbohydrates is not completely accurate. Eggs, cream and cheese contain small amounts, although the finished recipe remains very low in carbohydrates.

Variations

Replace Gruyรจre with Swiss cheese for a less expensive alternative with a similar flavour. Chopped chives, parsley, spinach or finely diced bell pepper can also be added. Avoid adding too many moist vegetables because they can prevent the centres from setting properly.

Storage

Refrigerate cooled egg cups in a covered container within 2 hours and consume them within 3 days. Reheat until the centres reach 74ยฐC (165ยฐF). They can be frozen for up to 1 month, although the texture may become slightly softer after thawing.

Wine Advice

Pair these creamy egg cups with a lightly oaked Chardonnay or a fresh Sauvignon Blanc. Chardonnay complements the Gruyรจre and cream, while Sauvignon Blanc provides a fresher contrast.

Nutrition values

Calories: 130 kcal | koolhydraten: 1 g | Eiwitten: 8 g | Vet: 10 g | Verzadigd vet: 5 g | Natrium: 230 mg | Suiker: 1 g
————————————————————————————————–

About Gruyรจre Egg Cups

Gruyรจre egg cups combine eggs, cream, nutmeg and melted cheese in convenient individual portions. They take inspiration from the flavours of Quiche au Fromage but contain no pastry crust. This keeps the preparation simple and makes the finished cups naturally low in carbohydrates.

The egg cups cook inside reusable silicone muffin cups in the air fryer. They are suitable for breakfast, brunch, a portable snack or advance meal preparation. The recipe produces six small cups, which provide four servings of approximately one and a half cups each.

French-inspired flavour without pastry

Quiche au Fromage traditionally combines a pastry shell with a savoury egg custard and cheese. This version uses the custard-style filling but leaves out the pastry. Gruyรจre provides a nutty, savoury flavour, while cream keeps the eggs soft. A small amount of nutmeg adds warmth without overpowering the cheese.

The recipe belongs to both European cuisine and French cuisine. Swiss cheese can replace Gruyรจre when you want a more affordable or widely available option. Both cheeses melt well and have a comparable savoury character, although Gruyรจre generally tastes nuttier and more complex.

Preparing an even egg mixture

Whisk the eggs and cream thoroughly before adding the cheese. A well-combined mixture produces a more even texture and prevents visible streaks of egg white. Shredding the cheese finely also helps distribute it throughout the cups.

Grease the silicone moulds lightly, even if the manufacturer describes them as non-stick. This makes the cooked cups easier to remove without tearing their edges. Do not fill the moulds completely because the egg mixture expands during cooking.

Cooking the French cheese egg cups

The original instructions cook only three silicone cups at a time. Because the recipe makes six cups, two separate 9-minute batches are required. Including the 3-minute preheating period, the realistic air-fryer time is approximately 21 minutes.

Different air fryers circulate heat differently. Check the first batch after about 8 minutes. The centres should appear set and should not release liquid when gently pressed. The eggs must reach an internal temperature of 71ยฐC before serving.

Advice about buying, storing and safely preparing eggs is available from the U.S. Food and Drug Administration. Refrigerate raw eggs until needed and avoid leaving the uncooked mixture at room temperature.

Serving ideas and variations

Serve the cups with sliced tomatoes, fresh fruit or a green salad. Toasted bread or roasted potatoes can turn them into a more substantial breakfast. The compact portions are also practical for a picnic, although they must remain properly chilled during transport.

Chopped chives, parsley or spinach can be added to the mixture. Small amounts of cooked mushroom, bell pepper or onion also work well. Avoid adding large quantities of watery vegetables because they can prevent the centres from setting correctly.

For a stronger flavour, add a little Dijon mustard. Smoked paprika introduces a warmer note, while cayenne provides gentle heat. Keep the additional ingredients modest so the cups retain their light texture.

Dietary information and storage

The recipe contains egg and cowโ€™s milk. Gruyรจre may contain animal-derived rennet, so strict vegetarians should select cheese specifically labelled as vegetarian. The cups can suit gluten-free, wheat-free, nut-free, soy-free, keto and low-carbohydrate diets when all individual products meet those requirements.

The original description claimed that the cups contain no carbohydrates. That statement is not completely accurate because eggs, cream and cheese contain small amounts. However, one serving contains only about one gram of carbohydrates, so the recipe remains very low in carbohydrates.

Refrigerate cooled egg cups within two hours and consume them within three days. Reheat them until their centres reach 74ยฐC. They can be frozen for up to one month, although freezing may make their texture slightly softer.

Easy preparation, individual portions and classic French flavours make Gruyรจre egg cups a practical option for busy mornings and relaxed weekend brunches.


Home โ€บ Breakfast โ€บ Eggs โ€บ Gruyรจre Egg Cups

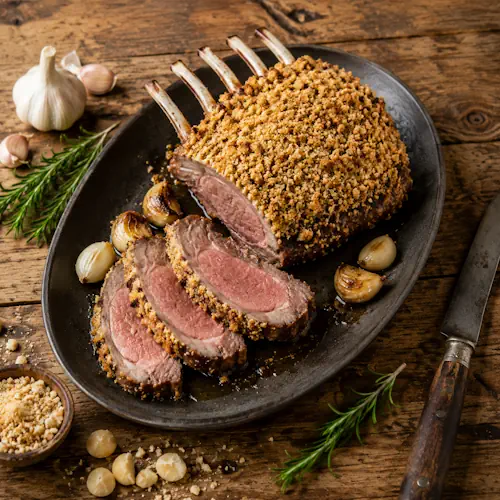
Rosemary Macadamia Lamb Rack

Rosemary Macadamia Lamb Rack

Tender rack of lamb coated with macadamia nuts, rosemary and garlic, then gently cooked and crisped in the air fryer.
Couverts4 servings
Preparation 10 minutes
Preparation time:30 minutes
Resting 10 minutes
estimated costs pp $9.50
Deel op Facebook Print Recipe

Equipment

  • Air Fryer, 5-quart or larger
  • Food processor or sharp knife
  • Meat thermometer
  • Mixing bowls
  • Tongs

Instructions

  • Remove any excess surface moisture from the lamb with paper towels.
  • Preheat the air fryer to 100ยฐC (212ยฐF).
  • Combine the minced garlic and olive oil in a small bowl.
  • Brush the lamb with the garlic oil and season it evenly with salt and black pepper.
  • Finely chop or pulse the macadamia nuts without processing them into a paste.
  • Combine the chopped nuts, breadcrumbs and rosemary in a shallow bowl.
  • Place the beaten egg in a separate shallow bowl.
  • Brush or dip the meaty side of the lamb rack in the beaten egg, allowing the excess to drain away.
  • Press the macadamia mixture firmly onto the egg-coated surface to form an even crust.
  • Place the lamb rack bone-side down in the air-fryer basket.
  • Air-fry at 100ยฐC (212ยฐF) for 25 minutes.
  • Increase the temperature to 200ยฐC (400ยฐF).
  • Cook for another 5 minutes, or until the crust is golden and the thickest part of the lamb reaches at least 63ยฐC (145ยฐF).
  • If necessary, continue cooking in 2-minute intervals until the correct internal temperature is reached.
  • Transfer the lamb to a cutting board and cover it loosely with aluminum foil.
  • Rest for 10 minutes before slicing between the bones.
  • Divide into four portions and serve immediately.

Notes & Wine Advice

Serving Suggestions

Serve the lamb with roasted potatoes, green beans, asparagus or a fresh herb salad. Allow approximately two lamb cutlets per person.

Recipe Notes

The original ingredient list contained a damaged line that referred to โ€œchopped fresh egg.โ€ The correct ingredient is one tablespoon of finely chopped fresh rosemary.
Make sure the lamb rack fits inside the air fryer without the bones touching the heating element. Cooking times can vary according to the thickness of the meat and the air-fryer model.
Check the thickest part of the lamb with a meat thermometer. It should reach at least 63ยฐC (145ยฐF), followed by a 10-minute resting period. Watch the macadamia crust during the final cooking stage because nuts can brown quickly.

Dietary Information

This recipe contains egg, macadamia tree nuts and wheat-based breadcrumbs. It is suitable for dairy-free, lactose-free, high-protein, low-carbohydrate, low-sugar and soy-free diets when the packaged ingredients meet those requirements.
Use certified gluten-free breadcrumbs if you want to prepare a gluten-free version. The standard recipe should not be classified as gluten-free when ordinary breadcrumbs are used.

Nutrition Information

The nutritional values apply to one-quarter of the prepared lamb rack, including the macadamia crust. Sodium depends on the quantity of salt and the brand of breadcrumbs used. Side dishes and sauces are not included.

Variations

Replace the macadamia nuts with pistachios, almonds or hazelnuts. Fresh thyme can replace the rosemary. Add one teaspoon of finely grated lemon zest for a brighter flavour.

Storage

Refrigerate leftover lamb in a covered container within 2 hours and consume it within 3 days. Reheat until the centre reaches 74ยฐC (165ยฐF). Freeze for up to 2 months if necessary, although the crust may lose some crispness.

Wine Advice

Serve this lamb with a full-bodied Cabernet Sauvignon or a spicy Shiraz. Their dark fruit, pepper and tannins complement the rich lamb and toasted macadamia crust.

Nutrition values

Serving: 2 lamb cutlets with crust | Calories: 435 kcal | koolhydraten: 2 g | Eiwitten: 26 g | Vet: 36 g | Verzadigd vet: 13 g | Natrium: 390 mg | Suiker: 1 g
————————————————————————————————–

About Macadamia-Crusted Lamb

Macadamia-crusted lamb combines tender rack of lamb with a crisp coating of macadamia nuts, fresh rosemary and garlic. The air fryer cooks the meat gently before a short burst of high heat gives the crust its golden colour. This method produces an elegant main course without requiring a large roasting oven.

Macadamia nuts have a rich, buttery flavour that complements lamb particularly well. Their natural oils help the crust brown, while breadcrumbs and beaten egg keep it attached to the meat. Fresh rosemary adds an aromatic note that balances the richness of both the lamb and nuts.

Preparing the lamb rack

Patting the lamb dry helps the garlic oil and egg adhere properly. Press the macadamia mixture firmly against the meaty surface, but keep the bones uncovered. A Frenched rack gives the finished dish a neat appearance and makes it easier to divide the meat into individual cutlets after resting.

The original ingredient list contained a damaged reference to โ€œchopped fresh egg.โ€ The correct ingredient is chopped fresh rosemary. The recipe already contains one beaten egg, which acts as the binding layer underneath the nut crust.

Gentle air-fryer cooking

The first cooking stage uses a temperature of 100ยฐC. This allows the lamb to cook gradually without burning the macadamia coating. Increasing the temperature to 200ยฐC for the final five minutes browns and crisps the surface.

Cooking times remain approximate because lamb racks differ in thickness and weight. Check the centre with a meat thermometer rather than relying entirely on the timer. The lamb should reach at least 63ยฐC before resting. Follow the safe handling guidance provided by the U.S. Food and Drug Administration when preparing raw meat.

Serving the finished lamb

Rest the cooked rack for 10 minutes before slicing. This allows the juices to settle and helps prevent moisture from running onto the plate. Slice carefully between the bones and serve approximately two cutlets per person.

This recipe works well with roasted potatoes, steamed green beans, asparagus or a simple salad. You can find additional serving ideas in the lamb recipe collection. Avoid very sweet or heavily spiced side dishes because they can overpower the rosemary and macadamia crust.

Dietary considerations and substitutions

The standard recipe contains macadamia tree nuts, egg and wheat-based breadcrumbs. It is therefore unsuitable for people with allergies to these ingredients. Certified gluten-free breadcrumbs can be used when preparing a gluten-free variation, but always inspect every packaged ingredient for allergen warnings.

The recipe contains no dairy ingredients and can suit a dairy-free or lactose-free diet when the breadcrumbs are also free from milk. It is naturally high in protein, low in carbohydrates and low in sugar. Anyone following a medically prescribed diet should calculate the values using the exact products and quantities used.

Pistachios, almonds or hazelnuts can replace the macadamias, although each option changes the flavour. Fresh thyme can replace rosemary. A small amount of grated lemon zest adds freshness without making the crust wet.

Storing leftovers safely

Place leftover lamb in a covered container and refrigerate it within two hours. Consume refrigerated leftovers within three days. Reheat only the portion required and make sure the centre reaches 74ยฐC. Gentle reheating helps prevent the lamb from becoming dry, although the crust will not remain as crisp as it was when freshly cooked.

With its golden nut coating and tender centre, macadamia-crusted lamb is suitable for weekend dinners, holidays and special occasions throughout the year.


Home โ€บ Main Course โ€บ Lamb โ€บ Macadamia-Crusted Lamb

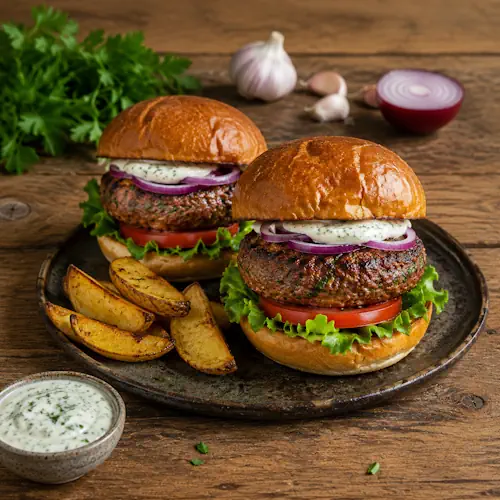
Minted Air-Fryer Lamb Burgers

Minted lamb burgers with harissa sauce, lettuce, tomato, cucumber and red onion on toasted buns

Minted Air-Fryer Lamb Burgers

Juicy air-fried lamb burgers seasoned with fresh mint, parsley, garlic and warm spices, served on toasted buns with crisp vegetables and a tangy harissa sauce.
Couverts4 servings
Preparation 20 minutes
Preparation time:14 minutes
Resting Time 5 minutes
estimated costs pp $4.25
Deel op Facebook Print Recipe

Equipment

Instructions

Prepare the Harissa Sauce

  • Combine the tomato relish, harissa paste and lemon juice in a small bowl.
  • Stir until evenly blended.
  • Cover and refrigerate until needed.

Prepare the Lamb Patties

  • Place the ground lamb in a large mixing bowl.
  • Add the shallot, garlic, mint, parsley, cumin, coriander, smoked paprika, salt and black pepper.
  • Mix gently with clean hands until the seasonings are evenly distributed.
  • Do not overmix because this can make the burgers dense.
  • Divide the mixture into 4 equal portions.
  • Shape each portion into a patty approximately 2 cm thick.
  • Press a shallow indentation into the centre of each patty to help it cook evenly.
  • Brush both sides lightly with olive oil.

Preheat the Air Fryer

  • Preheat the air fryer to 190ยฐC or 375ยฐF for 3 minutes.

Air-Fry the Lamb Burgers

  • Arrange the patties in the air-fryer basket in a single layer.
  • Leave space between them for the hot air to circulate.
  • Air-fry for 10 to 12 minutes.
  • Turn the patties after 6 minutes.
  • Check that the centres have reached an internal temperature of at least 71ยฐC or 160ยฐF.
  • Transfer the cooked burgers to a clean plate.
  • Let them rest for 5 minutes.

Toast the Buns

  • Place the cut sides of the burger buns in the air fryer.
  • Toast at 180ยฐC or 355ยฐF for 1 to 2 minutes.
  • Work in batches if necessary.

Assemble the Burgers

  • Spread the harissa sauce over the bottom halves of the toasted buns.
  • Add the lettuce, lamb patties, tomato, red onion and cucumber.
  • Cover with the top halves of the buns.
  • Serve immediately.

Notes & Wine Advice

Serving Suggestions

Serve the burgers with air-fried potato wedges, sweet potato fries, coleslaw or a tomato and cucumber salad. Offer additional harissa sauce separately for diners who enjoy more heat.

Recipe Notes

The supplied source was corrupted. It combined a lamb-burger title with ingredients for a large salmon dry brine and several incomplete salmon instructions. This version has therefore been rebuilt as a complete lamb-burger recipe for four servings.
Ground lamb containing approximately 15โ€“20% fat produces juicy burgers and holds together without egg or breadcrumbs. Mix the meat gently and avoid pressing the patties while they cook, as pressing releases moisture and fat.

Dietary Information

The lamb patties are naturally dairy-free, egg-free, gluten-free, lactose-free, nut-free and wheat-free. The complete burger is classified only as egg-free, high-protein and nut-free because standard burger buns may contain wheat, milk, soy or sesame. Always check the bun and harissa labels when accommodating allergies.

Nutrition Information

The nutrition values include one 150 g raw lamb patty, one standard burger bun, vegetables and one-quarter of the harissa sauce. The original source supplied no usable nutrition information. Actual values vary according to the fat content of the lamb and the size and composition of the buns.

Variations

Replace the mint with fresh cilantro for a different herbal flavour. Add one teaspoon of grated lemon zest for a brighter patty, or reduce the harissa when serving children. For cheeseburgers, add feta, halloumi or cheddar during the final minute of cooking, but note that the finished recipe will then contain milk.

Storage

Refrigerate cooked patties within 2 hours and store them in a covered container for up to 3 days. Keep the buns, vegetables and sauce separate. Reheat the patties in the air fryer at 180ยฐC or 355ยฐF until they reach 74ยฐC or 165ยฐF. Uncooked patties can be frozen for up to 2 months.

Wine Advice

A medium-bodied Cabernet Sauvignon complements the richness of the lamb and the earthy cumin. A fruit-forward Pinot Noir provides a lighter option when using only a small amount of harissa. Serve either wine at approximately 16โ€“18ยฐC.

Nutrition values

Serving: 1 assembled lamb burger | Calories: 670 kcal | koolhydraten: 46 g | Eiwitten: 35 g | Vet: 38 g | Verzadigd vet: 14 g | Natrium: 820 mg | Suiker: 8 g
————————————————————————————————–

These minted lamb burgers combine juicy ground lamb with fresh herbs, garlic, cumin, coriander and smoked paprika. The air fryer cooks the patties quickly and evenly, while a tangy harissa relish adds sweetness, acidity and gentle heat. Fresh lettuce, tomato, cucumber and red onion provide a crisp contrast to the rich meat.

Why These Minted Lamb Burgers Work

Lamb has enough natural fat to produce a juicy burger without adding egg or breadcrumbs. This also keeps the patties tender and prevents the texture from becoming heavy. Fresh mint cuts through the richness, while parsley, garlic and warm spices add depth without overpowering the meat.

The recipe combines the familiar structure of an American burger with seasonings associated with Middle Eastern cuisine. That makes it a natural addition to the collection of fusion recipes. The result feels familiar enough for a casual family meal but offers more character than a standard beef burger.

Preparing Tender Lamb Patties

Choose ground lamb with approximately 15โ€“20% fat. Very lean meat can dry out quickly, while fattier lamb may shrink excessively during cooking. Place the meat and seasonings in a chilled bowl and mix them gently with your fingertips. Stop as soon as the ingredients look evenly distributed.

Divide the mixture into four equal portions so every burger cooks at the same rate. Shape each portion into a patty approximately 2 centimetres thick. Press a shallow indentation into the centre with your thumb. This simple step helps prevent the middle from swelling as the meat cooks.

For another compact lamb meal, try these air-fryer lamb loin chops. The spicy Korean lamb chops provide a stickier and hotter alternative, while this lamb roast dinner with vegetables works well when you want a traditional Sunday-style meal.

Cooking Burgers in the Air Fryer

Preheating the appliance helps the outside of each burger start browning immediately. Arrange the patties in one layer and leave space between them. Crowding blocks airflow and can produce unevenly cooked meat. Turn the burgers once after approximately six minutes, but do not press them with the tongs.

Cooking time can vary according to the thickness of the patties and the power of the appliance. Check the centre with a clean meat thermometer instead of relying only on colour. Ground lamb should reach at least 71ยฐC or 160ยฐF. The FDAโ€™s safe food-handling guidance provides additional advice about cooking meat and preventing cross-contamination.

Let the cooked patties rest for five minutes before assembling the burgers. This short pause allows the juices to settle. Toast the buns while the meat rests so they remain warm and gain enough structure to hold the sauce and toppings.

Harissa Sauce and Serving Ideas

The simple sauce combines tomato relish, harissa and lemon juice. Tomato relish contributes sweetness, harissa supplies chilli and spices, and lemon juice keeps the mixture bright. Harissa brands vary considerably in strength, so taste the sauce before adding it to every bun.

Build each burger with lettuce beneath the patty to protect the bottom bun from excess moisture. Add tomato, cucumber and red onion above the meat. Serve the burgers with air-fried potato wedges, sweet potato fries, coleslaw or a tomato and cucumber salad. These air-fried lamb patties can also be served without buns alongside grilled vegetables or couscous.

Dietary Details and Variations

The complete recipe qualifies as egg-free, high-protein and nut-free when the selected buns and sauces carry suitable labels. The patties themselves contain no dairy, gluten, wheat or soy, but standard burger buns may contain these ingredients. Check every packaged product when preparing food for someone with an allergy.

Add crumbled feta for a salty finish or halloumi for a firmer bite, although either option introduces milk. Replace the mint with cilantro for a different herbal note. You can also omit the bun and wrap the burger in large lettuce leaves for a lower-carbohydrate serving option.

Wine Advice

A medium-bodied Cabernet Sauvignon supports the richness of the lamb and complements the earthy spices. A lighter Pinot Noir suits a milder version with less harissa.

Easy preparation, reliable cooking and bold seasoning make minted lamb burgers a practical choice for family dinners, game-day gatherings or relaxed weekend meals.


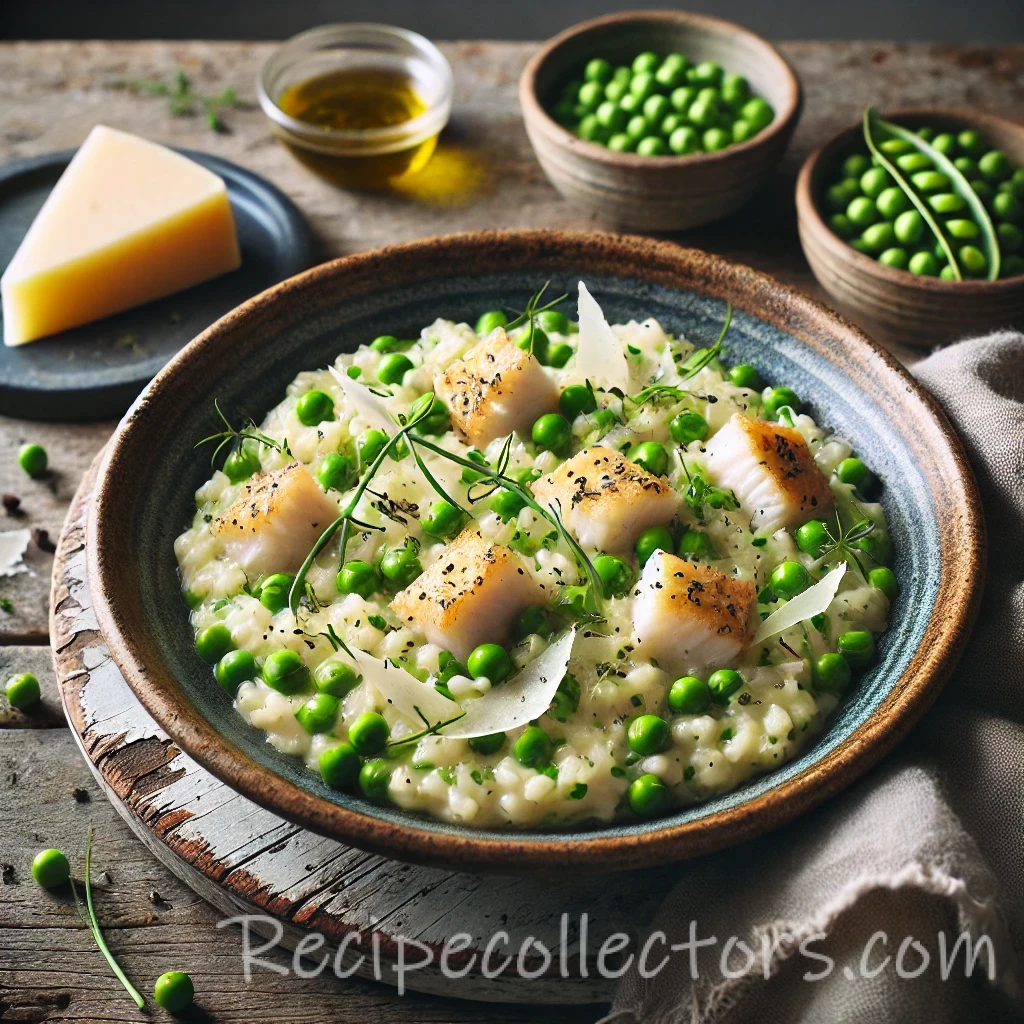
Smoky Haddock Pea Risotto

Smoky haddock pea risotto served in a bowl with sweet peas, Parmesan, chives, and flakes of smoked fish

Smoky Haddock Pea Risotto

Creamy Italian-style risotto with flaky smoked haddock, sweet peas, Parmesan, and dry white wine. A comforting British-Italian fusion dinner for four.
Couverts4 servings
Preparation 15 minutes
Preparation time:30 minutes
estimated costs pp $5.50
Deel op Facebook Print Recipe

Equipment

  • ladle,
  • Large sautรฉ pan
  • Measuring cups
  • Measuring spoons
  • medium saucepan
  • Tongs
  • Wooden spoon

Instructions

  • Pour the stock into a medium saucepan.
  • Bring it to a gentle simmer.
  • Add the smoked haddock.
  • Poach the fish gently for 5 to 7 minutes.
  • Remove the haddock with tongs.
  • Set it aside until cool enough to handle.
  • Keep the stock warm over low heat.
  • Flake the haddock into large pieces.
  • Check carefully for any remaining bones.
  • Heat the olive oil in a large sautรฉ pan over medium heat.
  • Add the chopped onion.
  • Cook for approximately 5 minutes or until softened.
  • Add the risotto rice.
  • Stir for 1 to 2 minutes until every grain looks glossy.
  • Pour in the white wine.
  • Stir until the rice absorbs most of the wine.
  • Add one ladleful of warm stock.
  • Stir regularly until the rice absorbs most of the liquid.
  • Continue adding the stock one ladleful at a time.
  • Wait until each addition has nearly absorbed before adding more.
  • Cook for approximately 18 minutes.
  • Stir in the frozen peas.
  • Continue cooking for 3 to 5 minutes.
  • Check that the rice is creamy but still slightly firm in the center.
  • Remove the pan from the heat.
  • Fold in the flaked smoked haddock.
  • Add the butter and grated Parmesan.
  • Stir gently until the risotto becomes creamy.
  • Season with black pepper.
  • Taste before adding salt because the smoked haddock, stock, and Parmesan already contain sodium.
  • Divide the risotto among four bowls.
  • Garnish with chopped chives or parsley.
  • Serve immediately.

Notes & Wine Advice

Serving Suggestions

Serve the risotto immediately in warmed bowls. Garnish with chopped chives, parsley, dill, lemon zest, or a small squeeze of lemon juice. A simple green salad or steamed asparagus makes a suitable side dish.

Recipe Notes

Keep the stock hot while preparing the risotto. Cold stock interrupts the cooking process and can produce unevenly cooked rice. Add the liquid gradually and stir regularly, but constant vigorous stirring is unnecessary. The finished risotto should spread slowly across the plate rather than hold a firm mound.

Dietary Information

This recipe contains fish and milk. Use certified gluten-free stock, wine, Parmesan, and seasonings when preparing it as gluten-free. Check the Parmesan for animal-derived rennet when dietary requirements make that relevant. The base recipe contains no eggs, wheat, soy, or nuts.

Nutrition Information

The estimate applies to one-quarter of the complete recipe. The original 450-calorie value was too low for 300 g rice, butter, olive oil, Parmesan, and smoked haddock. Sodium remains high because smoked fish and Parmesan naturally contain substantial salt, even when low-sodium stock is used.

Variations

Replace smoked haddock with smoked cod, hot-smoked salmon, or unsmoked white fish. Baby spinach can replace part of the peas. For a brighter flavor, add lemon zest with the herbs just before serving.

Storage

Risotto tastes best immediately. Refrigerate leftovers within two hours and use them within two days. Reheat gently with a splash of stock or water until the fish and rice reach 165ยฐF (74ยฐC). Do not leave cooked rice at room temperature for extended periods.

Wine Advice

Pair the smoky fish and creamy rice with a crisp Pinot Grigio. Its fresh acidity balances the butter and Parmesan. A lightly oaked Chardonnay provides a rounder pairing that complements the creamy texture and smoked haddock.

Nutrition values

Calories: 560 kcal | koolhydraten: 69 g | Eiwitten: 31 g | Vet: 14 g | Verzadigd vet: 7 g | Natrium: 1250 mg | Suiker: 5 g
————————————————————————————————–

Smoky haddock pea risotto combines creamy Italian-style rice with flaky smoked fish, sweet peas, Parmesan, white wine, and fresh herbs. The haddock seasons the cooking stock as it poaches, allowing its savory flavor to reach every spoonful. Peas add freshness and color, while butter and Parmesan create the characteristic flowing risotto texture.

A British and Italian Fusion Dish

Risotto belongs firmly to Italian cooking, while smoked haddock has a long association with food from England and other parts of Britain. Combining the two creates a natural Fusion dish rather than a strictly traditional Italian recipe.

The salty, smoky fish replaces the stronger cured-meat flavors that sometimes appear in risotto. Sweet peas provide contrast, while fresh chives or parsley brighten the final dish. The result feels comforting but still looks colorful enough for a dinner party.

Smoky Haddock Pea Risotto with Creamy Rice

Arborio and Carnaroli rice contain enough starch to produce a creamy consistency without adding cream. Carnaroli usually retains its shape slightly better, while Arborio remains widely available and cooks reliably. Do not rinse the rice because rinsing removes the surface starch needed for the sauce.

Cook the onion gently until soft but not browned. Toasting the rice for 1 to 2 minutes coats each grain with oil and gives it a slightly nutty flavor. Add the white wine next and allow the rice to absorb most of it before introducing the stock.

Keep the stock hot in a separate saucepan. Adding cold liquid repeatedly lowers the temperature and interrupts the cooking process. Add one ladleful at a time, then wait until the rice absorbs most of it before adding more.

Stir regularly to release starch and prevent sticking, but avoid beating the rice continuously. Excessive stirring can damage the grains and create a heavy, glue-like texture. Properly cooked risotto should remain creamy and loose enough to spread gently across a warm plate.

Poaching and Adding the Smoked Haddock

Poach the haddock directly in the stock for 5 to 7 minutes. This gently cooks the fish while transferring part of its smoky flavor to the liquid. Remove the fillets with tongs and check carefully for small bones before flaking them.

Fold the fish into the risotto only after removing the pan from the heat. Smoked haddock flakes easily, so vigorous stirring can break it into tiny pieces. Leaving larger flakes creates a better appearance and gives each serving a clear fish texture.

The fish must reach a safe internal temperature. The FDA recommends cooking fish to 145ยฐF (63ยฐC). Its safe food-handling guidance also explains how to store and reheat seafood and cooked rice safely.

Finishing the Risotto Correctly

Add the peas during the final few minutes so they become hot while retaining their sweet flavor and green color. After removing the pan from the heat, stir in the butter and Parmesan. This finishing technique gives the risotto extra gloss and richness.

Taste before adding salt. Smoked haddock, Parmesan, and stock already provide substantial sodium. Fresh black pepper, lemon zest, parsley, dill, or chives can strengthen the flavor without introducing more salt.

Serving Ideas and Variations

Serve this creamy smoked fish risotto immediately in warmed bowls. A green salad, steamed asparagus, roasted broccoli, or sautรฉed spinach adds freshness without competing with the fish.

For more seafood ideas, try Spicy Coconut Cod in Thai Broth, Jamaican-Style Fish Tacos, or Tropical Seafood Pizza. You can also replace the haddock with smoked cod, hot-smoked salmon, or unsmoked white fish.

Dietary Information and Storage

The recipe suits a Pescatarian, Egg-Free, and Nut FreeGluten-Free

Refrigerate leftovers within two hours and consume them within two days. Cooked rice requires careful handling. Reheat it only once with a splash of stock or water until the complete portion reaches 165ยฐF (74ยฐC).

Wine Pairing

A crisp Pinot Grigio balances the butter and cheese with lively acidity. A lightly oaked Chardonnay offers a rounder match for the creamy rice and smoky fish.

Comforting, colorful, and rich enough for a complete dinner, smoky haddock pea risotto brings British seafood and Italian technique together in one satisfying bowl.