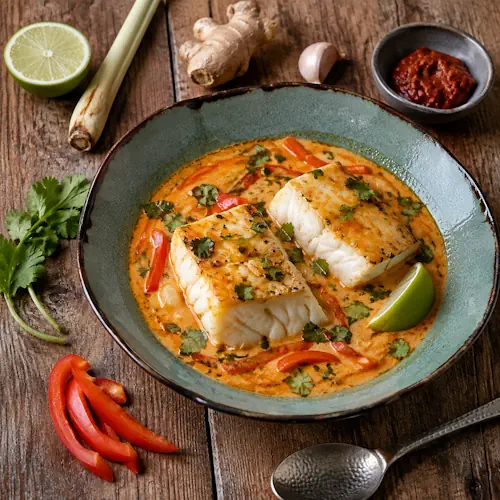
Fiery Thai Coconut Cod

Fiery Thai coconut cod served in spicy curry broth with bell pepper, cilantro, lime, and jasmine rice

Fiery Thai Coconut Cod

Golden pan-roasted cod served in a fragrant coconut broth with red curry, ginger, lemongrass, lime, and sweet bell pepper. A spicy Thai-inspired main course ready in about 35 minutes.
Couverts4 servings
Preparation 15 minutes
Preparation time:20 minutes
estimated costs pp $5.25
Deel op Facebook Print Recipe

Equipment

  • Knife
  • Large skillet or wok
  • Measuring cups
  • Measuring spoons
  • Tongs
  • Whisk

Instructions

  • Pat the cod fillets dry with paper towels.
  • Season the cod lightly with black pepper.
  • Heat the vegetable oil in a large skillet or wok over medium-high heat.
  • Add the cod fillets.
  • Cook for 3 to 4 minutes without moving them.
  • Turn the cod carefully.
  • Cook for another 3 to 4 minutes.
  • Transfer the cod to a clean plate when it reaches 145ยฐF (63ยฐC) in the center.
  • Reduce the heat to medium.
  • Add the garlic, ginger, and lemongrass paste to the skillet.
  • Cook for 1 minute while stirring.
  • Add the red curry paste.
  • Cook for another minute.
  • Whisk in the coconut milk and broth.
  • Add the fish sauce or gluten-free tamari, sugar, and lime juice.
  • Bring the broth to a gentle simmer.
  • Cook for 5 minutes.
  • Add the sliced bell pepper.
  • Simmer for 2 minutes or until just tender.
  • Return the cod fillets to the skillet.
  • Spoon some broth over the fish.
  • Warm gently for 1 minute.
  • Taste the broth before adding any salt.
  • Garnish with fresh cilantro.
  • Serve immediately.

Notes & Wine Advice

Serving Suggestions

Serve the cod and coconut broth with steamed jasmine rice, brown rice, quinoa, or rice noodles. Add lime wedges, extra cilantro, sliced red chile, or steamed green vegetables at the table.

Recipe Notes

Patting the cod dry helps it brown instead of steaming. Turn the fillets only once and handle them carefully because cooked cod flakes easily. Keep the coconut broth at a gentle simmer to prevent it from separating.

Dietary Information

The recipe contains fish and may contain shellfish because some Thai curry pastes include shrimp paste. Use certified gluten-free curry paste, broth, fish sauce, or tamari when preparing it as gluten-free. Choose fish sauce instead of tamari when avoiding soy. Coconut is present and can cause reactions in people with a coconut allergy.

Nutrition Information

The values apply to one cod fillet and one-quarter of the coconut broth. Full-fat coconut milk contributes most of the fat and saturated fat. Sodium varies according to the curry paste, broth, fish sauce, or tamari used.

Variations

Replace cod with haddock, pollock, halibut, or another firm white fish. Use light coconut milk for a lower-calorie broth, although the result will taste less rich. Add snow peas, baby spinach, mushrooms, or green beans for extra vegetables.

Storage

Refrigerate the fish and broth in a covered container within two hours and use within two days. Reheat gently over low heat until the fish reaches 165ยฐF (74ยฐC). Avoid boiling because vigorous heat can break apart the cod and split the coconut broth.

Wine Advice

Pair the spicy coconut broth with an aromatic Gewรผrztraminer. Its floral fruit character complements the lemongrass, ginger, and curry. A dry Riesling provides crisp acidity that balances the coconut milk and fresh lime.

Nutrition values

Serving: 1 cod fillet with approximately ยฝ cup coconut broth | Calories: 395 kcal | koolhydraten: 10 g | Eiwitten: 28 g | Vet: 28 g | Verzadigd vet: 17 g | Natrium: 720 mg | Suiker: 4 g
————————————————————————————————–

Fiery Thai coconut cod combines golden pan-roasted fish with a fragrant broth of coconut milk, red curry, ginger, lemongrass, garlic, lime, and sweet bell pepper. The rich broth carries plenty of flavor, while fresh lime and cilantro keep the dish bright. It takes about 35 minutes from start to finish, making it practical for both weeknight dinners and special meals.

Thai-Inspired Flavors in a Quick Fish Dinner

This dish draws inspiration from the aromatic balance found throughout Thai cooking. Red curry paste brings chile heat, spices, and savory depth. Coconut milk softens that heat, while ginger, lemongrass, garlic, and lime add fresh layers of flavor.

The recipe belongs in the Fusion category because the cooking method combines pan-roasting with a Thai-inspired coconut broth. It does not attempt to reproduce one specific traditional Thai curry. Instead, it uses familiar ingredients to create a quick and approachable Fish main course.

Fiery Thai Coconut Cod with Golden Edges

Dry the cod thoroughly before seasoning it. Surface moisture creates steam and prevents proper browning. Heat the skillet before adding the fish, then leave each fillet undisturbed for 3 to 4 minutes. Moving it too soon can make it stick or break.

Turn the fillets carefully with a wide spatula or tongs. Cook the second side until the cod turns opaque and separates into moist flakes. Transfer it to a plate before preparing the broth so the fish does not overcook.

The FDA recommends cooking fish to an internal temperature of 145ยฐF (63ยฐC). Measure the thickest part of the fillet without touching the pan. You can review the FDAโ€™s safe food-handling guidance for additional advice about buying, preparing, and storing seafood.

Building a Balanced Coconut Broth

Cook the garlic, ginger, and lemongrass briefly in the remaining oil before adding the curry paste. This releases their aromas and removes the raw flavor. Stir the curry paste for another minute, but do not let it scorch.

Whisk in the coconut milk and broth gradually. Add fish sauce for a traditional savory flavor or gluten-free tamari for a soy-based alternative. Sugar rounds out the chile heat, while lime juice supplies the acidity needed to balance full-fat coconut milk.

Keep the broth at a gentle simmer. Vigorous boiling can cause coconut milk to separate and may make the sauce look oily. Add the bell pepper near the end so it softens without losing all its color and texture.

Serving Ideas and Useful Variations

Serve this spicy coconut curry cod with jasmine rice, brown rice, quinoa, or rice noodles. These accompaniments absorb the aromatic broth and turn the recipe into a complete meal. Steamed green beans, bok choy, spinach, or snow peas provide additional vegetables.

For more seafood inspiration, try Jamaican-Style Fish Tacos or Thai Shrimp Pizza. A plant-based meal with similar creamy citrus flavors is Lemon Herb Coconut Tofu with Udon.

Haddock, pollock, halibut, or another firm white fish can replace cod. Light coconut milk reduces the calories and saturated fat but produces a thinner, less creamy broth. Add sliced mushrooms, baby spinach, or green beans when you want more vegetables.

Dietary Information

The recipe naturally contains no milk or eggs, making it suitable for Dairy-Free, Lactose Free, and Egg-Free

For a Gluten-Free

Storage and Reheating

Refrigerate leftover fish and broth within two hours and use them within two days. Reheat everything gently over low heat until the cod reaches 165ยฐF (74ยฐC). Avoid boiling because strong heat can break the fish apart and split the coconut broth.

Wine Pairing

An aromatic Gewรผrztraminer complements the curry, ginger, and lemongrass. A dry Riesling offers lively acidity that balances the coconut milk and fresh lime.

Fragrant, spicy, and quick enough for a busy evening, fiery Thai coconut cod delivers a complete seafood dinner without complicated preparation.



Saffron Apricot Rice Pudding

Saffron apricot rice pudding topped with spiced apricots, saffron threads, and orange zest

Saffron Apricot Rice Pudding

Creamy short-grain rice pudding scented with saffron and orange blossom water, topped with tender apricots simmered in warming whole spices.
Couverts4 servings
Preparation 20 minutes
Preparation time:1 hour 5 minutes
estimated costs pp $2.15
Deel op Facebook Print Recipe

Equipment

  • large saucepan
  • Measuring cups
  • Measuring spoons
  • Small saucepan
  • Wooden spoon

Ingredients

For the Spiced Apricots

For the Saffron Rice Pudding

Instructions

For the Spiced Apricots

  • Place the apricots, 50 ml water, 25 g sugar, cardamom pods, cinnamon stick, cloves, and star anise in a small saucepan.
  • Bring the mixture to a gentle simmer.
  • Cook for 15 to 20 minutes.
  • Stir carefully once or twice during cooking.
  • Remove the pan when the apricots are tender but still hold their shape.
  • Discard the cardamom pods, cinnamon stick, cloves, and star anise.
  • Set the apricots aside with their syrup.

For the Saffron Rice Pudding

  • Place the saffron threads in 2 tablespoons warm water.
  • Allow the saffron to steep for 10 minutes.
  • Combine the milk, rice, and remaining 50 g sugar in a large saucepan.
  • Bring the mixture to a gentle simmer over medium-low heat.
  • Cook for 45 to 60 minutes.
  • Stir regularly and scrape the bottom of the pan to prevent sticking.
  • Remove the pan from the heat when the rice is tender and the pudding has thickened.
  • Stir in the saffron water and orange blossom water.
  • Add the heavy cream.
  • Return the pan to low heat.
  • Cook for another 5 minutes while stirring.
  • Divide the rice pudding among four serving bowls.
  • Top each portion with spiced apricots and a little syrup.
  • Serve warm or refrigerate until chilled.

Notes & Wine Advice

Serving Suggestions

Serve the pudding warm for a softer, creamier consistency or chilled for a firmer texture. Garnish with a few saffron threads, finely grated orange zest, or edible rose petals. Add chopped pistachios or almonds only when nut allergies are not a concern.

Recipe Notes

Use short-grain rice because it releases enough starch to create a naturally creamy pudding. Keep the heat low and stir regularly, especially during the final 20 minutes. The pudding will continue to thicken as it cools.

Dietary Information

The base recipe contains milk but no eggs, gluten, wheat, soy, or nuts. Use ingredients with suitable certification when preparing the dessert for halal, kosher, or allergy-sensitive guests. Adding pistachios or almonds means the dessert is no longer nut-free.

Nutrition Information

The values apply to one-quarter of the adjusted recipe and include the apricots and their syrup. The original quantities produced closer to eight dessert portions, so the ingredient amounts have been reduced for four realistic servings. Sugar includes added sugar and the naturally occurring sugars in milk and apricots.

Variations

Replace the apricots with peaches, pears, or plums. Rose water can replace the orange blossom water, but use it sparingly because its flavor can quickly dominate. For a lighter pudding, replace the heavy cream with additional whole milk.

Storage

Refrigerate the pudding and spiced apricots in covered containers within two hours. Use them within three days. Stir a small amount of milk into chilled pudding if it becomes thicker than desired. Reheat gently over low heat.

Wine Advice

Pair this fragrant dessert with a sweet Muscat. Its floral character complements the saffron and orange blossom water. A gently sweet Riesling also pairs well with the tart apricots and warming spices.

Nutrition values

Serving: 1 cup pudding with spiced apricots | Calories: 355 kcal | koolhydraten: 47 g | Eiwitten: 7 g | Vet: 15 g | Verzadigd vet: 9 g | Natrium: 65 mg | Suiker: 30 g
————————————————————————————————–

Saffron apricot rice pudding combines creamy short-grain rice with fragrant saffron, orange blossom water, and gently spiced fruit. Tender apricots simmer with cardamom, cinnamon, cloves, and star anise, creating a bright topping that balances the rich milk and cream. Serve the pudding warm for maximum creaminess or chilled for a firmer, refreshing dessert.

A Fragrant Persian-Inspired Dessert

Saffron and orange blossom water appear throughout Persian cooking, especially in fragrant rice dishes and sweets. This recipe draws on those flavors without attempting to reproduce one specific traditional pudding. The combination creates an aromatic dessert with floral, fruity, and warming notes.

Saffron contributes more than its golden color. It adds a subtle earthy, honey-like flavor that works particularly well with milk and rice. Steeping the threads in warm water before using them distributes their color and flavor evenly. Avoid adding dry saffron directly to the pudding because the threads may form concentrated patches.

Saffron Apricot Rice Pudding with Creamy Texture

Short-grain rice releases starch as it cooks, which naturally thickens the milk. Keep the heat low and stir regularly to prevent the rice from sticking to the bottom of the saucepan. As the mixture becomes thicker, stir more frequently and scrape the bottom and corners of the pan.

The pudding should remain slightly looser than your preferred serving consistency when you remove it from the heat. Rice continues absorbing liquid as it rests, and chilled pudding becomes considerably firmer. Stir in a small amount of milk before serving if it thickens too much.

Add the heavy cream near the end of cooking. This keeps its flavor fresh and gives the finished dessert a velvety consistency. Orange blossom water should also go in near the end because prolonged heat can weaken its aroma. Measure it carefully, since too much can make the pudding taste perfumed rather than delicately floral.

Preparing the Spiced Apricots

Choose ripe but firm apricots that can withstand gentle simmering. Very soft fruit may break apart and turn into compote. Cook the halves until tender while keeping their shape, then remove the whole spices before serving.

Cardamom brings citrus-like warmth, cinnamon provides sweetness, cloves add depth, and star anise introduces a mild licorice note. Together they create a flavorful syrup without overpowering the apricots. Spoon only a small amount of syrup over each serving so the topping complements rather than overwhelms the pudding.

This Persian-inspired rice dessert also works with peaches, plums, pears, or nectarines. Adjust the cooking time according to the ripeness and firmness of the fruit. Dried apricots require more water and a longer simmering time than fresh ones.

Serving and Garnishing Ideas

Serve the pudding as a comforting Dessert after a spicy meal. For a decorative finish, add orange zest, edible rose petals, or a few saffron threads. Chopped pistachios or almonds provide crunch, but adding them means the recipe no longer belongs in the Nut Free category.

For a varied dessert table, pair it with Air-Fried Rhubarb Galette, Classic Apple Pie Cupcakes, or a colorful Fruit Pizza Pie. These recipes provide contrasting baked, creamy, and fresh-fruit textures.

Dietary Information and Nutrition

The recipe suits a Vegetarian, Egg-Free, Gluten-Free, and Wheat Free

The nutrition estimate covers one-quarter of the complete recipe, including the spiced fruit and syrup. It contains about 30 grams of sugar per serving, including added sugar and naturally occurring sugars from milk and apricots. This makes it an occasional dessert rather than a low-sugar option.

Storage and Food Safety

Refrigerate the pudding and apricots within two hours and use them within three days. Store them separately if you want to preserve the appearance of the fruit. Reheat the pudding gently over low heat with a splash of milk, stirring regularly. Follow the FDAโ€™s safe food-handling guidance when cooling and storing dairy-based desserts.

Wine Pairing

A sweet Muscat mirrors the floral orange blossom and saffron aromas. A gently sweet Riesling offers fresh acidity that balances the cream and complements the tart apricots.

Fragrant, colorful, and equally enjoyable warm or chilled, saffron apricot rice pudding makes an elegant finish for both casual meals and festive gatherings.


Slow-Cooker Buffalo Wings

Slow cooker buffalo wings with tangy dipping sauce, celery sticks and carrots

Sticky Buffalo Party Wings

Tender slow-cooked chicken wings coated in buttery buffalo sauce, broiled until lightly caramelized, and served with a creamy, tangy dipping sauce.
Couverts4 servings
Preparation 15 minutes
Preparation time:4 hours 8 minutes
estimated costs pp $3.50
Deel op Facebook Print Recipe

Equipment

  • Baking sheet
  • Mixing bowls
  • Slow Cooker, 4-quart
  • Tongs
  • Whisk

Instructions

For the Buffalo Wings

  • Pat the chicken wings completely dry with paper towels.
  • Arrange the wings in the slow cooker.
  • Whisk together the buffalo sauce, melted butter, Worcestershire sauce, garlic powder, and paprika.
  • Season lightly with salt and black pepper.
  • Pour the sauce over the chicken wings.
  • Turn the wings until evenly coated.
  • Cover the slow cooker.
  • Cook on low for 3ยฝ to 4 hours.
  • Check that the thickest wings have reached an internal temperature of at least 165ยฐF (74ยฐC).
  • Preheat the broiler during the final 10 minutes.
  • Line a baking sheet with foil.
  • Transfer the cooked wings to the prepared baking sheet.
  • Brush the wings lightly with sauce from the slow cooker.
  • Broil for 5 to 8 minutes.
  • Turn the wings halfway through.
  • Remove them when the edges look browned and lightly caramelized.

For the Tangy Dip

  • Whisk together the mayonnaise, sour cream, apple cider vinegar, honey, Dijon mustard, and celery seed.
  • Season with salt and black pepper.
  • Cover and refrigerate until serving.

To Serve

  • Serve the wings hot with the chilled tangy dip.
  • Add celery and carrot sticks if desired.

Notes & Wine Advice

Serving Suggestions

Serve the wings with celery sticks, carrot sticks and the chilled dipping sauce. Provide extra buffalo sauce separately for guests who prefer more heat.

Recipe Notes

Slow cooking produces very tender wings but does not make the skin crisp. Broiling them for 5 to 8 minutes adds browned edges and improves their texture. Watch them carefully because the buttery sauce can darken quickly.

Dietary Information

This recipe contains cowโ€™s milk and egg. Use certified gluten-free buffalo sauce, Worcestershire sauce, mayonnaise, Dijon mustard and spices when preparing it as gluten-free. Worcestershire sauce may contain fish, while mayonnaise commonly contains egg and soybean oil. Check all labels before applying allergen-related classifications.

Nutrition Information

The values include the chicken skin, buffalo sauce and the complete mayonnaise-based dip. The original estimate of 450 calories was too low for four servings. Not every diner will consume all the cooking sauce or dip, so actual intake may be lower. Sodium varies significantly between hot-sauce and Worcestershire-sauce brands.

Variations

For a lighter dipping sauce, replace half the mayonnaise with Greek yogurt. Reduce the honey for a sharper dip or add extra hot sauce for more heat. Smoked paprika can replace regular paprika for a deeper flavor.

Storage

Refrigerate cooked wings and dip separately within 2 hours. Store them in covered containers and use within 3 days. Reheat the wings to 165ยฐF (74ยฐC). Do not reheat the mayonnaise-based dipping sauce.

Wine Advice

Pair these spicy wings with Luis Felipe Edwards Rosรฉ. This Chilean rosรฉ combines Cabernet Sauvignon and Syrah grapes with flavors of strawberry, raspberry, cherry and citrus. Its juicy fruit and soft acidity balance the buffalo heat and creamy dip. Serve it chilled at 8โ€“10ยฐC.

Nutrition values

Serving: 8 wing pieces with 3 tablespoons dip | Calories: 830 kcal | koolhydraten: 8 g | Eiwitten: 42 g | Vet: 68 g | Verzadigd vet: 20 g | Natrium: 1150 mg | Suiker: 5 g
————————————————————————————————–

Slow cooker buffalo wings combine tender chicken with buttery hot sauce and a cool, tangy dipping sauce. The slow cooker gently cooks the meat until succulent, while a short broiling step adds browned edges. This method delivers plenty of buffalo flavor without deep-frying.

The recipe makes four generous servings and works well for game nights, parties and relaxed family dinners. Buffalo sauce brings acidity and heat, while butter softens its sharpness. The chilled mayonnaise dip provides a creamy contrast with honey, mustard, vinegar and celery seed.

Why the Slow Cooker Method Works

Low, steady heat cooks the wings evenly and allows the sauce to penetrate the skin and meat. The covered slow cooker also traps moisture, which helps prevent the chicken from drying out. This produces very tender wings, although the skin will remain soft.

A quick broil solves that texture problem. The intense heat caramelizes the sauce and browns the edges without overcooking the center. These tender crockpot hot wings therefore combine slow-cooked meat with a more appealing exterior.

How to Make Slow Cooker Buffalo Wings

Pat the chicken dry before placing it in the appliance. Removing surface moisture helps the buffalo mixture cling to the wings. Whisk the hot sauce with melted butter, Worcestershire sauce, garlic powder and paprika before pouring it over the chicken.

Cook the wings on low for three and a half to four hours. Slow cookers vary, so check them toward the end of the cooking period. The thickest pieces must reach at least 165ยฐF or 74ยฐC. Avoid cooking them much longer because exceptionally soft wings can fall apart when transferred.

Move the cooked wings carefully to a foil-lined baking sheet. Brush them with a small amount of cooking sauce and broil for five to eight minutes. Turn them halfway through so both sides develop color. Watch closely because butter and hot sauce can darken quickly.

Making the Tangy Dip

Whisk mayonnaise and sour cream until smooth before adding the vinegar, honey, Dijon mustard and celery seed. The vinegar provides acidity, while honey rounds out the sharp flavors. Celery seed echoes the traditional celery sticks commonly served with buffalo wings.

Prepare the dip before the wings finish cooking and refrigerate it until needed. Chilling gives the flavors time to blend and creates a refreshing temperature contrast with the hot chicken.

Ideas for a Party Menu

Serve the wings with celery and carrot sticks, extra napkins and a separate bowl of buffalo sauce. Add cucumber, sweet peppers or toasted bread if you want more variety. Keep the dipping sauce over ice when it remains on a buffet for an extended period.

For a larger appetizer table, add Fiery Shrimp and Bacon Cheese Dip or Sweet-and-Sour Cocktail Sausages. Crispy Steak Fingers with Tangy Lime Sauce provide another substantial finger-food option.

Variations and Dietary Considerations

Use a milder buffalo sauce or reduce the cayenne content for less heat. Smoked paprika adds deeper flavor, while extra hot sauce creates a fierier version. Replacing half the mayonnaise with Greek yogurt makes the dip lighter but slightly more acidic.

This recipe contains cowโ€™s milk and egg. Worcestershire sauce may contain fish, and mayonnaise often contains soybean oil. Use certified gluten-free hot sauce, Worcestershire sauce, mayonnaise, mustard and spices when preparing a gluten-free version.

Although the recipe is low in carbohydrates, it contains a small amount of honey. Its high calorie and fat content comes mainly from the chicken skin, butter and mayonnaise. Serving less dip can considerably reduce the calories per portion.

Safe Storage and Reheating

Refrigerate the wings and dipping sauce separately within two hours. Use both within three days. Reheat the chicken until it reaches 165ยฐF or 74ยฐC, but serve the mayonnaise dip cold. Consult the FDAโ€™s safe food-handling guidance for further information about cooking poultry and refrigerating leftovers.

A Fruity Rosรฉ Pairing

Luis Felipe Edwards Rosรฉ combines Cabernet Sauvignon and Syrah grapes with strawberry, raspberry, cherry and citrus flavors. Its juicy fruit softens the buffalo heat, while its acidity cuts through the butter and mayonnaise. Serve this Chilean rosรฉ well chilled at 8โ€“10ยฐC.

Serve slow cooker buffalo wings immediately after broiling so the edges remain caramelized and the meat stays juicy. With cool dip and crisp vegetables alongside, they make a satisfying centerpiece for an informal meal or party spread.


Fiery Corn Pepper Empanadas

Fiery corn pepper empanadas served warm with fresh salsa and lime wedges

Fiery Corn Pepper Empanadas

Flaky baked empanadas filled with corn, colorful peppers, onion, Monterey Jack and warm Tex-Mex spices. This recipe makes eight empanadas.
Couverts4 servings
Preparation 30 minutes
Preparation time:35 minutes
Cooling Time 10 minutes
Total time 1 hour 15 minutes
estimated costs pp $1.75
Deel op Facebook Print Recipe

Equipment

  • Baking sheet
  • Fork
  • Large skillet
  • Mixing bowl
  • Parchment paper
  • Rolling Pin
  • Round Cutter, 4-inch

Instructions

  • Preheat the oven to 375ยฐF (190ยฐC).
  • Line a baking sheet with parchment paper.
  • Heat the olive oil in a large skillet over medium heat.
  • Add the onion and bell peppers.
  • Cook for approximately 5 minutes until softened.
  • Add the corn, chili powder, cumin, garlic powder and paprika.
  • Season lightly with salt and black pepper.
  • Cook for 2 minutes.
  • Pour in the vegetable broth.
  • Simmer for 3 to 5 minutes until the liquid has evaporated.
  • Remove the skillet from the heat.
  • Stir in the Monterey Jack.
  • Allow the filling to cool for 10 minutes.
  • Unroll the pie crusts.
  • Cut eight circles measuring approximately 4 inches each.
  • Reroll the pastry scraps when necessary.
  • Place approximately 2 tablespoons filling in the center of each circle.
  • Leave a clean border around the edge.
  • Fold the dough over the filling to form a half-moon.
  • Press the edges together.
  • Seal the edges with a fork.
  • Arrange the empanadas on the prepared baking sheet.
  • Cut a small steam vent in the top of each empanada.
  • Bake for 20 to 25 minutes.
  • Remove them when the pastry is crisp and golden.
  • Allow the empanadas to cool for 10 minutes before serving.

Notes & Wine Advice

Serving Suggestions

Serve two empanadas per person with salsa, guacamole or a crisp salad. They also work well as part of a Fingerfood platter or party buffet.

Recipe Notes

The ingredient quantities have been adjusted to make eight empanadas and four servings. Cool the filling before assembling the pastries because hot filling can soften the dough. Do not overfill them, or the seams may open during baking.

Dietary Information

Use refrigerated pie crust made without lard or other animal fats. Some commercial pie crusts contain lard and are therefore not suitable for a Vegetarian diet. Check that the pastry and vegetable broth contain no egg or nuts when those classifications are required. Use certified cheese, broth and pastry when halal or kosher certification is needed.

Nutrition Information

The nutritional values cover two empanadas and include the complete package of pastry. Pastry contributes most of the calories, fat, saturated fat and sodium. The original estimate of 280 calories was more appropriate for one large empanada than for a two-empanada serving.

Variations

Add chopped jalapeรฑo or chili flakes for more heat. Black beans can replace part of the corn. Pepper Jack creates a spicier filling, while Cheddar provides a sharper flavor. Allow any added vegetables to cook until their moisture has evaporated.

Storage

Refrigerate leftover empanadas within 2 hours and use them within 3 days. Reheat them in an oven or air fryer until the filling is piping hot. Freezing the unbaked assembled empanadas is possible for up to 2 months.

Wine Advice

A light Pinot Noir complements the baked pastry, peppers and melted cheese without overpowering the filling. A crisp Sauvignon Blanc offers a fresher pairing for salsa and guacamole. Serve Pinot Noir at 14โ€“16ยฐC or Sauvignon Blanc at 8โ€“10ยฐC.

Nutrition values

Serving: 2 empanadas | Calories: 515 kcal | koolhydraten: 50 g | Eiwitten: 9 g | Vet: 31 g | Verzadigd vet: 11 g | Natrium: 680 mg | Suiker: 5 g
————————————————————————————————–

Fiery corn pepper empanadas combine a crisp, golden pastry shell with a colorful filling of corn, bell peppers, onion, warm spices, and melted Monterey Jack cheese. They deliver gentle sweetness, savory richness, and a lively touch of heat in every bite. Serve them as a satisfying appetizer, a handheld lunch, or flavorful party food.

Why These Baked Empanadas Work

Baking gives the pastry an attractive golden finish without the extra oil and cleanup associated with deep-frying. The corn brings natural sweetness, while the mixed bell peppers add freshness, color, and a subtle crunch. Onion builds a savory base, and Monterey Jack melts smoothly through the filling.

Chili powder, cumin, paprika, and garlic powder give the vegetables a warm, balanced flavor. The vegetable broth helps the spices coat the filling, but reducing it fully remains important. A wet filling can soften the pastry and make the empanadas difficult to seal. Letting the mixture cool before assembling also protects the dough from becoming greasy or fragile.

Fiery Corn Pepper Empanadas for Sharing

This recipe makes eight empanadas, which provides two per serving for four people. Their compact size makes them easy to arrange on an appetizer platter or pack for a picnic. They also work well for Game Day, relaxed weekends, and informal family gatherings.

Serve the empanadas with fresh salsa, lime wedges, or Special Guacamole. For a larger spread, add Layered Pinto Bean Dip Olรฉ or pair them with Mexican Chicken Pizza. A crisp cabbage salad can provide a refreshing contrast to the warm pastry and melted cheese.

Preparing and Sealing the Pastry

Roll or unfold the refrigerated pie crust according to its package directions, then cut eight circles measuring approximately 4 inches across. Place about two tablespoons of cooled filling in the center of each circle. Avoid overfilling because excess filling can break the seam during baking.

Lightly moisten the edge of each pastry circle with water, fold it over, and press out any trapped air. Crimp the edge firmly with a fork. Chill soft assembled empanadas for about 10 minutes before baking if the dough becomes warm. This short rest helps them retain their shape and improves the flaky texture.

Choose a refrigerated pie crust made without lard to keep the recipe vegetarian. Check the package carefully because some commercial crusts contain animal fat. The recipe can also suit an egg-free diet when the selected pastry contains no egg. Ingredient labels remain essential for anyone managing allergies or following religious dietary requirements.

Variations and Heat Adjustments

For milder empanadas, replace the chili powder with sweet paprika. For more heat, add finely chopped jalapeรฑo, chipotle powder, or a pinch of cayenne. Black beans can replace part of the corn for extra protein and a heartier texture. You can also use pepper Jack instead of Monterey Jack for a stronger chile flavor.

These spicy vegetable pastry pockets can be assembled several hours ahead and refrigerated until baking. Store cooled leftovers in an airtight container for up to three days. Reheat them in a 180ยฐC oven or air fryer until the pastry becomes crisp and the center reaches a safe temperature. Follow the FDAโ€™s safe food-handling guidance when cooling, storing, and reheating prepared foods.

Wine Pairing

A chilled Sauvignon Blanc provides bright acidity that balances the cheese and sweet corn. A light Pinot Noir also works well, especially when the filling contains smoked paprika or chipotle.

With their colorful filling, flaky crust, and adjustable heat, fiery corn pepper empanadas offer an inviting option for sharing throughout the year.


Sticky Pineapple Honey Wings

Sticky Pineapple Honey Wings

Sticky Pineapple Honey Wings

Oven-baked chicken wings coated in a sweet, tangy and lightly spicy glaze made with honey, pineapple, ginger and garlic.
Couverts4 servings
Preparation 20 minutes
Preparation time:45 minutes
estimated costs pp $3.25
Deel op Facebook Print Recipe

Equipment

  • aluminum foil
  • Baking sheet
  • Large bowl
  • Measuring cups
  • Measuring spoons
  • Small saucepan
  • Tongs
  • Wire rack

Instructions

  • Preheat the oven to 425ยฐF (220ยฐC).
  • Line a baking sheet with aluminum foil.
  • Place a wire rack over the baking sheet.
  • Pat the chicken wings completely dry.
  • Season the wings lightly with salt and black pepper.
  • Arrange them in a single layer on the wire rack.
  • Bake for 20 minutes.
  • Turn the wings with tongs.
  • Continue baking for 15 minutes.
  • Combine the honey, pineapple juice, soy sauce, apple cider vinegar, garlic, ginger and optional red pepper flakes in a small saucepan.
  • Bring the mixture to a gentle simmer over medium heat.
  • Cook for 10 to 15 minutes.
  • Stir regularly until the glaze has reduced and lightly coats the back of a spoon.
  • Reserve approximately one-third of the glaze in a clean bowl for serving.
  • Brush the remaining glaze over the wings.
  • Return the wings to the oven.
  • Bake for another 8 to 10 minutes.
  • Turn and glaze the wings once during the final cooking time.
  • Check that the chicken has reached at least 165ยฐF (74ยฐC).
  • Serve hot with the reserved glaze.

Notes & Wine Advice

Serving Suggestions

Serve the wings with steamed rice, coleslaw, grilled pineapple or a crisp cucumber salad. They also work well as part of a Barbecue or game-day spread.

Recipe Notes

Drying the wings and baking them on a wire rack improves browning. The original temperature of 400ยฐF was usable, but 425ยฐF creates better edges before applying the wet glaze. Reserve any dipping glaze before it touches the chicken or the basting brush.

Dietary Information

The recipe contains soy and may contain wheat when prepared with regular soy sauce. Use certified gluten-free tamari for a Gluten-Free and wheat-free version. It contains no dairy, lactose, eggs or nuts when prepared with suitable products. Use certified chicken and condiments when halal or kosher certification is required.

Nutrition Information

The values include the chicken skin and complete quantity of glaze. The original estimate understated the calories, sugar and sodium for four servings. Honey provides most of the sugar, while soy sauce contributes most of the sodium. Actual intake may be lower when some glaze remains unused.

Variations

Add extra red pepper flakes or hot sauce for more heat. Replace part of the pineapple juice with fresh lime juice for a sharper glaze. Boneless chicken pieces can also be used, but their cooking time will differ.

Storage

Refrigerate leftover wings and glaze separately within 2 hours. Use them within 3 days. Reheat the wings to 165ยฐF (74ยฐC) in an oven or air fryer. Bring leftover glaze to a full simmer before serving it again.

Wine Advice

A fragrant Gewรผrztraminer complements the pineapple, honey and ginger while handling the optional chili heat. A fruity Rosรฉ provides a fresher alternative for outdoor meals and balances the sweet glaze with gentle acidity. Serve either wine chilled at approximately 8โ€“10ยฐC.

Nutrition values

Serving: 6 wing pieces with glaze | Calories: 515 kcal | koolhydraten: 37 g | Eiwitten: 34 g | Vet: 25 g | Verzadigd vet: 6 g | Natrium: 1050 mg | Suiker: 34 g
————————————————————————————————–

Sticky pineapple honey wings combine oven-baked chicken with a glossy glaze made from pineapple juice, honey, soy sauce, ginger and garlic. The result balances sweetness, acidity, salt and gentle heat while retaining the familiar appeal of crisp-edged chicken wings.

This recipe makes four generous servings and works as an Appetizer, informal dinner or substantial Snack. Serve the wings during a Barbecue, game night or weekend gathering.

Why Pineapple and Honey Work Together

Pineapple juice adds tropical fruit, acidity and natural sweetness. Honey thickens the glaze and helps it caramelize during the final minutes in the oven. Apple cider vinegar prevents the sauce from becoming cloying, while soy sauce adds salt and savory depth.

Fresh ginger and garlic strengthen the glaze without hiding the pineapple. Optional red pepper flakes provide contrast, creating sweet pineapple glazed wings with enough heat to keep the flavors lively.

How to Make Sticky Pineapple Honey Wings

Pat the chicken completely dry before seasoning it. Moisture on the skin creates steam and prevents effective browning. Arrange the pieces on a wire rack so hot air can circulate around them and rendered fat can drip onto the lined baking sheet.

Bake the wings without glaze for the first 35 minutes. Applying honey too early would cause the outside to darken before the chicken cooks through. Turn the pieces after 20 minutes so they develop an even color.

Meanwhile, simmer the honey, pineapple juice, soy sauce, vinegar, garlic and ginger. The glaze is ready when it lightly coats the back of a spoon. It will continue thickening as it cools, so do not reduce it to a heavy syrup.

Reserve one-third of the glaze in a clean bowl before basting the chicken. Brush the remaining sauce over the wings and return them to the Oven for eight to ten minutes. Turn and glaze them again so both sides become glossy.

A Fusion of Familiar Flavors

The oven-baked wing format has strong links to American cuisine. Soy sauce, ginger and garlic add clear Asian influences, while pineapple introduces a tropical element. That combination makes the recipe suitable for the Fusion classification.

The sauce does not belong to one traditional regional cuisine. Instead, it combines familiar ingredients to create an accessible party dish with sweet, savory and tangy characteristics.

Serving Ideas and Menu Pairings

Serve the wings with steamed rice, coleslaw, grilled pineapple or cucumber salad. Crisp vegetables provide a refreshing contrast to the sticky glaze. Keep additional sauce in a separate bowl so guests can control how much they add.

For a larger chicken spread, serve them alongside Slow-Cooker Buffalo Wings. The spicy buffalo sauce contrasts well with the sweeter pineapple glaze. Add Tortilla Chips and Special Guacamole or Zesty Lemon Hummus to provide cooler accompaniments.

Adjusting the Glaze

Add more red pepper flakes, cayenne or hot sauce for extra heat. Replace two tablespoons of pineapple juice with fresh lime juice for a sharper finish. You can also add a teaspoon of toasted sesame oil, although this will make the sesame allergen relevant.

Use fresh pineapple juice when available, but canned juice also works. Avoid pineapple packed in heavy syrup because it can make the glaze excessively sweet. Low-sodium soy sauce reduces sodium but does not automatically make the complete recipe low-sodium.

Dietary Information

The recipe contains soy and may contain wheat when made with standard soy sauce. Use certified gluten-free tamari to prepare a Gluten-Free and wheat-free version.

The ingredients contain no cowโ€™s milk or lactose, making the wings suitable for a Dairy-Free diet. They can also suit Egg-Free and Nut Free diets when all packaged ingredients carry appropriate allergen information.

Honey contributes considerable sugar, so the recipe does not qualify as low-sugar, low-carb, keto or diabetic-friendly. The chicken provides substantial protein, but the skin also contributes fat and calories.

Food Safety and Storage

Chicken wings must reach at least 165ยฐF or 74ยฐC internally. Insert a thermometer into a thick section without touching the bone. Refrigerate leftovers within two hours and use them within three days.

Reheat the wings to 165ยฐF or 74ยฐC in an oven or air fryer. Bring stored glaze to a proper simmer before serving it again. Consult the FDAโ€™s safe food-handling guidance for additional advice about preparing poultry and storing leftovers.

Wine Pairings for Sweet Heat

A fragrant Gewรผrztraminer complements pineapple, honey and ginger while handling the chili heat. Its aromatic character suits the tropical glaze. A fruity Rosรฉ provides a lighter, fresher alternative for outdoor meals. Its acidity balances the honey and chicken skin. Serve either choice chilled at approximately 8โ€“10ยฐC.

Bring sticky pineapple honey wings to the table immediately after glazing. Their combination of browned chicken, tropical fruit and savory seasoning makes them especially suited to informal meals and shared appetizer platters.


Lemon Coconut Tofu Udon

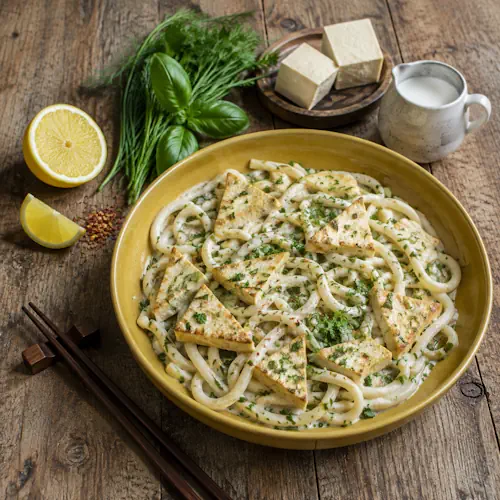
Lemon coconut tofu udon with fresh herbs, scallions and creamy coconut sauce

Lemon Coconut Tofu Udon

Creamy udon noodles with tender tofu, coconut milk, lemon and fresh herbs. This quick fusion dish combines Japanese noodles with bright Mediterranean flavors.
Couverts4 servings
Preparation 15 minutes
Preparation time:15 minutes
estimated costs pp $2.25
Deel op Facebook Print Recipe

Equipment

  • Knife
  • Large pot
  • Measuring cups
  • Measuring spoons
  • medium saucepan
  • strainer
  • Wooden spoon

Instructions

  • Cook the udon noodles in lightly salted water according to the package instructions.
  • Reserve ยผ cup of the noodle water.
  • Drain the noodles and set them aside.
  • Cut the pressed tofu into bite-size triangles.
  • Pour the coconut milk into a medium saucepan.
  • Add the lemon juice, scallions, chives, basil, dill, parsley and curry powder.
  • Bring the mixture to a gentle boil over medium heat.
  • Reduce the heat to low.
  • Add the tofu and simmer uncovered for 10 minutes.
  • Stir occasionally without breaking the tofu.
  • Add the drained udon noodles.
  • Toss gently until the noodles are evenly coated.
  • Add a little reserved noodle water if the sauce is too thick.
  • Season with salt and black pepper.
  • Serve warm or allow it to cool before serving.

Notes & Wine Advice

Serving Suggestions

Top the noodles with additional fresh herbs, scallions, lemon zest or chili flakes. Serve warm as a main course or refrigerate and serve chilled as a noodle salad.

Recipe Notes

Press the tofu thoroughly so it absorbs more of the coconut and herb sauce. Bring the coconut milk only to a gentle boil because prolonged high heat can cause it to separate. Reserve some noodle water so you can adjust the sauce after adding the udon.

Dietary Information

This recipe contains soy. Standard udon noodles contain wheat, so the original gluten-free and wheat-free classifications were incorrect. Only classify the dish as gluten-free or wheat-free when using certified gluten-free udon-style noodles. Check the noodles, tofu, coconut milk and curry powder for allergen warnings and the appropriate halal or kosher certification when required. Coconut is not a culinary nut, although people with a coconut allergy must avoid this recipe.

Nutrition Information

The nutritional values assume 280 g dry udon noodles and full-fat canned coconut milk. Fresh precooked udon contains more water and may provide fewer calories per 280 g package. The original estimate of 350 calories was therefore too low for the stated dry ingredient quantities. Sodium depends heavily on the noodles and the amount of added salt.

Variations

Add broccoli, mushrooms, snow peas or baby spinach for extra vegetables. Replace the tofu with tempeh for a firmer texture. Use light coconut milk to reduce calories, total fat and saturated fat. Fresh basil, dill and parsley provide a brighter flavor than dried herbs.

Storage

Refrigerate leftovers in a covered container within 2 hours and use them within 3 days. The noodles will continue absorbing sauce during storage. Add a splash of water or coconut milk when reheating them gently on the stove.

Wine Advice

A crisp Sauvignon Blanc complements the lemon and fresh herbs with lively acidity. A lighter Pinot Grigio also works well because its fresh character balances the rich coconut sauce without overpowering the tofu and herbs. Serve either wine chilled at approximately 8โ€“10ยฐC.

Nutrition values

Serving: 2 cups | Calories: 535 kcal | koolhydraten: 61 g | Eiwitten: 18 g | Vet: 25 g | Verzadigd vet: 17 g | Natrium: 450 mg | Suiker: 5 g
————————————————————————————————–

Lemon coconut tofu udon combines creamy coconut milk, tender tofu, thick Japanese noodles and a generous selection of fresh herbs. Lemon juice adds enough acidity to balance the rich sauce, while a small amount of curry powder provides warmth without dominating the other flavors.

This recipe makes four portions and takes about 30 minutes from start to finish. You can serve it warm as a comforting main course or chill it for a creamy noodle salad. The combination of Japanese udon, coconut milk and Mediterranean-style herbs gives the dish its distinctive fusion character.

Why This Flavor Combination Works

Full-fat coconut milk creates a smooth sauce that clings to the thick noodles. Lemon juice cuts through its richness and keeps the finished dish from feeling heavy. Scallions and chives add a mild onion flavor, while basil, dill and parsley provide several fresh aromatic layers.

Extra-firm tofu contributes protein and absorbs the seasoned sauce. Pressing it before cooking removes excess water and improves its texture. The result is a creamy herb tofu noodles dish with contrasting citrus, coconut and savory flavors.

How to Make Lemon Coconut Tofu Udon

Cook the udon according to the instructions on its package. The required cooking time varies considerably between dry, frozen and precooked noodles. Reserve a small amount of noodle water before draining because its starch helps loosen the sauce without making it watery.

Cut the pressed tofu into small triangles or cubes of similar size. Bring the coconut milk, lemon juice, scallions, herbs and curry powder to a gentle boil. Immediately lower the heat before adding the tofu. A gentle simmer allows the flavors to combine without causing the coconut milk to separate.

Add the cooked udon after the tofu has simmered for ten minutes. Toss everything carefully to avoid breaking the tofu. If the sauce appears too thick, add the reserved noodle water one tablespoon at a time.

Fresh Herbs and Useful Substitutions

Fresh herbs provide the brightest result, but dried herbs offer a practical alternative. Use approximately one-third of the fresh quantity when substituting dried basil, dill or parsley. Add dried herbs earlier so they have enough time to soften and release their flavor.

You can add mushrooms, broccoli, snow peas, pak choi or baby spinach. Cook firm vegetables before adding the tofu and stir tender leafy vegetables through the sauce shortly before serving. Tempeh can replace tofu when you prefer a firmer, nuttier texture.

For another citrus-flavored tofu dish, try Grilled Ginger Lime Tofu. Tofu Marsala provides a richer mushroom variation, while Veggie Tofu Bake offers an oven-baked alternative.

Serving It Warm or Chilled

Serve the warm noodles immediately with lemon zest, extra herbs and chili flakes. For a cold version, let the dish cool briefly before refrigerating it. Stir in a small splash of coconut milk or lemon juice before serving because the noodles continue absorbing sauce as they rest.

A cucumber salad or quickly steamed green vegetables provide a fresh accompaniment. Avoid pairing the noodles with another heavy coconut dish because the meal may become overly rich.

Dietary Classification and Nutrition

The ingredients contain no meat, fish, dairy products or eggs, making the recipe vegan and vegetarian. Tofu means the dish contains soy. Regular udon contains wheat and gluten, so the original gluten-free and wheat-free classifications do not apply.

You can prepare a gluten-free version with certified gluten-free udon-style noodles. Check packaged tofu, coconut milk and curry powder for allergen statements. Coconut is not a culinary nut, but anyone with a specific coconut allergy must avoid the dish.

Full-fat coconut milk contributes most of the saturated fat. Light coconut milk reduces both calories and fat, although it produces a thinner sauce. The precise nutritional values also depend on whether you use dry, frozen or precooked udon.

Storage and Food Safety

Refrigerate leftovers in a covered container within two hours and use them within three days. Reheat the noodles gently with a splash of water or coconut milk until piping hot. Do not repeatedly cool and reheat the complete batch. Consult the FDAโ€™s safe food-handling guidance for more information.

Fresh White Wine Pairings

A crisp Sauvignon Blanc reinforces the lemon and fresh herbal notes. Its lively acidity also balances the coconut milk. A light Pinot Grigio provides a more neutral alternative that will not overpower the delicate tofu and herbs. Serve either wine at approximately 8โ€“10ยฐC.

With its quick preparation and bright, creamy sauce, lemon coconut tofu udon offers a flexible dinner for every season. Adjust the herbs, vegetables and heat level to suit the occasion while retaining the balance between citrus and coconut.


Creamy Slow-Cooker Bean Dip

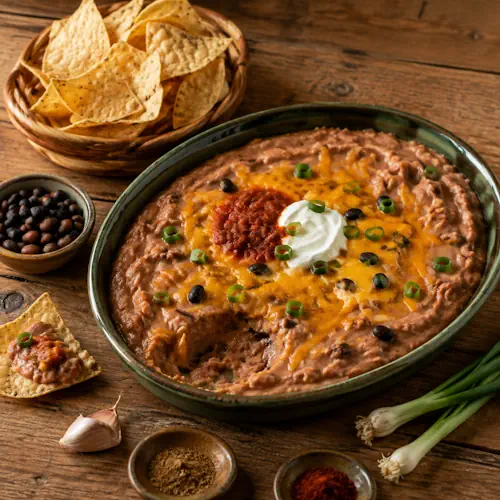
Slow cooker bean dip topped with Cheddar cheese, green onions and diced tomato

Creamy Slow-Cooker Bean Dip

A warm and creamy slow-cooker dip made with black beans, pinto beans, cheese, salsa and Tex-Mex spices. Perfect for tortilla chips, vegetables or loaded nachos.
Couverts4 servings
Preparation 15 minutes
Preparation time:4 hours
estimated costs pp $1.40
Deel op Facebook Print Recipe

Equipment

  • Can opener
  • Measuring cups
  • Measuring spoons
  • Mixing bowl
  • Potato masher
  • Slow cooker (2-quart)
  • Wooden spoon

Ingredients

Instructions

  • Add the black beans and pinto beans to a mixing bowl.
  • Add the cream cheese, Cheddar, sour cream, salsa, green onions and garlic.
  • Season with the chili powder, cumin, salt and optional cayenne.
  • Stir until evenly combined.
  • Transfer the mixture to a 2-quart slow cooker.
  • Cover and cook on low for 3 to 4 hours.
  • Stir the dip once every hour.
  • Mash the beans during the final 30 minutes until the desired texture is reached.
  • Check that the dip is piping hot throughout.
  • Add a tablespoon of water if the dip becomes too thick.
  • Serve warm.

Notes & Wine Advice

Serving Suggestions

Serve the dip warm with corn tortilla chips, vegetable sticks or toasted bread. You can also spoon it over nachos, baked potatoes, tacos or rice bowls.

Recipe Notes

The quantities have been adjusted to make four generous servings. This is a creamy mashed bean dip rather than a traditional refried bean dip because the beans are not fried. Mash only part of the mixture for a chunky texture or mash it thoroughly for a smoother result.

Dietary Information

This recipe contains cowโ€™s milk and is suitable for a vegetarian diet. It contains no eggs or nuts when prepared with suitable packaged products. Use certified gluten-free beans, salsa, spices and tortilla chips when serving it as gluten-free or wheat-free. Check labels because seasoning blends and processed dairy products may contain gluten, egg, soy or nut traces.

Nutrition Information

The nutritional values are estimates for one-quarter of the complete recipe. Rinsing the canned beans helps remove some sodium. The final sodium content still varies according to the beans, salsa and cheese brands. Omitting the added salt will reduce the sodium by approximately 145 mg per serving.

Variations

Add drained corn or diced roasted peppers for extra texture. Pepper Jack can replace Cheddar for a hotter dip. For a fresher finish, top each serving with diced tomato, cilantro or additional green onions. Add a splash of water if the dip becomes too thick while cooking.

Storage

Refrigerate leftovers in a covered container within 2 hours and use them within 3 days. Reheat the dip until piping hot, stirring regularly so it heats evenly. Do not use the warm setting for longer than 2 hours when serving the dip at a party.

Wine Advice

Pair this creamy bean dip with Purcari Pinot Noir 1827. This light Moldovan red consists entirely of Pinot Noir grapes and offers strawberry, red cherry, cranberry and subtle spice. Its soft tannins complement the beans and Cheddar without intensifying the chili heat. Serve it lightly chilled at 14โ€“16ยฐC.

Nutrition values

Serving: 1 cup | Calories: 380 kcal | koolhydraten: 36 g | Eiwitten: 16 g | Vet: 20 g | Verzadigd vet: 11 g | Natrium: 790 mg | Suiker: 4 g
————————————————————————————————–

Slow cooker bean dip combines black beans, pinto beans, cream cheese and Tex-Mex spices in one warm, satisfying appetizer. Gentle cooking softens the beans and allows the chili powder, cumin, garlic and salsa to blend into the creamy base. Serve it with tortilla chips, vegetables or toasted bread.

This recipe makes four generous servings and requires only 15 minutes of preparation. The slow cooker handles the rest, making it useful for parties, game nights and weekends. You can serve the dip directly from the appliance, provided you monitor the holding time and temperature.

Why Two Types of Beans Work Well

Black beans have an earthy flavor and hold some of their shape during cooking. Pinto beans soften more readily and help create a creamier texture. Combining them produces a dip with more character than using only one variety.

Cream cheese and sour cream soften the spices, while Cheddar contributes a sharper savory note. Salsa adds acidity and moisture. Green onions and garlic prevent this creamy Tex-Mex bean dip from tasting too heavy.

How to Make Slow Cooker Bean Dip

Rinse and drain the canned beans thoroughly before adding them to the mixing bowl. Rinsing removes packing liquid and reduces some of the sodium. Add softened cream cheese so it combines easily with the remaining ingredients.

Stir in the Cheddar, sour cream, salsa, green onions, garlic and seasonings. Transfer everything to a 2-quart slow cooker and cook it on low for three to four hours. Stir once every hour to distribute the heat and prevent the cheese around the edges from overcooking.

Mash the beans during the final 30 minutes. Mash only part of the mixture for a rustic, chunky result or continue until it becomes mostly smooth. Add a tablespoon of water if the dip thickens too much.

Serving Ideas for Sharing

Serve the dip with sturdy corn tortilla chips that can hold a generous scoop. Celery, cucumber, carrots and sweet bell pepper strips provide crisp alternatives. Toasted baguette slices work well when you do not require a gluten-free accompaniment.

You can also spoon the mixture over nachos, baked potatoes or rice. Add diced tomato, cilantro, avocado or fresh green onions shortly before serving. These toppings bring color and freshness without thinning the dip.

For a larger appetizer table, pair it with Layered Pinto Bean Dip Olรฉ or Zesty Lemon Hummus. Add Tortilla Chips and Special Guacamole to create a varied selection of warm and cold dips.

Variations and Adjustments

Replace Cheddar with Pepper Jack for more heat. For a milder result, omit the cayenne and choose a mild salsa. Drained corn, roasted peppers or chopped jalapeรฑos can add extra texture.

Lean toward a smoother consistency when using the dip as a nacho topping. Keep it chunkier when serving it with chips. You can prepare the mixture several hours ahead and refrigerate it in the slow-cooker insert. Allow a little extra cooking time when starting with cold ingredients.

Dietary and Food-Safety Notes

This vegetarian recipe contains cowโ€™s milk but no meat, fish, eggs or nuts. Packaged beans, salsa, spices and cheese may contain traces of allergens. Check every label when preparing the recipe for someone with an allergy.

Use certified gluten-free beans, salsa, spices and tortilla chips for a gluten-free or wheat-free serving. The dip does not qualify as vegan, dairy-free, lactose-free or low-carb because it contains dairy products and a substantial quantity of beans.

Do not leave the dip on the slow cookerโ€™s warm setting indefinitely. Refrigerate leftovers within two hours and use them within three days. Reheat the required portion until piping hot. Consult the FDAโ€™s safe food-handling guidance for more information about temperature control and storing leftovers.

A Light Red Wine Pairing

Serve this dip with Purcari Pinot Noir 1827. The Moldovan wine consists entirely of Pinot Noir grapes and offers strawberry, cherry, cranberry and subtle spice. Soft tannins complement the beans and Cheddar without increasing the perceived chili heat. Serve it lightly chilled at 14โ€“16ยฐC.

Bring slow cooker bean dip to the table while it remains warm and creamy. Its combination of beans, cheese and gentle spices makes it a practical appetizer that guests can enjoy with several different accompaniments.


Spicy Sausage Taco Dip

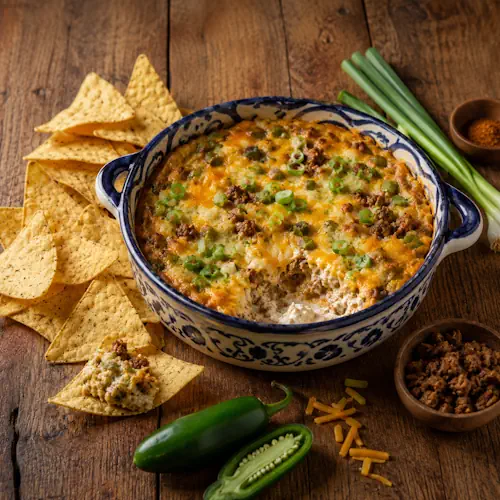
Spicy sausage taco dip topped with melted cheese, sliced jalapeรฑos and green onions

Spicy Sausage Taco Dip

A hot and creamy baked taco dip made with savory sausage, jalapeรฑos, green onions and melted cheese. Ideal for sharing with tortilla chips or fresh vegetables.
Couverts4 servings
Preparation 15 minutes
Preparation time:33 minutes
Resting Time 5 minutes
estimated costs pp $2.25
Deel op Facebook Print Recipe

Equipment

  • Baking dish (8-inch),
  • Measuring cups
  • Measuring spoons
  • Mixing bowl
  • skillet
  • Wooden spoon

Instructions

  • Preheat the oven to 350ยฐF (175ยฐC).
  • Cook the sausage in a skillet over medium heat for 6 to 8 minutes.
  • Break the sausage into small pieces while cooking.
  • Cook until completely browned and no pink remains.
  • Drain the excess fat thoroughly.
  • Combine the cream cheese, Cheddar, sour cream, jalapeรฑos, green onions and taco seasoning in a mixing bowl.
  • Add the cooked sausage.
  • Stir until evenly combined.
  • Spread the mixture in an 8-inch baking dish.
  • Sprinkle the Monterey Jack evenly over the top.
  • Bake for 20 to 25 minutes, until hot and bubbling.
  • Let the dip rest for 5 minutes before serving.

Notes & Wine Advice

Serving Suggestions

Serve the dip warm with sturdy tortilla chips, toasted bread, crackers, celery sticks, cucumber slices or strips of sweet bell pepper.

Recipe Notes

The quantities have been adjusted to make four generous servings. Drain the sausage thoroughly before adding it to the cheese mixture. Excess sausage fat can make the finished dip greasy.

Dietary Information

The recipe contains cowโ€™s milk. It contains no eggs or nuts when prepared with suitable packaged products. For a gluten-free version, check that the sausage, taco seasoning and tortilla chips carry gluten-free certification. Processed sausage and seasoning blends can contain gluten, soy, egg or traces of nuts, so always inspect their labels. Pork sausage makes the recipe unsuitable for halal and kosher diets.

Nutrition Information

The nutritional values are estimates for one-quarter of the adjusted recipe. The exact sodium and fat content depends heavily on the sausage, cheese and taco-seasoning brands. Using reduced-fat dairy products or lean turkey sausage will lower the fat and calorie content.

Variations

Use turkey or chicken sausage for a lighter variation. Replace Monterey Jack with Pepper Jack for additional heat. For a milder dip, reduce the jalapeรฑos or replace them with diced green bell pepper. A spoonful of drained tomato salsa can add freshness, but too much liquid may make the dip thin.

Storage

Refrigerate leftovers in a covered container within 2 hours. Use them within 3 days and reheat only the required portion until piping hot. Do not leave this meat and dairy dip at room temperature throughout a party.

Wine Advice

Pair the dip with Purcari Pinot Noir 1827. This Moldovan wine is made entirely from Pinot Noir grapes and offers strawberry, red cherry, cranberry and subtle spice. Its soft tannins complement the sausage and melted cheese without intensifying the jalapeรฑo heat. Serve it lightly chilled at 14โ€“16ยฐC.

Nutrition values

Calories: 415 kcal | koolhydraten: 6 g | Eiwitten: 20 g | Vet: 35 g | Verzadigd vet: 17 g | Natrium: 910 mg | Suiker: 3 g
————————————————————————————————–

Spicy sausage taco dip combines seasoned sausage, jalapeรฑos, green onions and three creamy cheeses in one satisfying oven-baked appetizer. The rich filling becomes hot and smooth in the oven, while Monterey Jack creates a bubbling golden topping. Serve it with tortilla chips, toasted bread or fresh vegetables.

This recipe makes four generous servings and works well for game nights, parties and relaxed weekends. Sausage adds a savory, meaty base, while jalapeรฑos provide freshness and adjustable heat. Taco seasoning ties everything together with familiar Tex-Mex spices.

Why These Ingredients Work Together

Cream cheese forms the smooth foundation of the dip. Sour cream loosens the mixture and adds a gentle tang, while Cheddar gives it a sharper cheese flavor. Monterey Jack melts easily and produces a soft, appealing topping.

Ground sausage contributes salt, seasoning and richness. Green onions brighten the heavier ingredients, and jalapeรฑos prevent the dip from tasting flat. Together, they create a jalapeรฑo sausage cheese dip with balanced heat, creaminess and texture.

How to Make Spicy Sausage Taco Dip

Cook the sausage thoroughly before combining it with the dairy ingredients. Break it into small pieces as it browns so guests can scoop the dip easily. Drain the cooked meat carefully because excess fat can separate from the cheese while the dish bakes.

Softened cream cheese blends more easily than cold cream cheese. Stir it with the sour cream, Cheddar, jalapeรฑos, green onions and taco seasoning before adding the sausage. This method distributes the seasoning and peppers evenly throughout the dip.

Spread the mixture in an 8-inch baking dish and finish it with Monterey Jack. Bake until the edges bubble and the cheese begins to turn golden. Let it rest for five minutes before serving so the filling can thicken slightly.

Serving Ideas for a Party Table

Sturdy corn tortilla chips make the most practical accompaniment. Toasted baguette slices and crackers also work well, although you should check their ingredients when serving guests who avoid gluten. Celery, cucumber, carrots and sweet pepper strips provide lighter alternatives.

For a varied appetizer table, serve the dip with Layered Pinto Bean Dip Olรฉ. Its beans, guacamole and salsa bring fresher flavors to the table. Add Sweet-and-Sour Cocktail Sausages for another warm option or offer Zesty Lemon Hummus as a cooler contrast.

Heat Levels and Variations

Remove all the jalapeรฑo seeds and pale inner membranes for a milder result. Keep some of them for extra heat or replace Monterey Jack with Pepper Jack. A few drops of hot sauce can increase the heat without changing the texture.

Lean turkey or chicken sausage reduces some of the fat while keeping the dip satisfying. You can also add drained corn, black beans or diced roasted peppers. Avoid adding watery salsa directly to the mixture because it may prevent the dip from thickening properly.

Prepare the mixture several hours ahead if necessary. Cover and refrigerate it without the Monterey Jack topping. Add the cheese shortly before baking. A refrigerated dip may need about five additional minutes in the oven.

Dietary and Food-Safety Information

This recipe contains cowโ€™s milk and pork. It does not contain eggs or nuts when made with suitable packaged products. Sausage and taco seasoning can contain gluten, soy, milk or other additives, so inspect every label before assigning dietary classifications.

Use certified gluten-free sausage, taco seasoning and tortilla chips when preparing the gluten-free version. Pork makes the recipe unsuitable for halal, kosher and pescatarian diets.

Refrigerate the ingredients until needed and cook ground sausage completely. Do not leave the finished dip at room temperature for more than two hours. Refrigerate leftovers promptly and consume them within three days. More information appears in the FDAโ€™s safe food-handling guidance.

A Light Red Wine Pairing

Purcari Pinot Noir 1827 provides a lighter alternative to a heavy red wine. This Moldovan wine consists entirely of Pinot Noir grapes and offers strawberry, cherry, cranberry and subtle spice. Its soft tannins complement the sausage and melted cheese without making the jalapeรฑo heat seem stronger. Serve it lightly chilled at 14โ€“16ยฐC.

Bring spicy sausage taco dip to the table while the topping remains melted and the center stays creamy. The combination of seasoned meat, peppers and cheese makes it a dependable appetizer for almost any informal gathering.


Spicy Shrimp Bacon Dip

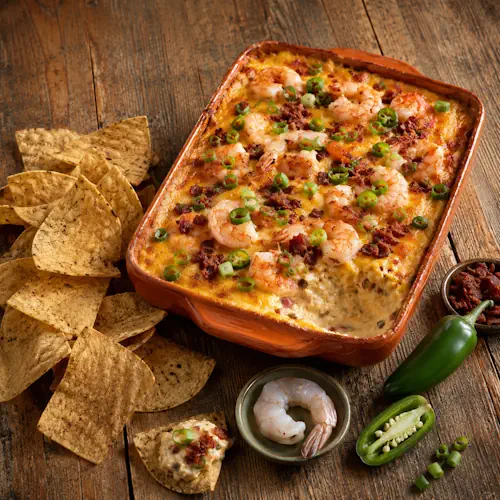
Spicy shrimp bacon dip topped with melted cheese, crispy bacon and sliced jalapeรฑos

Spicy Shrimp Bacon Dip

A rich oven-baked dip filled with tender shrimp, crispy bacon, jalapeรฑos and three creamy cheeses. Serve it bubbling hot for a spicy party appetizer.
Couverts4 servings
Preparation 15 minutes
Preparation time:25 minutes
Resting Time 5 minutes
estimated costs pp $3.25
Deel op Facebook Print Recipe

Equipment

  • Baking dish (8-inch),
  • Large skillet
  • Measuring cups
  • Measuring spoons
  • Mixing bowl
  • Sharp knife
  • Wooden spoon

Instructions

  • Preheat the oven to 350ยฐF (175ยฐC).
  • Cook the chopped bacon in a large skillet over medium heat until crisp.
  • Transfer the bacon to a paper towel-lined plate and drain well.
  • Combine the cream cheese, mayonnaise, Cheddar and green onions in a mixing bowl.
  • Fold in the shrimp, jalapeรฑos and taco seasoning.
  • Spread the mixture evenly in an 8-inch baking dish.
  • Top with the Monterey Jack and crispy bacon.
  • Bake for 20 to 25 minutes, until hot and bubbling around the edges.
  • Let the dip rest for 5 minutes before serving.

Notes & Wine Advice

Serving Suggestions

Serve the dip warm with tortilla chips, toasted baguette slices, crackers, celery sticks or sweet bell pepper strips.

Recipe Notes

The ingredient quantities have been adjusted to make four generous servings. Drain the cooked bacon thoroughly and pat the shrimp dry before adding them. Excess moisture or bacon fat can make the dip greasy or watery.

Dietary Information

This recipe is naturally low in carbohydrates and contains no nuts. To classify it as gluten-free, use certified gluten-free bacon, mayonnaise, taco seasoning and tortilla chips. It contains shellfish, cowโ€™s milk and egg. Bacon means the recipe is not pescatarian, halal or kosher.

Nutrition Information

The nutritional values are estimates calculated for one-quarter of the complete recipe. The original values were too low for the listed quantities because cream cheese, mayonnaise, bacon and two shredded cheeses contribute substantial fat and calories. Sodium varies considerably between bacon, shrimp, cheese and taco-seasoning brands.

Variations

For a milder dip, remove the jalapeรฑo seeds or replace the jalapeรฑos with diced green bell pepper. For extra heat, add cayenne pepper or a few drops of hot sauce. Smoked Cheddar can replace regular Cheddar for a deeper flavor.

Storage

Refrigerate leftovers in a covered container within 2 hours and use them within 2 days. Reheat only the amount needed until piping hot. Do not leave this seafood and dairy dip at room temperature throughout a party.

Wine Advice

Serve this rich, spicy dip with Gรฉrard Bigonneau Reuilly Blanc. This French Loire wine is made entirely from Sauvignon Blanc grapes and offers citrus, green apple and mineral notes. Its lively acidity refreshes the palate after the creamy cheese and bacon, while its citrus character complements the shrimp. Serve it at 8โ€“10ยฐC.

Nutrition values

Calories: 495 kcal | koolhydraten: 6 g | Eiwitten: 27 g | Vet: 41 g | Verzadigd vet: 17 g | Natrium: 1150 mg | Suiker: 2 g
————————————————————————————————–

Spicy shrimp bacon dip combines tender shrimp, crisp bacon, jalapeรฑos and three creamy cheeses in one hot, satisfying appetizer. Baking brings everything together and creates a bubbling cheese topping with lightly golden edges. Serve it warm with tortilla chips, toasted bread, crackers or crisp vegetables.

This recipe makes four generous servings and suits game nights, holiday gatherings and relaxed weekends. Shrimp adds a mild seafood flavor, bacon brings smokiness and jalapeรฑos cut through the rich cheese mixture. Taco seasoning adds warmth without requiring a long list of separate spices.

Why This Combination Works

Cream cheese forms a smooth base, while mayonnaise keeps the mixture soft enough for dipping. Cheddar supplies a sharp, savory flavor, and Monterey Jack melts into a creamy topping. Together, these ingredients create richness without hiding the shrimp completely.

Crispy bacon contributes salt and texture. Jalapeรฑos provide freshness and controlled heat, while green onions add a light onion flavor. The result is a hot seafood cheese dip with enough contrast to keep every bite interesting.

How to Make Spicy Shrimp Bacon Dip

Cook the chopped bacon until crisp, then drain it thoroughly on paper towels. Removing the excess bacon fat prevents the finished dip from becoming oily. Pat the cooked shrimp dry as well because moisture from the shrimp can thin the cheese mixture during baking.

Soften the cream cheese before mixing it with the mayonnaise, Cheddar and green onions. Soft cream cheese blends more evenly and prevents small lumps. Fold in the shrimp, jalapeรฑos and taco seasoning, then spread everything in an 8-inch baking dish.

Finish with Monterey Jack and the drained bacon. Bake until the edges bubble and the topping begins to turn golden. Let the dish rest for five minutes before serving. This short pause thickens the mixture slightly and makes dipping easier.

Serving Ideas for Parties

Tortilla chips provide a sturdy scoop and match the Tex-Mex flavors. Toasted baguette slices offer a more substantial option, while celery, cucumber and sweet pepper strips add freshness. Place several choices around the baking dish so guests can choose a lighter or richer combination.

For a larger appetizer table, serve it beside Sweet-and-Sour Cocktail Sausages or a cool bowl of Zesty Lemon Hummus. The fresh hummus balances the creamy dip, while the sausages create a hearty party spread. You could also follow it with Tropical Seafood Pizza for a seafood-themed menu.

Useful Variations

Remove the jalapeรฑo seeds for milder heat or leave some seeds in for a stronger kick. Add a pinch of cayenne or a few drops of hot sauce if you enjoy more spice. Smoked Cheddar deepens the bacon flavor, while Pepper Jack can replace Monterey Jack for additional heat.

You can prepare the cheese mixture several hours ahead. Cover and refrigerate it without the final topping. Add the Monterey Jack and bacon shortly before baking. The chilled dip may need approximately five additional minutes in the oven.

Dietary and Food-Safety Notes

This recipe contains shellfish, cowโ€™s milk and egg because regular mayonnaise includes egg. Bacon makes it unsuitable for pescatarian, halal and kosher diets. For a gluten-free version, check the labels on the bacon, mayonnaise, taco seasoning and serving chips. Cross-contamination can occur in packaged seasonings and processed meat.

Keep the dip refrigerated until baking and do not leave it at room temperature for longer than two hours. Refrigerate leftovers promptly and use them within two days. Reheat only the portion you plan to eat until it becomes piping hot. The FDA provides additional guidance about safe food handling and refrigeration.

A Fresh Wine Match

Serve the dip with Gรฉrard Bigonneau Reuilly Blanc. This French Loire wine consists entirely of Sauvignon Blanc grapes. Citrus, green apple and mineral notes complement the shrimp, while its lively acidity refreshes the palate after the cheese and bacon. Serve the wine chilled at 8โ€“10ยฐC.

Bring spicy shrimp bacon dip to the table while the cheese remains warm and creamy. Its mixture of seafood, smoky bacon, melted cheese and jalapeรฑo heat makes it a dependable centerpiece for a relaxed appetizer spread.


Gruyรจre French Onion Soup

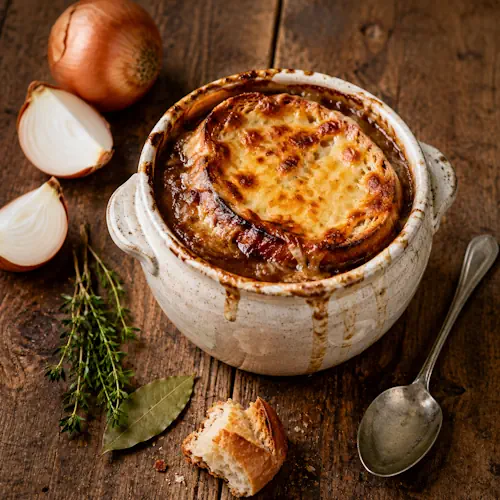
Gruyรจre French onion soup topped with toasted baguette and melted cheese

Gruyรจre French Onion Soup

A deeply savory French soup with slowly caramelized onions, thyme and vegetable broth, finished with toasted baguette and a bubbling layer of Gruyรจre and Parmesan-style cheese.
Couverts4 servings
Preparation 15 minutes
Preparation time:55 minutes
estimated costs pp $3.25
Deel op Facebook Print Recipe

Equipment

  • Baking sheet
  • Dutch oven or large pot
  • Knife
  • Oven-safe soup bowls
  • Soup ladle
  • Wooden spoon

Instructions

  • Melt the butter with the olive oil in a Dutch oven over medium heat.
  • Add the sliced onions.
  • Reduce the heat to medium-low.
  • Cook for 35 to 40 minutes.
  • Stir every few minutes until the onions become soft, deeply golden and caramelized.
  • Add a splash of water if the onions begin sticking before they caramelize.
  • Pour in the vegetable broth.
  • Add the thyme and bay leaf.
  • Bring the soup to a gentle simmer.
  • Cook uncovered for 10 minutes.
  • Remove the bay leaf.
  • Season with salt and black pepper.
  • For the Cheese Toasts
  • Preheat the oven to 200ยฐC.
  • Arrange the baguette slices on a baking sheet.
  • Toast for 5 to 7 minutes.
  • Turn the bread halfway through the cooking time.
  • Preheat the broiler.
  • Divide the hot soup among 4 oven-safe bowls.
  • Place one toasted baguette slice on each bowl.
  • Combine the Gruyรจre-style and Parmesan-style cheeses.
  • Divide the cheese evenly over the bread.
  • Place the bowls under the broiler.
  • Broil for 2 to 3 minutes until the cheese has melted and developed golden spots.
  • Remove the bowls carefully.
  • Serve immediately.

Notes & Wine Advice

Serving Suggestions

Serve the soup immediately with a simple green salad. The cheese-topped baguette makes each bowl quite filling, so additional bread is optional.

Recipe Notes

Slow caramelization gives the soup its characteristic depth. Keep the heat at medium-low and allow the onions to become deeply golden. Increasing the heat may burn the onions before their natural sugars develop properly.

Dietary Information

This version uses vegetable broth and cheeses made with microbial or vegetarian rennet. Traditional Parmesan and some Gruyรจre cheeses contain animal rennet and therefore do not meet a vegetarian diet. Check the bread, broth and cheese labels for nut warnings when preparing the soup for someone with a nut allergy.

Nutrition Information

The original estimate of 320 calories per serving is too low for the stated quantities. The recipe contains 300 g of cheese, which contributes more than 300 calories to each serving before adding the bread, onions, butter and olive oil. The revised estimate is approximately 560 calories per bowl. Sodium varies considerably according to the broth, bread and cheese brands.

Variations

Use beef broth for a more traditional variation, but the soup will no longer be vegetarian. For a lighter topping, reduce the total cheese from 300 g to 200 g. A small splash of dry white wine can be added after caramelizing the onions.

Storage

Refrigerate the soup without the bread and cheese in an airtight container for up to 3 days. Reheat it until steaming hot, then add freshly toasted bread and cheese. Store the bread separately to prevent it from becoming soggy.

Wine Advice

A lightly oaked Chardonnay complements the sweet onions and melted cheese. A light Pinot Noir also works well without overwhelming the soup. Explore suitable wines at Renรฉโ€™s Wijnbeleving.

Nutrition values

Serving: 1 bowl with cheese toast | Calories: 560 kcal | koolhydraten: 37 g | Eiwitten: 28 g | Vet: 35 g | Verzadigd vet: 19 g | Natrium: 1250 mg | Suiker: 11 g
————————————————————————————————–

Gruyรจre French onion soup combines deeply caramelized onions with aromatic thyme, savory vegetable broth and crisp baguette. A generous layer of melted cheese turns each bowl into a complete comfort-food experience. The recipe uses simple ingredients, but slow cooking gives the soup its characteristic color, sweetness and depth.

This version makes four substantial servings. It uses vegetable broth and vegetarian cheeses so the completed dish remains suitable for vegetarians. Traditional versions often contain beef broth, while authentic Gruyรจre and Parmesan may use animal rennet. Choosing appropriate products therefore matters when applying a vegetarian classification.

Caramelizing the Onions Properly

The onions need 35 to 40 minutes over medium-low heat. During this time, their moisture evaporates and their natural sugars gradually develop richer flavors. Stir every few minutes to encourage even browning.

A heavy Dutch oven distributes heat more consistently than a thin saucepan. If browned residue begins sticking to the bottom, add a small splash of water and scrape it loose with a wooden spoon. This residue contains concentrated flavor and should remain in the soup unless it has burned.

Do not rush the process by increasing the heat. High heat can darken the outside of the onions while leaving them firm and sharp. Properly caramelized onions should feel soft and look evenly deep golden rather than blackened.

Gruyรจre French Onion Soup

Once the onions reach the correct color, vegetable broth transforms them into a savory soup. Thyme supports their sweetness, while a bay leaf adds subtle herbal depth. Ten minutes of gentle simmering brings the flavors together without reducing the liquid too aggressively.

Taste the soup before adding more salt. Vegetable broth and cheese can both contain substantial amounts of sodium. Using low-sodium broth gives you more control over the final seasoning.

If you enjoy rich vegetable side dishes, Creamed Spinach with Garlic and Onion provides another comforting option. The soup also pairs naturally with Roasted Butternut Squash with Onion and Fennel.

Creating the Cheese Topping

Toast the baguette before placing it on the soup. Dry, crisp bread floats more effectively and absorbs the broth gradually rather than becoming soggy immediately. Turn the slices halfway through to brown both sides.

Combining Gruyรจre-style and Parmesan-style cheeses produces a topping with both good melting qualities and savory intensity. Divide the cheese evenly so each bowl receives the same amount. Place the bowls close enough to the broiler for rapid melting, but watch them continuously because cheese can burn within seconds.

This cheese-topped onion soup requires bowls that manufacturers specifically describe as oven-safe. Ordinary serving bowls may crack under the intense heat of a broiler. Use oven gloves and warn diners that the bowls remain extremely hot.

Serving a Balanced Meal

One bowl already contains bread and approximately 75 grams of cheese, making it richer than a simple broth-based starter. Serve it with a green salad, steamed vegetables or a lightly dressed tomato salad. These fresher accompaniments balance the buttery onions and melted cheese.

For a larger meal, follow it with a modest main course or serve smaller soup portions. The Classic Homestyle Bread Dressing works well on a holiday table, although pairing both dishes creates a particularly filling menu.

Nutrition and Dietary Details

The original nutrition estimate of 320 calories does not match the listed ingredients. Three hundred grams of cheese divided among four portions contributes more than 300 calories per bowl before adding butter, oil, onions and bread. A more realistic estimate is approximately 560 calories per serving.

The soup only qualifies as vegetarian when the broth contains no meat and both cheeses use microbial or vegetarian rennet. It contains milk, lactose, gluten and wheat. Check labels for allergen warnings and production methods instead of relying solely on the product name.

Storage and Safe Reheating

Store the soup separately from the bread and cheese. Refrigerate it in an airtight container for up to three days. Reheat only the quantity you need until it becomes steaming hot, then prepare fresh cheese toasts.

Do not store leftover soup in the oven-safe serving bowls unless they have suitable airtight lids. Follow the FDAโ€™s safe food-handling guidance for cooling, refrigerating and reheating prepared foods.

Patient cooking and carefully selected ingredients give Gruyรจre French onion soup its full character. Deeply golden onions, savory broth, crisp bread and bubbling cheese create a classic French-inspired meal that suits family dinners, relaxed weekends and special occasions.