Crispy Air-Fryer Vegetable Spring Rolls

Air fryer spring rolls filled with noodles and vegetables

Crispy Air-Fryer Vegetable Spring Rolls

Crispy Air-Fryer Vegetable Spring Rolls are filled with rice noodles, cabbage, carrot, ginger, and Chinese five-spice. They become golden and crunchy with considerably less oil than traditionally fried spring rolls.
Couverts4 servings
Preparation 20 minutes
Preparation time:15 minutes
Total time 35 minutes
estimated costs pp $1.50
Deel op Facebook Print Recipe

Equipment

  • Air fryer, 5- or 6-quart
  • Bowls, medium and small
  • Kitchen scissors
  • Parchment paper
  • Pastry brush
  • Wire rack

Ingredients

For the Noodles

For the Vegetable Filling

For the Spring Rolls

Instructions

Prepare the Noodles

  • Place the rice vermicelli noodles in a medium bowl.
  • Cover the noodles with boiling water.
  • Leave them to soften for approximately 2 minutes.
  • Drain the noodles thoroughly.
  • Cut the noodles into shorter lengths with kitchen scissors.

Cook the Vegetable Filling

  • Line the air-fryer basket with parchment paper.
  • Add the garlic, ginger, shallot, carrot, Napa cabbage, Chinese five-spice powder, sesame oil, and peanut oil.
  • Toss until evenly combined.
  • Air-fry at 175ยฐC (350ยฐF) for 5 minutes, or until the vegetables have softened.
  • Transfer the cooked vegetables to a medium bowl.
  • Combine the soy sauce and cornstarch in a small bowl.
  • Add the soy sauce mixture and noodles to the vegetables.
  • Toss until thoroughly combined.
  • Allow the filling to cool to room temperature.

Assemble the Spring Rolls

  • Place one spring roll wrapper on a clean work surface.
  • Place approximately 1/4 cup filling in a line one-third of the way up from the bottom edge.
  • Leave a 3/4-inch border on both sides.
  • Fold the bottom of the wrapper over the filling.
  • Fold both sides inward and roll the wrapper up firmly.
  • Brush the final edge with water and press to seal.
  • Repeat with the remaining wrappers and filling.

Air-Fry the Spring Rolls

  • Preheat the air fryer to 175ยฐC (350ยฐF) for 3 minutes.
  • Spray the spring rolls generously with cooking spray.
  • Arrange five spring rolls in the basket without allowing them to overlap.
  • Air-fry for 12 minutes, turning halfway through, until golden and crisp.
  • Transfer the cooked spring rolls to a wire rack.
  • Repeat with the remaining five spring rolls.
  • Serve hot with your preferred dipping sauce.

Notes & Wine Advice

Serving Suggestions

Serve the spring rolls hot with sweet chilli sauce, plum sauce, soy dipping sauce, or a ginger-lime dip. They also work well alongside fried rice, noodles, or a crunchy Asian-style salad.

Recipe Notes

Allow the filling to cool completely before assembling the rolls. Warm filling creates steam and can soften or tear the wrappers. Do not overfill them, and keep unused wrappers covered with a slightly damp kitchen towel to prevent drying.

Variations

Add sliced mushrooms, bean sprouts, spring onions, or finely chopped water chestnuts. Peanut oil can be replaced with vegetable oil. For extra heat, add chilli flakes or finely chopped fresh chilli to the vegetable filling.

Storage

Store cooked spring rolls in an airtight container in the refrigerator for up to two days. Reheat them in the air fryer at 175ยฐC (350ยฐF) for 4 to 6 minutes. Uncooked rolls can be frozen in a single layer and transferred to a freezer container once firm.

Wine Advice

A crisp Riesling balances the savoury filling and complements sweet or spicy dipping sauces. Sauvignon Blanc is another refreshing choice.

Nutrition values

Serving: 1 spring roll | Calories: 105 kcal | koolhydraten: 18 g | Eiwitten: 2.5 g | Vet: 2.5 g | Verzadigd vet: 0.4 g | Natrium: 230 mg | Suiker: 1.5 g
————————————————————————————————–

Air fryer spring rolls deliver a crisp, golden wrapper and a savoury vegetable filling without the large quantity of oil required for deep-frying. Inside each roll is a colourful mixture of rice vermicelli, Napa cabbage, carrot, shallot, garlic, ginger, and Chinese five-spice. Sesame and peanut oils add nutty depth, while soy sauce gives the filling its characteristic savoury flavour.

A Lighter Way to Make Spring Rolls

Traditional spring rolls are commonly submerged in hot oil until crisp. An air fryer uses rapidly circulating hot air instead, allowing the wrappers to become golden with only a coating of cooking spray. The result is lighter and less greasy while still providing the crunch expected from a freshly cooked spring roll.

Cooking the vegetables in the air fryer before assembling the rolls softens them and removes some excess moisture. This step also develops the flavours of the ginger, garlic, shallot, and Chinese five-spice. Explore more convenient recipes in the air-fryer collection.

Preparing a Balanced Filling

Rice vermicelli gives the filling structure without making it heavy. Soak the noodles only until tender, drain them thoroughly, and cut them into shorter lengths. Long strands can make the rolls difficult to fill, roll, and eat.

Napa cabbage has a mild flavour and tender texture that work particularly well in spring rolls. Finely shred it so the filling cooks evenly. The carrot should be cut into thin matchsticks, while the shallot, garlic, and ginger need to be chopped finely enough to spread throughout the mixture.

Cornstarch thickens the soy sauce and helps it cling to the noodles and vegetables. Allow the completed filling to cool to room temperature before placing it on the wrappers. Warm filling produces steam, which can soften the pastry or cause it to tear.

Rolling Them Neatly

Place the filling slightly below the centre of each wrapper, leaving space along the sides. Fold the bottom edge over the filling, bring both sides inward, and continue rolling firmly. Brush the final edge with water and press gently to seal it.

Avoid using too much filling. Overfilled wrappers are harder to close and may burst during cooking. Keep wrappers that are waiting to be filled beneath a slightly damp kitchen towel because exposure to air can make them dry, brittle, and difficult to fold.

Food should be prepared on clean surfaces and leftovers must be refrigerated promptly. Further practical information is available in the FDA safe food handling guidance.

Cooking for Maximum Crispness

Coat the assembled rolls generously but evenly with cooking spray. Arrange them in a single layer with space between each one. Overcrowding restricts the airflow and can leave pale or soft areas on the wrappers.

Turn the rolls halfway through cooking so both sides brown evenly. Cooking them in two batches is preferable to forcing all ten into the basket. Transfer each finished batch to a wire rack rather than a flat plate, as air circulation underneath helps preserve the crisp texture.

These crispy vegetable rolls are suitable as an appetiser, party snack, or part of a larger Asian-inspired meal. Serve them with sweet chilli sauce, plum sauce, or a ginger-lime dip. Find more serving ideas among the appetiser recipes and vegetable dishes.

Variations and Storage

Add mushrooms, bean sprouts, spring onions, or finely chopped water chestnuts for additional texture. Fresh chilli or chilli flakes provide extra heat. Replace the peanut oil with vegetable oil when a milder flavour is preferred, although all ingredient labels should still be checked carefully when cooking for someone with an allergy.

Store cooked rolls in an airtight container in the refrigerator for up to two days. Reheat them in the air fryer at 175ยฐC (350ยฐF) for four to six minutes. Microwaving is not recommended because it makes the wrappers soft.

Uncooked rolls can be frozen in a single layer and transferred to a freezer container once firm. With careful rolling and enough space in the basket, air fryer spring rolls become evenly browned, satisfyingly crisp, and easy to serve.

Classic Margherita Pizza

Classic Margherita pizza with fresh mozzarella and basil

Classic Margherita Pizza

Classic Margherita Pizza features a crisp crust topped with rich tomato sauce, fresh mozzarella, fragrant basil, and extra-virgin olive oil. A simple Italian pizza made with fresh ingredients.
Couverts4 servings
Preparation 20 minutes
Preparation time:15 minutes
estimated costs pp $2.50
Deel op Facebook Print Recipe

Equipment

  • Baking sheet or pizza stone
  • Knife
  • Rolling Pin

Ingredients

For the Pizza Base

  • 1 gluten-free pizza crust
  • 1 tablespoon extra-virgin olive oil

For the Toppings

  • 150 g tomato sauce
  • 200 g fresh mozzarella cheese sliced
  • 12 fresh basil leaves
  • 1 tablespoon extra-virgin olive oil
  • Salt to taste

Instructions

Prepare the Pizza Base

  • Preheat the oven to 220ยฐC (425ยฐF).
  • Place the pizza crust on a baking sheet or preheated pizza stone.
  • Brush the crust evenly with 1 tablespoon extra-virgin olive oil.

Add the Toppings

  • Spread the tomato sauce in a thin, even layer over the pizza crust.
  • Arrange the fresh mozzarella slices evenly over the tomato sauce.

Bake and Finish

  • Bake for 12 to 15 minutes, or until the crust is golden and the mozzarella has melted.
  • Remove the pizza from the oven.
  • Scatter the fresh basil leaves over the pizza.
  • Drizzle with the remaining tablespoon extra-virgin olive oil.
  • Season lightly with salt.
  • Cut into four equal portions and serve immediately.

Notes & Wine Advice

Serving Suggestions

Serve the pizza with an arugula salad, grilled vegetables, or a simple tomato and cucumber salad. A small bowl of olives makes a suitable Italian-inspired accompaniment.

Recipe Notes

Drain the fresh mozzarella thoroughly and pat it dry before adding it to the pizza. Excess moisture can make the centre of the crust soggy. Add the basil after baking to preserve its fresh flavour, colour, and aroma.

Variations

Add sliced cherry tomatoes, roasted garlic, chilli flakes, or a light drizzle of balsamic glaze. A traditional wheat pizza crust can replace the gluten-free crust when gluten does not need to be avoided.

Storage

Store leftover pizza in an airtight container in the refrigerator for up to two days. Reheat it in a hot oven or dry frying pan until the crust is crisp and the mozzarella is thoroughly heated.

Wine Advice

A crisp Pinot Grigio complements the tomato, mozzarella, and fresh basil. A light Chianti is a suitable red-wine alternative.

Nutrition values

Serving: 1 1/4 pizza | Calories: 300 kcal | koolhydraten: 30 g | Eiwitten: 18 g | Vet: 16 g | Verzadigd vet: 7 g | Natrium: 620 mg | Suiker: 5 g
————————————————————————————————–

Classic Margherita pizza proves that a memorable meal does not require a long list of ingredients. A crisp pizza crust, rich tomato sauce, creamy fresh mozzarella, aromatic basil, and extra-virgin olive oil come together in a balanced Italian favourite. Each ingredient remains clearly recognisable, which makes freshness and careful preparation especially important.

The Story Behind This Italian Favourite

Margherita pizza is closely associated with Naples and is known for its simple red, white, and green topping. Tomato represents the red, mozzarella provides the white, and fresh basil adds the green. These colours are often connected with the Italian flag, although the pizzaโ€™s precise historical origin has been debated.

Whatever its exact history, the recipe has become one of the most recognisable examples of Italian cooking. Its appeal lies in the contrast between tangy tomato, mild cheese, fragrant herbs, and a crisp base. You can find more traditional inspiration among the Italian recipes or explore other combinations in the pizza collection.

Choosing the Best Ingredients

Use a tomato sauce with a smooth consistency and a clean tomato flavour. A heavily seasoned sauce can overpower the mozzarella and basil. If the sauce is watery, allow it to drain or simmer briefly before spreading it over the crust. Only a thin layer is needed to provide flavour without making the base soggy.

Fresh mozzarella contains considerably more moisture than grated pizza cheese. Drain it thoroughly and pat the slices dry with kitchen paper before assembling the pizza. Leaving the sliced mozzarella in a strainer for 15 to 20 minutes can remove additional liquid and improve the final texture.

Fresh basil should be bright green and free from dark or wilted areas. Add it after baking so it retains its colour and aroma. Extra-virgin olive oil provides the finishing touch, so choose one with a flavour you enjoy. Discover more dishes featuring melted and fresh cheeses in the cheese recipes section.

Creating a Crisp Pizza Base

A fully preheated oven is essential. If using a pizza stone, place it in the oven before preheating so that it becomes thoroughly hot. This intense heat starts crisping the bottom of the crust immediately and helps prevent a soft centre.

Spread the tomato sauce thinly, leaving a small border around the edge. Arrange the mozzarella with some space between the slices instead of covering the entire surface. This allows moisture to evaporate during baking and creates attractive areas of tomato between the melted cheese.

Food safety still matters with a simple recipe. Keep chilled mozzarella refrigerated until needed, clean preparation surfaces properly, and refrigerate leftovers promptly. More practical information is available in the FDA safe food handling guidance.

Serving Ideas and Variations

This traditional mozzarella pizza makes a satisfying light dinner or lunch when served with an arugula salad, grilled vegetables, olives, or tomato salad. A crisp Pinot Grigio complements the tomato and basil, while a light Chianti is suitable for anyone who prefers red wine.

For gentle heat, sprinkle chilli flakes over the pizza after baking. Roasted garlic adds depth without changing its basic character too much. Cherry tomatoes, a little Parmesan, or a drizzle of balsamic glaze can also be added, although using too many toppings will move the result away from the simplicity that defines the original.

Storage and Reheating

Store leftover pizza in an airtight container in the refrigerator for up to two days. Reheat it in a hot oven for approximately five minutes or place it in a dry frying pan over medium-low heat. Cover the pan briefly so the mozzarella warms while the base becomes crisp again.

A microwave will heat the pizza quickly but usually produces a softer crust. Add a few fresh basil leaves after reheating to restore its fresh aroma. With careful preparation and good-quality ingredients, Classic Margherita pizza remains one of the simplest and most satisfying ways to enjoy homemade Italian food.


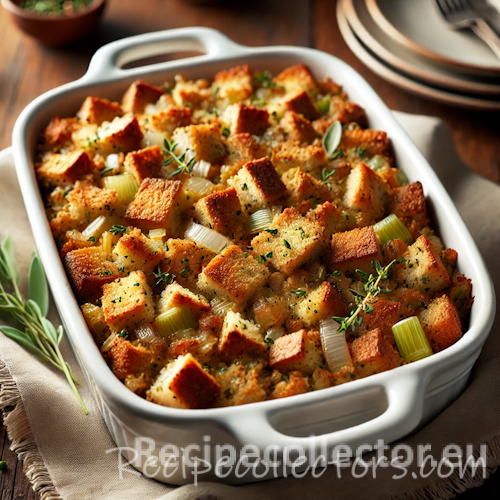
Classic Bread Dressing

Classic bread dressing with a soft centre and crisp golden topping

Classic Bread Dressing

Traditional bread dressing with tender onion, celery, vegetable broth, and nondairy butter. Soft and savoury inside with a crisp golden top, it is ideal for holiday meals.
Couverts4 servings
Preparation 15 minutes
Preparation time:45 minutes
Resting Time 5 minutes
Total time 1 hour 5 minutes
estimated costs pp $1.25
Deel op Facebook Print Recipe

Equipment

  • Baking Dish, 9-inch square glass
  • Knife
  • Mixing Bowl, Large
  • oven
  • Saucepan, Medium

Ingredients

Instructions

  • Preheat the oven to 350ยฐF (180ยฐC).
  • Lightly grease a 9-inch square glass baking dish.
  • Melt 2 tablespoons of the nondairy butter in a medium saucepan over medium heat.
  • Add the chopped onion and celery.
  • Cook for 5 to 7 minutes, stirring occasionally, until softened, translucent, and fragrant.
  • Melt the remaining 4 tablespoons of nondairy butter.
  • Place the stale bread cubes in a large mixing bowl.
  • Add the sautรฉed onion and celery, melted butter, and vegetable broth.
  • Gently toss until the bread is evenly moistened.
  • Transfer the mixture to the prepared baking dish and spread it into an even layer.
  • Bake uncovered for 40 to 45 minutes, until the centre is hot and the top is crisp and golden brown.
  • Let rest for 5 minutes before serving.

Notes & Wine Advice

Serving Suggestions

Serve the bread dressing with roasted vegetables, mashed potatoes, green beans, vegan gravy, or a festive plant-based roast. It is particularly suited to Christmas and Thanksgiving dinners.

Recipe Notes

Stale bread absorbs the broth without immediately becoming mushy. If the bread is still fresh, cut it into cubes and dry it in a 225ยฐF (110ยฐC) oven for about 1 hour before preparing the dressing. The unbaked mixture can also be used as a stuffing base in another recipe.

Variations

Add fresh sage, thyme, parsley, or rosemary for a more aromatic dressing. Mushrooms, chopped apples, dried cranberries, or vegan sausage can be included for extra flavour and texture.

Storage

Allow leftovers to cool before transferring them to an airtight container. Refrigerate for up to three days. Reheat in a covered baking dish, then uncover during the final few minutes to restore the crisp topping.

Wine Advice

A dry Sauvignon Blanc balances the rich, buttery bread and savoury vegetables. A light Pinot Noir is an excellent red alternative for a holiday dinner.

Nutrition values

Serving: 1 gr | Calories: 230 kcal | koolhydraten: 30 g | Eiwitten: 5 g | Vet: 10 g | Verzadigd vet: 2 g | Natrium: 620 mg | Suiker: 4 g
————————————————————————————————–

Classic bread dressing transforms stale bread, onion, celery, vegetable broth, and nondairy butter into a comforting holiday side dish. The centre remains soft and savoury while the uncovered baking time creates a crisp golden surface. It is simple enough for a family dinner but feels especially appropriate at Christmas or Thanksgiving.

This recipe is also a practical way to use bread that is no longer fresh enough for sandwiches. Slightly dry bread absorbs the vegetable broth and melted butter without immediately falling apart. That produces a cohesive dressing with recognisable pieces of bread instead of a wet or pasty mixture.

Classic Bread Dressing for Holiday Meals

Onion and celery provide the familiar savoury base associated with traditional American stuffing. Cooking them in nondairy butter before combining them with the bread softens their texture and develops their flavour. The vegetables should become translucent and fragrant without browning heavily.

Vegetable broth moistens the bread and distributes the flavours throughout the dish. Add it evenly and toss gently so that some bread cubes do not remain dry while others become saturated. Find more festive accompaniments in the Side Dish recipes collection.

Choosing and Preparing the Bread

A firm white loaf, sourdough, or rustic country bread all work well. Very soft sliced bread can also be used, but it should be thoroughly dried first. Different breads absorb liquid at different rates, so check the consistency before transferring the mixture to the baking dish.

If your bread is fresh, cut it into cubes and dry it in a low oven. The goal is to remove moisture without heavily toasting the cubes. Once dry, allow them to cool before mixing them with the warm vegetables and broth.

For more ways to use loaves, rolls, and homemade dough, browse the Bread recipes on RecipeCollectors.

Creating a Soft Centre and Crisp Top

The dressing should feel moist before baking but should not contain visible pools of broth. An uncovered baking dish allows moisture to escape and encourages the surface to become crisp. Spreading the mixture evenly helps the centre heat through before the top becomes too dark.

Let the dish rest briefly after baking. This gives the absorbed broth time to settle and makes the portions easier to serve. If you prefer an especially crisp topping, return it to the oven uncovered for a few additional minutes.

Variations and Serving Ideas

This homemade bread stuffing provides a useful foundation for other flavours. Sage, thyme, parsley, or rosemary gives it a more aromatic holiday character. Mushrooms add earthy depth, while chopped apple or dried cranberries introduces sweetness. Crumbled vegan sausage can make it richer and more substantial.

Serve it with mashed potatoes, green beans, roasted vegetables, cranberry sauce, or vegan gravy. More comforting dishes for festive menus can be found among the Oven recipes.

The mixture can be assembled in advance, covered, and refrigerated before baking. A chilled dish may require a few additional minutes in the oven. Cool cooked leftovers promptly and refrigerate them in a covered container. Consult the FDA safe food handling guidelines for general storage and reheating advice.

With its short ingredient list, soft interior, and golden crust, classic bread dressing remains a dependable side dish for relaxed family meals and traditional holiday tables.


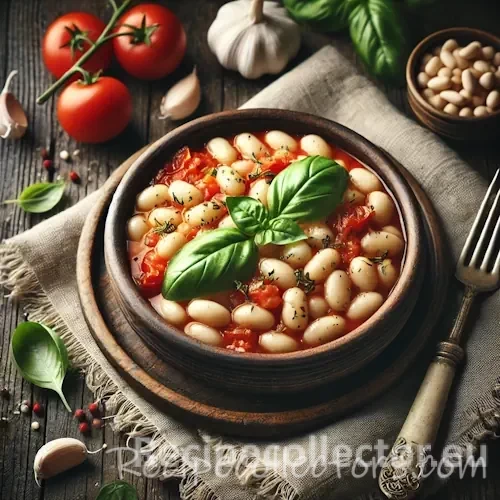
Italian Cannellini Beans

Italian cannellini beans with roasted red peppers, green olives and tomato sauce

Italian Cannellini Beans

Creamy cannellini beans simmered with roasted red peppers, green olives, tomato, oregano, garlic, and red onion. A hearty Italian one-pot meal packed with Mediterranean flavour.
Couverts4 servings
Preparation 10 minutes
Preparation time:35 minutes
estimated costs pp $2.25
Deel op Facebook Print Recipe

Equipment

Ingredients

Instructions

  • Heat the olive oil in a medium saucepan over medium heat.
  • Add the chopped red onion and grated garlic.
  • Cook for about 4 minutes, stirring occasionally, until tender and fragrant.
  • Add the cannellini beans, roasted red peppers, green olives, tomato paste, oregano, vegetable broth, salt, and black pepper.
  • Stir until the tomato paste is evenly distributed.
  • Bring the mixture to a gentle boil.
  • Cover the saucepan and reduce the heat to low.
  • Simmer for 30 minutes, stirring occasionally.
  • Remove the lid during the final few minutes if the sauce needs to thicken.
  • Taste and adjust the seasoning if necessary.
  • Serve warm.

Notes & Wine Advice

Serving Suggestions

Serve the cannellini beans with brown rice, crusty bread, creamy polenta, or roasted potatoes. Steamed broccoli, sautรฉed kale, or a fresh green salad completes the meal without making it too heavy.

Recipe Notes

Rinse the canned beans thoroughly to remove excess liquid and sodium. Because the olives, beans, and vegetable broth can already contain salt, taste the finished dish before adding any additional seasoning.

Variations

Add spinach, kale, zucchini, mushrooms, or artichoke hearts for extra vegetables. Chilli flakes provide gentle heat, while fresh basil or parsley adds freshness immediately before serving.

Storage

Allow leftovers to cool before transferring them to an airtight container. Refrigerate for up to four days or freeze for up to two months. Reheat gently in a saucepan, adding a splash of vegetable broth if needed.

Wine Advice

A light Pinot Noir complements the tomato, olives, and creamy beans. A crisp Sauvignon Blanc offers a refreshing contrast to the savoury Mediterranean flavours.

Nutrition values

Serving: 1 serving | Calories: 290 kcal | koolhydraten: 40 g | Eiwitten: 10 g | Vet: 11 g | Verzadigd vet: 2 g | Natrium: 1100 mg | Suiker: 4 g
————————————————————————————————–

Italian cannellini beans are simmered with roasted red peppers, green olives, tomato paste, oregano, garlic, and red onion to create a hearty Mediterranean-style meal. The beans become creamy as they cook, while the peppers contribute sweetness and the olives add a savoury, briny contrast. Everything comes together in one saucepan with very little hands-on work.

Cannellini beans have a mild flavour and soft interior that works particularly well with robust ingredients. They absorb the tomato, garlic, oregano, and vegetable broth while still retaining their shape. This makes the dish substantial enough to serve as a vegan main course but also suitable as a side dish.

Italian Cannellini Beans in One Pan

The recipe begins by gently cooking red onion and garlic in extra-virgin olive oil. This creates an aromatic base before the beans and remaining ingredients are added. Tomato paste provides concentrated flavour and helps form a rich sauce without requiring a long list of ingredients.

Once everything is combined, the covered saucepan holds in moisture and allows the flavours to develop slowly. Stir the mixture occasionally to prevent the beans from catching on the bottom. For more simple meals centred around legumes, explore the Bean recipes collection.

Balancing Peppers, Olives, and Tomato

Roasted red peppers have a naturally sweet flavour that balances the acidity of the tomato paste. Green olives provide saltiness and a firmer texture, preventing the finished dish from tasting flat or overly soft.

Because canned beans, olives, roasted peppers, and vegetable broth may all contain sodium, it is sensible to taste the dish before adding extra salt. Rinsing the cannellini beans thoroughly can remove some of the liquid and salt from the can.

Ways to Serve This Bean Dish

These Mediterranean white beans pair well with ingredients that can absorb their savoury tomato sauce. Serve them over creamy polenta, brown rice, couscous, or mashed potatoes. Crusty bread is a particularly easy choice for a relaxed lunch or family dinner.

For a lighter plate, add steamed broccoli, sautรฉed kale, roasted zucchini, or a simple green salad. More colourful accompaniments can be found among the Vegetable recipes on RecipeCollectors.

The beans can also be served in smaller portions beside grilled vegetables, fish, or another main dish. Their combination of protein, fibre, and vegetables makes them versatile enough for both everyday meals and larger shared menus.

Variations and Make-Ahead Tips

Spinach or kale can be stirred through during the final few minutes of cooking. Mushrooms, artichoke hearts, or chopped zucchini make the dish even more substantial. Chilli flakes add warmth, while fresh basil or parsley gives the finished sauce a brighter flavour.

This is also a useful make-ahead meal because the flavours continue to develop while refrigerated. Prepare it a day in advance and reheat gently in a saucepan, adding a small splash of broth if the sauce has thickened too much. Browse the Main Course recipes for more easy plant-based dinner ideas.

Cool leftovers promptly and store them in a covered container. General information about safe storage and reheating is available in the FDA safe food handling guidelines.

With creamy beans, sweet roasted peppers, savoury olives, and a fragrant tomato sauce, Italian cannellini beans provide a comforting one-pot dinner using practical pantry ingredients.


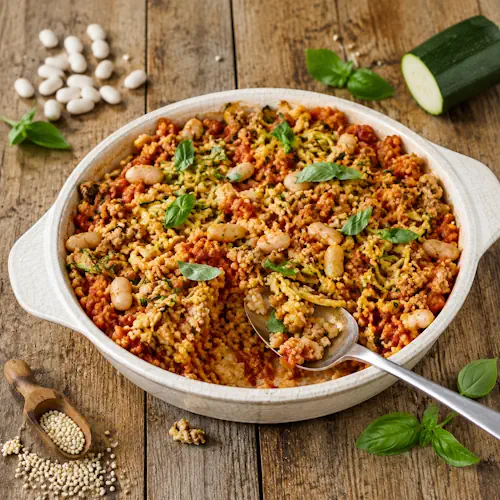
Tempeh Cannellini Couscous Bake

Tempeh couscous bake with cannellini beans, zucchini and tomato

Tempeh Cannellini Couscous Bake

A hearty vegan bake combining creamy cannellini beans, protein-rich tempeh, couscous, zucchini, tomato, garlic, and fresh basil in flavourful foil-baked parcels.
Couverts4 servings
Preparation 10 minutes
Preparation time:1 hour
Resting Time 10 minutes
Total time 1 hour 20 minutes
estimated costs pp $2.25
Deel op Facebook Print Recipe

Equipment

  • aluminum foil
  • Baking sheet
  • Food processor
  • oven

Ingredients

Instructions

  • Preheat the oven to 350ยฐF (180ยฐC).
  • Add the tempeh, cannellini beans, tomato sauce, couscous, yellow zucchini, green zucchini, olive oil, basil, garlic, salt, and black pepper to a food processor.
  • Pulse until the ingredients are evenly combined but the mixture remains slightly chunky.
  • Cut two sheets of aluminum foil, each about 12 inches long.
  • Divide the mixture evenly between the two sheets of foil.
  • Place each portion in the centre of the foil and shape it into a compact log.
  • Roll the foil tightly around each portion and twist the ends to seal.
  • Arrange the foil parcels on a baking sheet.
  • Bake for 1 hour.
  • Remove the parcels from the oven and let them rest for 10 minutes.
  • Carefully open the foil, transfer the mixture to a serving bowl, and fluff it with a fork.
  • Serve warm.

Notes & Wine Advice

Serving Suggestions

Serve the bake with steamed greens, roasted vegetables, or a fresh tomato and cucumber salad. It can be enjoyed as a vegan main course or served in smaller portions as a hearty side dish.

Recipe Notes

Pulse the mixture only until evenly combined. Processing it completely smooth will produce a dense texture. Seal the foil parcels tightly so the couscous can absorb the moisture from the tomato sauce and vegetables while baking.

Variations

Add chopped olives, roasted peppers, oregano, or chilli flakes for extra Mediterranean flavour. Chickpeas can replace the cannellini beans, while fresh parsley can be used instead of basil.

Storage

Allow leftovers to cool before storing them in an airtight container in the refrigerator for up to three days. Reheat in the oven or microwave until thoroughly hot, adding a spoonful of vegetable broth if the couscous seems dry.

Wine Advice

A light Chianti complements the tomato, basil, and cannellini beans. A crisp Pinot Grigio is a refreshing white alternative for this vegetable-rich bake.

Nutrition values

Serving: 1 serving | Calories: 220 kcal | koolhydraten: 28 g | Eiwitten: 9 g | Vet: 8 g | Verzadigd vet: 1 g | Natrium: 4603 mg | Suiker: 4 g
————————————————————————————————–

Tempeh couscous bake combines cannellini beans, crumbled tempeh, couscous, zucchini, tomato sauce, garlic, and basil in one hearty plant-based dish. The mixture cooks inside sealed foil parcels, allowing the couscous to absorb moisture and flavour while the beans and tempeh create a satisfying texture. It works as a vegan main course or a substantial side dish.

This unusual preparation method keeps the ingredients moist without requiring the couscous to be cooked separately. Tomato sauce and water released by the zucchini provide liquid, while extra-virgin olive oil adds richness. Fresh basil and garlic give the bake a Mediterranean character that complements the mild beans and nutty tempeh.

Why This Combination Works

Cannellini beans have a creamy texture and delicate flavour, making them a useful partner for firmer, more savoury tempeh. Couscous absorbs the tomato, basil, and garlic flavours while giving the finished dish a light, fluffy base.

Yellow and green zucchini add colour and moisture without dominating the other ingredients. For more dishes featuring legumes as a central ingredient, explore the Bean recipes collection.

Preparing the Tempeh Couscous Bake

Processing the ingredients briefly ensures they are evenly distributed, but the mixture should remain slightly chunky. Blending for too long can turn the beans and tempeh into a paste and produce a heavier finished texture.

Pulse just until no large pieces remain, then divide the mixture evenly between the foil sheets. Shape each portion into a compact log and seal the foil tightly. The enclosed steam helps cook the couscous and prevents the mixture from drying out during its hour in the oven.

Place the parcels on a baking sheet before transferring them to the oven. This provides support and catches any liquid if the foil is accidentally punctured.

Serving It as a Complete Meal

After baking, allow the parcels to rest before opening them. Steam will escape when the foil is unwrapped, so open each parcel carefully and away from your face. Transfer the contents to a bowl and fluff them with a fork to separate the couscous.

Serve this cannellini bean bake with steamed greens, roasted vegetables, or a tomato and cucumber salad. You can find more substantial plant-based ideas among the Main Course recipes.

The dish also works in smaller portions alongside grilled vegetables or a fresh salad. The creamy beans, chewy tempeh, and fluffy couscous provide enough contrasting textures to keep the meal satisfying without needing a heavy sauce.

Simple Variations

Chopped olives, roasted peppers, chilli flakes, oregano, or parsley can all be added for extra Mediterranean flavour. Chickpeas can replace the cannellini beans when you prefer a firmer texture. Finely chopped spinach is another useful addition, although excess moisture should be squeezed out first.

For more inspiration using seasonal produce, browse the Vegetable recipes collection. Leftovers can be added to stuffed peppers, wraps, grain bowls, or salads the following day.

Allow leftovers to cool promptly before transferring them to a covered container. Store them in the refrigerator and reheat until thoroughly hot. General guidance about storing and reheating prepared food is available in the FDA safe food handling guidelines.

With beans, tempeh, vegetables, and couscous together in one parcel, this vegan bake offers a practical way to prepare a filling meal using simple ingredients and minimal washing up.


Spicy Seitan Poppers

Spicy seitan poppers filled with vegan cheese and jalapeรฑos

Spicy Seitan Poppers

Crispy vegan seitan poppers stuffed with creamy vegan cheese and spicy jalapeรฑos, coated in a light beer batter and fried until golden. Perfect for parties and game day.
Couverts4 servings
Preparation 20 minutes
Preparation time:15 minutes
estimated costs pp $2.50
Deel op Facebook Print Recipe

Equipment

  • cast-iron skillet
  • Measuring cups
  • Mixing Bowl, Large
  • Mixing Bowl, Medium
  • Paper towels
  • Plate

Ingredients

For the Seitan

For the Filling

For the Beer Batter

Instructions

For the Seitan

  • Combine the vital wheat gluten, whole wheat pastry flour, chili powder, paprika, cumin, and black pepper in a large mixing bowl.
  • Add the canola oil, tamari, and water.
  • Mix and knead until a uniform dough forms.
  • Divide the dough into 12 equal pieces.
  • Flatten each piece into a small patty.

For the Filling

  • Place a piece of vegan cheese and 2 jalapeรฑo slices in the centre of each seitan patty.
  • Fold the seitan around the filling and pinch the edges closed.
  • Shape each filled piece into a small log.
  • Repeat until all 12 poppers are filled.

For the Beer Batter

  • Heat about 1/4 inch of canola oil in a cast-iron skillet over medium-high heat.
  • Combine the all-purpose flour, paprika, salt, and black pepper in a medium mixing bowl.
  • Gradually whisk in the beer until a smooth batter forms.
  • Dip each filled seitan popper into the beer batter until completely coated.
  • Carefully place the battered poppers into the hot oil without overcrowding the skillet.
  • Fry for about 3 minutes per side, until crisp and golden brown.
  • Transfer to a paper towel-lined plate to drain.
  • Serve hot.

Notes & Wine Advice

Serving Suggestions

Serve the poppers hot with buffalo sauce, vegan ranch dressing, barbecue sauce, or a spicy mayonnaise for dipping. They are especially suited to game day, parties, movie nights, or a shared snack platter.

Recipe Notes

Seal the seitan firmly around the cheese and jalapeรฑos so the filling stays inside during frying. Fry in small batches to prevent the oil temperature from dropping, which can make the batter absorb too much oil.

Variations

Use a mild vegan cheddar for less heat or add extra jalapeรฑo for a spicier version. Smoked paprika can replace regular paprika for a deeper flavour. A little garlic or onion powder can also be added to the beer batter.

Storage

Store cooled leftovers in an airtight container in the refrigerator for up to three days. Reheat in an oven or air fryer until thoroughly hot and crispy. Avoid reheating in the microwave if you want to preserve the crunchy coating.

Wine Advice

A chilled Riesling works well with the spicy jalapeรฑos because its fresh fruit character balances the heat. A crisp Sauvignon Blanc is another refreshing choice with the rich fried coating.

Nutrition values

Serving: 1 popper | Calories: 210 kcal | koolhydraten: 18 g | Eiwitten: 8 g | Vet: 12 g | Verzadigd vet: 2 g | Natrium: 390 mg | Suiker: 2 g
————————————————————————————————–

Spicy seitan poppers are crispy, golden bites filled with creamy vegan cheese and jalapeรฑos, wrapped in seasoned seitan and finished with a light beer batter. They combine a savoury, chewy centre with a crunchy exterior and enough chilli heat to make them particularly well suited to parties, game days, or a relaxed movie night.

Seitan provides the structure for these poppers. Made primarily from vital wheat gluten, it develops a firm, pleasantly chewy texture when kneaded. Chili powder, paprika, cumin, black pepper, and tamari season the dough from the inside, so the flavour does not depend entirely on the crispy coating.

Building the Filled Seitan Centre

Dividing the dough into equal portions before filling makes the poppers easier to cook evenly. Each piece is flattened before adding vegan cheese and jalapeรฑo slices. The edges are then brought around the filling and firmly sealed.

Take a little extra time when closing them. A good seal helps prevent melted cheese from escaping into the frying oil. If you enjoy plant-based alternatives like this, explore more ideas in the Comfort Food recipes collection.

Why the Beer Batter Gets Crispy

The beer batter creates a different texture from ordinary breading. Flour forms the structure, while beer produces a lighter coating around the seitan. The paprika adds colour and a mild savoury flavour.

Oil temperature matters when frying spicy seitan poppers. If the oil is not hot enough, the coating absorbs excess fat and becomes heavy. Frying in small batches also helps maintain a steady temperature and gives each popper enough room to brown properly.

For more dishes with a crisp golden exterior, browse the Fried Food recipes on RecipeCollectors.

Perfect for Sharing

These vegan jalapeรฑo poppers are made for dipping. Buffalo sauce is a natural choice when you want even more heat, while vegan ranch provides a cool contrast. Barbecue sauce, spicy mayonnaise, or a simple garlic dip also work well.

Serve them as part of a larger snack platter with vegetable sticks, pickles, fries, and other finger foods. More ideas for informal entertaining can be found among the Snack recipes.

Adjusting the Heat and Flavour

The recipe is easy to adapt to different spice preferences. Reduce the amount of jalapeรฑo for a milder popper or add extra slices when you want noticeably more heat. Smoked paprika can replace regular paprika for a deeper character, while garlic or onion powder works well in either the seitan dough or batter.

Different vegan cheeses can also change the result. A cheddar-style variety gives the poppers a familiar sharp flavour, while a milder cheese allows the spices and jalapeรฑos to stand out more clearly.

These poppers are best eaten freshly fried, when the coating is at its crispiest. Refrigerate leftovers promptly and reheat them in an oven or air fryer rather than a microwave. For general information about storing prepared foods safely, follow the FDA safe food handling guidelines.

Crispy outside, chewy inside, and filled with spicy jalapeรฑo and creamy cheese, these plant-based poppers are a satisfying alternative to ordinary party snacks and an easy way to put seitan firmly in the spotlight.


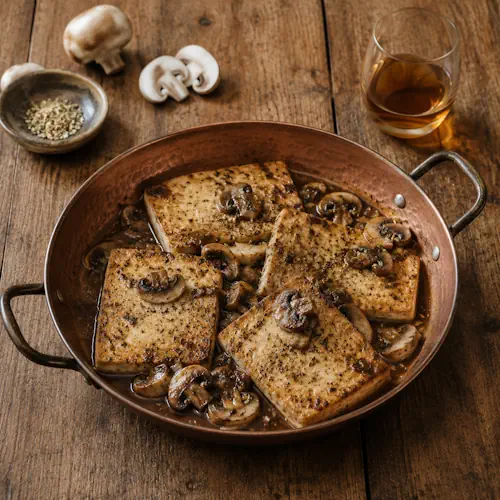
Mushroom Tofu Marsala

Mushroom tofu Marsala with golden tofu steaks and rich wine sauce

Mushroom Tofu Marsala

Golden tofu steaks with tender mushrooms in a rich Marsala wine and sherry sauce. An elegant plant-based Italian-inspired main course for dinner or special occasions.
Couverts4 servings
Preparation 10 minutes
Preparation time:15 minutes
estimated costs pp $3.50
Deel op Facebook Print Recipe

Equipment

Ingredients

Instructions

  • Combine the flour, salt, black pepper, and oregano in a mixing bowl.
  • Coat each tofu steak evenly with the seasoned flour mixture.
  • Heat the olive oil in a large frying pan over medium heat.
  • Add the tofu steaks and cook for 3 to 5 minutes per side, until lightly golden.
  • Add the sliced mushrooms, Marsala wine, and cooking sherry.
  • Cover the pan and simmer for 10 minutes.
  • Turn the tofu halfway through cooking and gently stir the mushrooms to prevent sticking.
  • Remove the lid during the final few minutes if the sauce needs to reduce and thicken.
  • Spoon the mushrooms and Marsala sauce over the tofu steaks and serve hot.

Notes & Wine Advice

Serving Suggestions

Serve the tofu Marsala with wilted kale, roasted vegetables, mashed potatoes, pasta, or creamy polenta. Spoon plenty of mushrooms and Marsala sauce over each tofu steak before serving.

Recipe Notes

Press the tofu thoroughly before coating it with flour. Removing excess moisture helps the flour adhere and allows the tofu to develop a golden crust. Allow the sauce to simmer uncovered for a few extra minutes if you prefer a thicker consistency.

Variations

Add garlic, shallots, fresh thyme, or parsley to the mushrooms for extra flavour. Cremini mushrooms can replace button mushrooms for a deeper, earthier taste.

Storage

Store leftover tofu, mushrooms, and sauce together in an airtight container in the refrigerator for up to three days. Reheat gently in a frying pan, adding a small splash of water if the sauce has become too thick.

Wine Advice

Serve with a dry Marsala to echo the flavours in the sauce. A light Pinot Noir is another excellent choice with the earthy mushrooms and golden tofu.

Nutrition values

Serving: 1 tofu steak with mushrooms and sauce | Calories: 310 kcal | koolhydraten: 20 g | Eiwitten: 22 g | Vet: 20 g | Verzadigd vet: 3 g | Natrium: 620 mg | Suiker: 2 g
————————————————————————————————–

Mushroom tofu Marsala combines golden pan-fried tofu steaks with tender mushrooms and a rich Marsala wine sauce. Inspired by classic Italian Marsala dishes, this plant-based version replaces meat with extra-firm tofu while keeping the savoury mushrooms, herbs, and distinctive wine sauce that give the dish its comforting character.

The tofu is lightly coated with seasoned flour before frying. This simple coating gives each steak a delicate golden crust and also helps the Marsala sauce cling to the surface. Mushrooms add earthy depth, while Marsala wine and cooking sherry create a sauce that is slightly sweet, savoury, and aromatic.

Why Tofu Works Well with Marsala

Extra-firm tofu is particularly useful in recipes with strongly flavoured sauces because it absorbs surrounding flavours while retaining its structure. Pressing it thoroughly before cooking removes excess moisture and makes it easier to brown.

Cutting the tofu into four thick steaks also gives the dish a more substantial presentation. Instead of disappearing into the sauce, each piece becomes the centre of the plate. For more plant-based meal ideas, browse the Main Course recipes on RecipeCollectors.

Building a Rich Mushroom Sauce

After browning the tofu, the mushrooms cook directly in the same pan with the wines. This allows them to pick up the flavours left behind during frying. Covering the pan initially keeps enough moisture inside to cook the mushrooms and warm the tofu through.

If the sauce remains thinner than you prefer, simply remove the lid during the final few minutes. Gentle simmering reduces the liquid and concentrates the flavour. The small amount of flour coating the tofu also contributes naturally to thickening the sauce.

Mushroom lovers can find more hearty combinations among the Comfort Food recipes.

What to Serve Alongside It

This vegan Marsala dish pairs particularly well with sides that can absorb the sauce. Creamy mashed potatoes, polenta, pasta, or rice are all excellent choices. For something lighter, serve it with wilted kale, steamed green beans, roasted asparagus, or a simple green salad.

A mixture of roasted vegetables also works beautifully and adds colour to the plate. Browse the Vegetable recipes for more ideas that can turn the tofu steaks into a complete dinner.

Easy Variations for Different Flavours

Button mushrooms keep the recipe simple, but cremini mushrooms provide a deeper earthy flavour. A mixture of mushrooms can make the dish feel even more special. Shallots or garlic can be sautรฉed before adding the mushrooms, while fresh thyme or parsley adds brightness to the finished sauce.

The Mushroom tofu Marsala is best served immediately while the tofu crust is still lightly crisp and the sauce is hot. Leftovers can nevertheless be refrigerated and reheated gently in a frying pan. Add a tablespoon of water if the sauce becomes too thick during storage.

Prepared leftovers should be cooled and refrigerated promptly. General guidance about safe storage and reheating is available from the FDA safe food handling guidelines.

With golden tofu, earthy mushrooms, and a distinctive wine sauce, this Italian-inspired meal is sophisticated enough for a special occasion while remaining simple enough for a relaxed weekend or family dinner.


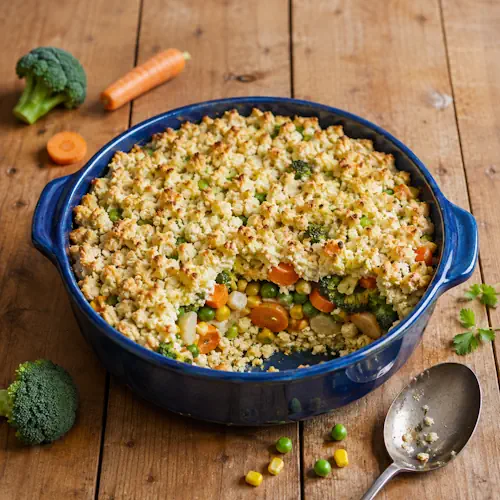
Savory Veggie Tofu Bake

Savory veggie tofu bake with colorful vegetables and golden tofu topping

Savory Veggie Tofu Bake

A hearty vegan casserole layered with seasoned tofu, broccoli, carrots, peas, corn, and water chestnuts. A colorful, protein-rich oven meal with plenty of vegetables.
Couverts4 servings
Preparation 15 minutes
Preparation time:35 minutes
$3.25 5 minutes
estimated costs pp $3.25
Deel op Facebook Print Recipe

Equipment

  • Baking Dish 9 ร— 13-inch
  • Knife
  • Measuring cups
  • Mixing bowls
  • spoon

Ingredients

For the Tofu

For the Vegetables

Instructions

For the Tofu

  • Preheat the oven to 350ยฐF (180ยฐC).
  • Lightly grease a 9 ร— 13-inch baking dish.
  • Crumble the pressed tofu into a mixing bowl until it resembles ricotta.
  • Add the nutritional yeast, olive oil, parsley, salt, and black pepper.
  • Mix until thoroughly combined.
  • Spread half of the tofu mixture evenly over the bottom of the baking dish.
  • Press it gently into an even base and reserve the remaining tofu mixture.

For the Vegetables

  • Combine the carrots, broccoli, peas, corn, water chestnuts, garlic, tamari, olive oil, salt, and black pepper in a large mixing bowl.
  • Toss until the vegetables are evenly coated.
  • Spread the vegetable mixture evenly over the tofu base.
  • Sprinkle the reserved tofu mixture evenly over the vegetables.
  • Bake for 35 minutes, until the vegetables are tender and the tofu topping is lightly golden.
  • Let rest for 5 minutes before serving.

Notes & Wine Advice

Serving Suggestions

Serve the tofu bake with a fresh green salad, roasted potatoes, brown rice, or crusty bread. Because the casserole already contains tofu and plenty of vegetables, it can also be served on its own as a complete main course.

Recipe Notes

Press the tofu well before crumbling it. Removing excess moisture helps create the ricotta-like texture needed for the base and topping. Tamari is used instead of regular soy sauce to keep the recipe gluten-free and wheat-free.

Variations

Replace some of the vegetables with mushrooms, bell peppers, zucchini, spinach, or cauliflower. Add smoked paprika, chilli flakes, or dried herbs for a stronger flavour. For extra crunch, sprinkle gluten-free breadcrumbs over the top before baking.

Storage

Allow leftovers to cool completely before transferring them to an airtight container. Refrigerate for up to three days. Reheat individual portions in the oven or microwave until thoroughly hot.

Wine Advice

A crisp Chardonnay complements the savoury tofu and vegetables without overpowering them. A fresh Sauvignon Blanc is a lighter alternative that works particularly well with the parsley and broccoli.

Nutrition values

Serving: 1 serving | Calories: 220 kcal | koolhydraten: 20 g | Eiwitten: 14 g | Vet: 12 g | Verzadigd vet: 2 g | Natrium: 72024 mg | Suiker: 4 g
————————————————————————————————–

Savory veggie tofu bake is a colorful vegan casserole filled with tofu, broccoli, carrots, peas, corn, and crisp water chestnuts. The tofu is crumbled until it has a texture similar to ricotta, then seasoned with nutritional yeast, parsley, and olive oil. Layered around the vegetables, it creates a satisfying plant-based meal with plenty of texture and flavour.

This casserole is particularly useful for anyone who wants to cook more often with tofu but is unsure where to begin. Instead of serving tofu in large cubes or slices, crumbling it changes the texture completely. Nutritional yeast adds savoury depth, while parsley keeps the mixture fresh and aromatic.

A Hearty Plant-Based Casserole

The combination of tofu and vegetables makes this suitable as a complete main course. Broccoli and carrots provide texture, peas and corn add sweetness, and sliced water chestnuts introduce a distinctive crunch. Tamari seasons everything with a rich savoury flavour while keeping the recipe gluten-free and wheat-free.

If you enjoy this type of oven meal, explore more Casserole recipes for easy family dinners and comforting one-dish meals.

Creating the Tofu Layers

Pressing the tofu before preparing the casserole is worth the extra effort. Removing excess moisture allows the tofu to absorb the seasonings more effectively and produces a firmer finished texture. Crumble it finely with your fingers or a spoon until the pieces resemble ricotta cheese.

Half of the seasoned tofu forms the base of the casserole. The vegetables are then spread over that layer before the remaining tofu is scattered across the top. During baking, the upper layer becomes lightly golden while the vegetables cook underneath.

For more meals built around fresh and frozen produce, browse the Vegetable recipes collection.

Serving Ideas

This tofu vegetable casserole can easily stand on its own, but several simple accompaniments work well with it. Serve it with brown rice, quinoa, roasted potatoes, or a fresh green salad. Crusty bread is another good option if you do not need the complete meal to remain gluten-free.

The casserole also works well for meal preparation because individual portions are easy to store and reheat. Pair it with another dish from the Side Dish recipes collection when serving a larger family meal.

Ways to Change the Flavour

The vegetable mixture is flexible. Mushrooms, cauliflower, bell peppers, spinach, or zucchini can replace part of the original vegetables. Smoked paprika adds warmth, chilli flakes provide heat, and dried oregano or basil gives the casserole a more herbaceous flavour.

You can also change the consistency of the topping. Leave the tofu slightly chunky for more texture or crumble it very finely for a softer, ricotta-style finish. A scattering of gluten-free breadcrumbs before baking creates a crispier surface.

Allow leftovers to cool before refrigerating them in a covered container and reheat thoroughly before serving. For general advice on safely storing and reheating prepared foods, consult the FDA safe food handling guidelines.

With its combination of seasoned tofu, colourful vegetables, and simple oven preparation, this vegan casserole is a practical option for family dinners, healthy eating, and relaxed weekend meals throughout the year.


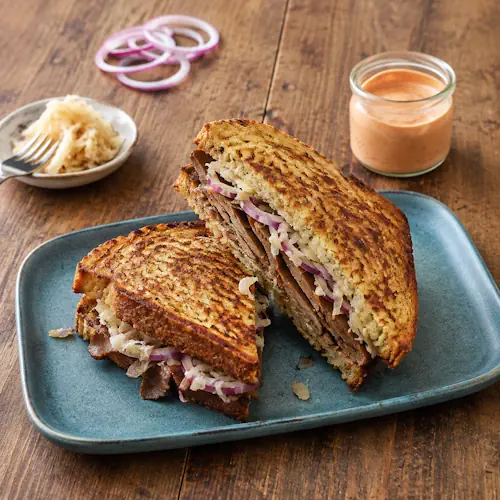
Crispy Monte Cristo Reuben

Crispy Monte Cristo Reuben filled with seitan and sauerkraut

Crispy Monte Cristo Reuben

A crispy vegan fusion of a Monte Cristo and Reuben sandwich, filled with savory seitan, tangy sauerkraut, and red onion between golden pan-fried bread.
Couverts4 servings
Preparation 10 minutes
Preparation time:20 minutes
estimated costs pp $3.00
Deel op Facebook Print Recipe

Equipment

  • Frying pan
  • Shallow dish
  • spatula

Ingredients

For the Batter

For the Sandwiches

Instructions

For the Batter

  • Add the oat milk, flour, paprika, dill, salt, and black pepper to a shallow dish.
  • Whisk until smooth and well combined.

For the Sandwiches

  • Heat 1 tablespoon of vegetable oil in a frying pan over medium-high heat.
  • Dip each slice of bread into the batter, coating both sides.
  • Pan-fry the bread for 2 to 3 minutes per side until golden brown and crisp, adding more oil when needed.
  • Transfer the fried bread to a plate and set aside.
  • Add the seitan, sauerkraut, and sliced red onion to the same pan.
  • Cook for about 5 minutes, stirring occasionally, until heated through and lightly browned.
  • Spread the seitan mixture evenly over 4 slices of the fried bread.
  • Add the vegan sandwich spread.
  • Top each sandwich with a remaining slice of fried bread.
  • Serve immediately while hot and crispy.

Notes & Wine Advice

Serving Suggestions

Serve the sandwiches immediately while the bread is hot and crispy. Pair them with fries, roasted potatoes, pickles, coleslaw, or a fresh green salad for a complete meal.

Recipe Notes

Drain the sauerkraut thoroughly before frying to prevent excess moisture from making the sandwiches soggy. Firm or slightly stale bread works particularly well because it absorbs the batter without falling apart.

Variations

Add vegan cheese for a richer Reuben-style sandwich or include sliced pickles for extra acidity and crunch. A little Dijon mustard can be added to the sandwich spread for a sharper flavour.

Storage

These sandwiches are best eaten immediately. Leftover filling can be stored in an airtight container in the refrigerator for up to three days. Reheat the filling separately and fry fresh battered bread before assembling.

Wine Advice

A crisp Sauvignon Blanc works particularly well with the tangy sauerkraut and savoury seitan. A dry Riesling is another refreshing choice for balancing the rich fried bread.

Nutrition values

Serving: 1 serving | Calories: 400 kcal | koolhydraten: 45 g | Eiwitten: 20 g | Vet: 15 g | Verzadigd vet: 2 g | Natrium: 1020 mg | Suiker: 3 g
————————————————————————————————–

Crispy Monte Cristo Reuben brings together two famous American sandwiches in one satisfying plant-based meal. Golden battered bread takes inspiration from the Monte Cristo, while savoury seitan, tangy sauerkraut, and onion provide the unmistakable character of a Reuben. The result is crispy on the outside, hearty in the centre, and packed with contrasting flavours.

Unlike a traditional Monte Cristo, this version does not need eggs or dairy milk for its coating. Oat milk and flour create a simple batter that fries into a crisp golden layer. Seitan takes the place of the traditional meat and provides a substantial texture that works especially well with sharp sauerkraut.

Two Classic Sandwiches Come Together

The fun of this recipe comes from combining elements that normally belong to two different sandwiches. A Monte Cristo is known for bread coated and fried in a French-toast style, while a Reuben traditionally combines a savoury filling with sauerkraut and dressing. Bringing those ideas together creates something familiar without simply copying either sandwich.

If hearty handheld meals are your thing, take a look at more Sandwich recipes for lunch and quick dinner inspiration.

Getting the Bread Golden and Crispy

Firm or slightly stale sandwich bread is the best choice because it can absorb the batter without becoming too soft. Dip each slice just long enough to coat both surfaces. Leaving it submerged for too long may cause the bread to become difficult to handle.

Keep the frying pan hot enough to create a golden crust but not so hot that the outside browns before the batter cooks. Frying the bread separately also keeps it crisp while you prepare the filling. Fans of this cooking style can find more ideas among the Fried Food recipes.

A Filling Plant-Based Meal

Seitan gives the sandwich its hearty bite and absorbs flavour particularly well. Browning it together with the onion adds extra savoury character. Make sure the sauerkraut is thoroughly drained before it goes into the pan. Too much liquid can soften the bread once the sandwich is assembled.

The finished sandwiches are substantial enough to serve as a main course. Pair them with a green salad for something lighter or add fries, roasted potatoes, pickles, or coleslaw for full American-style comfort food. You can find more substantial ideas in the Comfort Food recipes collection.

Easy Variations

The filling is easy to customize. Vegan cheese gives it an even richer Reuben character, while sliced pickles add extra acidity and crunch. Dijon mustard works well when you want something sharper. For more heat, mix a little hot sauce into the sandwich spread or add freshly ground black pepper to the seitan.

You can prepare the seitan and sauerkraut filling in advance and refrigerate it until needed. However, fry the battered bread shortly before serving. That contrast between freshly crisp bread and warm savoury filling is what makes the Crispy Monte Cristo Reuben especially enjoyable.

Leftover filling should be cooled and refrigerated promptly in a covered container. For general information about storing and handling prepared foods safely, consult the FDA safe food handling guidelines.

Whether served for lunch, a casual family dinner, or a relaxed weekend meal, this vegan Reuben variation offers plenty of texture and flavour without requiring complicated preparation. It is an inventive way to turn a few familiar sandwich ingredients into something distinctly different.


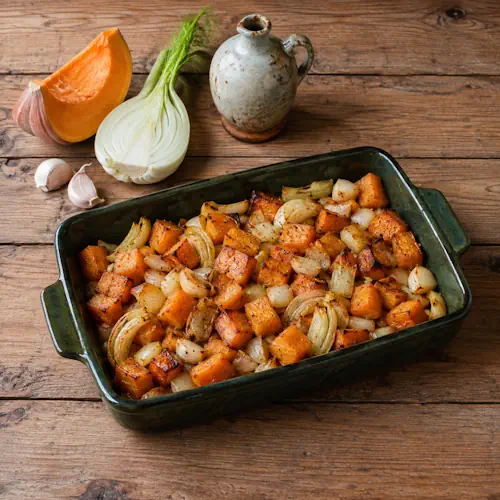
Roasted Butternut Squash & Fennel

Roasted butternut squash with fennel, caramelized onion and garlic

Roasted Butternut Squash & Fennel

Sweet butternut squash roasted with fennel, caramelized onions, and garlic until beautifully tender and golden. An easy, aromatic vegetable dish for autumn and winter meals.
Couverts4 servings
Preparation 10 minutes
Preparation time:1 hour
estimated costs pp $2.00
Deel op Facebook Print Recipe

Equipment

Ingredients

Instructions

  • Preheat the oven to 350ยฐF (180ยฐC).
  • Place the butternut squash, onions, garlic, and fennel in a large mixing bowl.
  • Add the olive oil, salt, and black pepper and toss until the vegetables are evenly coated.
  • Spread the vegetables evenly in a shallow baking dish.
  • Roast for 30 minutes.
  • Remove the dish from the oven and gently toss the vegetables for even browning.
  • Return to the oven and roast for another 25 to 30 minutes, until the squash and fennel are fork-tender and the onions are caramelized around the edges.
  • Serve warm.

Notes & Wine Advice

Serving Suggestions

Serve warm alongside roasted chicken, fish, a plant-based main course, or a hearty grain such as quinoa or brown rice. It also works beautifully as part of an autumn or Thanksgiving vegetable spread.

Recipe Notes

Cut the butternut squash into similarly sized pieces so they cook evenly. Spread the vegetables out rather than overcrowding the baking dish, which helps the onions and squash caramelize instead of steaming.

Variations

Add fresh rosemary, thyme, or sage before roasting for extra autumn flavour. A small pinch of chilli flakes adds gentle heat, while chopped walnuts or pecans can be scattered over the finished dish when a nut-free version is not required.

Storage

Store cooled leftovers in an airtight container in the refrigerator for up to three days. Reheat in the oven until thoroughly hot for the best texture.

Wine Advice

A crisp Sauvignon Blanc balances the sweetness of the roasted squash and caramelized onion. A lightly oaked Chardonnay is another good choice with the roasted fennel and garlic.

Nutrition values

Serving: 1 serving | Calories: 210 kcal | koolhydraten: 35 g | Eiwitten: 4 g | Vet: 8 g | Verzadigd vet: 1 g | Natrium: 610 mg | Suiker: 8 g
————————————————————————————————–

Roasted butternut squash becomes wonderfully sweet and tender when combined with fennel, onion, and garlic in the oven. As the vegetables slowly roast, their natural sugars caramelize and create golden edges, while the fennel adds a gentle aromatic flavour. It is a simple vegetable dish that feels especially at home during autumn and winter.

One of the strengths of this recipe is its simplicity. Butternut squash already has plenty of natural sweetness, so it needs very little seasoning. Extra-virgin olive oil, salt, and black pepper allow the vegetables themselves to remain the focus. The garlic becomes milder and sweeter during roasting, while the onions develop the deep flavour that makes roasted vegetables so comforting.

Why These Vegetables Work Together

Butternut squash and fennel may taste quite different when raw, but roasting brings them surprisingly close together. The squash becomes creamy inside, while fennel loses much of its sharp anise character and develops a softer sweetness. Onion and roasted garlic provide the savoury balance.

If you enjoy dishes built around seasonal produce, browse the Vegetable recipes collection for more ways to turn everyday vegetables into complete dishes.

Getting Beautiful Caramelized Edges

The secret to good roasted butternut squash is giving the vegetables enough space. When pieces are packed tightly together, released moisture causes them to steam. A shallow baking dish with the vegetables spread evenly gives the surfaces more opportunity to brown.

Cut the squash into similar bite-size chunks so everything cooks at approximately the same rate. Tossing the vegetables halfway through roasting exposes different surfaces to the heat and encourages more even caramelization. You can find plenty of other dishes that benefit from the same technique among the Oven recipes.

Serving Ideas for Autumn and Winter

The finished squash and fennel can be served as a vegetable side, but the combination is substantial enough to form the basis of a light meal. Add quinoa, brown rice, couscous, or another grain for extra texture. It also pairs well with roasted chicken, grilled fish, lentils, or a plant-based roast.

For Thanksgiving or another holiday meal, place the vegetables on a large serving platter and finish them with fresh rosemary, thyme, or sage. Their orange and golden colours make an attractive addition to an autumn table. More accompaniments can be found in the Side Dish recipes collection.

Easy Ways to Change the Recipe

The basic combination is easy to adapt. Fresh thyme or rosemary adds a stronger herbal character. Chilli flakes provide gentle heat, while a touch of smoked paprika gives the vegetables a warmer, earthier flavour. If nuts are suitable for your guests, toasted walnuts or pecans provide a welcome contrast to the soft roasted vegetables.

Leftovers are useful too. Chop them and add them to pasta, grain bowls, salads, or soup. They can also be mashed with vegetable stock to make a quick creamy soup without adding dairy. Refrigerate leftovers promptly in a covered container and follow the FDA safe food handling guidelines when storing and reheating prepared food.

This roasted squash with fennel is proof that a short ingredient list can still deliver plenty of flavour. With sweet squash, aromatic fennel, caramelized onion, and mellow roasted garlic, it is an uncomplicated recipe worth keeping for the colder months.