Air Fryer Chicken Tikka Kebabs


Air Fryer Chicken Tikka Kebabs

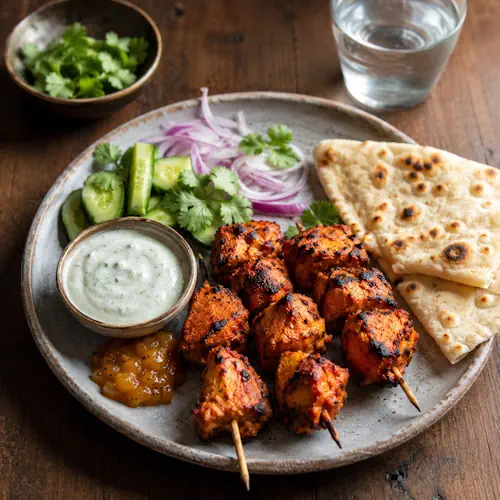
Tender chicken breast marinated in yogurt, tikka masala curry paste and garlic, then air fried on skewers until lightly charred and juicy. Served with warm naan bread and a cooling homemade raita, these easy chicken tikka kebabs make a flavourful Indian-inspired meal.
Couverts4
Preparation 10 minutes
Preparation time:20 minutes
Marinating 20 minutes
estimated costs pp $3.25
Deel op Facebook Print Recipe

Equipment

  • Bowl, large
  • Bowl, small
  • Knife
  • Skewers, 4
  • Tongs

Ingredients

Raita

Instructions

  • Mix the yogurt, tikka masala curry paste and crushed garlic together in a large bowl. Add the chicken and stir thoroughly until every piece is coated. Cover and refrigerate for at least 20 minutes or overnight.
  • Preheat the air fryer to 180ยฐC.
  • Thread the marinated chicken onto four skewers, using one skewer for each serving.
  • Place the skewers in the air fryer basket and cook for 15 to 20 minutes, turning halfway through, until the chicken is cooked through and lightly charred. Cook in batches if necessary.
  • Meanwhile, combine the yogurt, mint, coriander and cucumber in a small bowl to make the raita.
  • Warm the naan bread in the microwave or lightly toast it with water.
  • Serve each chicken tikka skewer with warm naan bread, raita and extra yogurt. Add mango chutney, lime pickle or diced cucumber as desired.

Notes & Wine Advice

Serving Suggestions

Serve the Chicken Tikka Kebabs straight from the Airfryer with warm naan bread and plenty of cool raita. Mango chutney adds sweetness, while lime pickle provides a sharper and spicier contrast. For a more substantial meal, add Rice or a fresh Salad.

Recipe Notes

Cut the chicken into evenly sized bite-size pieces so they cook at approximately the same rate. The yogurt marinade helps keep the chicken tender, while tikka masala curry paste provides most of the spice and seasoning.
A minimum of 20 minutes marinating time will flavour the chicken, but leaving it covered in the refrigerator overnight develops a deeper flavour. If using wooden skewers, check that they are suitable for your air fryer and trim them if necessary so they fit comfortably inside the basket.

Variations

Adjust the amount of tikka masala curry paste to control the strength of the spices. Red onion or pieces of capsicum can be threaded between the chicken pieces for extra vegetables. You can also serve the chicken without skewers and use it as a filling for Wraps.

Storage Advice

Store leftover cooked chicken in an airtight container in the refrigerator for up to 3 days. Keep the raita in a separate covered container. Reheat the chicken thoroughly before serving. The raita should remain chilled and should not be reheated.

Wine Advice

A dry Riesling is an excellent partner for Chicken Tikka Kebabs because its freshness works well with the aromatic spices and creamy yogurt. A Sauvignon Blanc is another good choice, particularly with the mint, coriander and cooling cucumber raita.

Nutrition values

Serving: 255 gr | Calories: 365 kcal | koolhydraten: 29 g | Eiwitten: 39 g | Vet: 11 g | Verzadigd vet: 4 g | Natrium: 610 mg | Suiker: 8 g
————————————————————————————————–

About Air Fryer Chicken Tikka Kebabs

Air Fryer Chicken Tikka Kebabs combine pieces of marinated chicken breast with tikka masala curry paste, garlic and yogurt before cooking them quickly at high heat. The result is tender, aromatic chicken with lightly charred edges and a creamy, spicy flavour. Served with naan bread and homemade raita, these skewers create an easy Main Course inspired by the flavours of India.

What Makes Chicken Tikka So Flavourful?

The key to chicken tikka is the marinade. Natural yogurt coats the chicken and carries the flavours of the tikka masala curry paste and garlic. The creamy marinade also helps protect the lean chicken breast from drying out during the relatively intense cooking process.

Tikka masala curry pastes vary between brands, so the exact balance of spices and heat can differ. Some are relatively mild, while others contain considerably more chilli. This makes it sensible to adjust the amount according to personal preference rather than automatically adding extra chilli or salt.

Why Marinating Time Matters

The chicken can be cooked after approximately 20 minutes of marinating, making this recipe practical when time is limited. However, preparing the chicken earlier and leaving it covered in the refrigerator overnight allows the garlic and spices more time to flavour the meat.

Always marinate raw chicken in the refrigerator rather than at room temperature. Once the chicken has been threaded onto the skewers, discard marinade that has been in contact with the raw poultry unless it will be thoroughly cooked before serving.

Cooking Chicken Tikka in the Air Fryer

The Airfryer is particularly useful for chicken tikka because circulating hot air cooks the small pieces quickly while helping the yogurt-based marinade brown around the edges. Turning the skewers halfway through cooking exposes both sides to the heat.

Leave some space around the skewers rather than packing the basket tightly. If four skewers do not fit comfortably, cook them in batches. The exact cooking time depends on the size of the chicken pieces and the air fryer, so the chicken should be checked for doneness rather than relying entirely on the timer.

Making a Cooling Raita

Raita provides a useful contrast to the warm spices in the chicken. This simple version combines natural yogurt with mint, coriander and cucumber. The yogurt gives it a creamy texture, cucumber provides freshness and the herbs contribute a bright flavour that complements the tikka marinade.

Keep the raita refrigerated until serving. It can be prepared while the chicken cooks, or slightly earlier if convenient. Stir it again just before placing it on the table because cucumber can release a little moisture as it stands.

Serving with Naan Bread

Warm naan bread turns the chicken skewers and raita into a satisfying Dinner. The bread can be torn into pieces and used to pick up chicken and raita, or the chicken can be removed from the skewers and wrapped inside pieces of naan.

Mango chutney introduces sweetness that works particularly well with the spices, while lime pickle creates a much sharper and more intense flavour. Extra yogurt is useful when serving people with different tolerances for spicy food.

Making the Meal More Substantial

Although naan and raita are enough for a relatively light meal, the kebabs can easily become part of a larger spread. Serve them with basmati Rice, a fresh salad or additional vegetable dishes. The individual skewers also make portioning straightforward when serving four people.

For an informal Family Dinner, place the naan, raita, chutney and pickle on the table separately. Everyone can then decide how much sauce and spice they want with their chicken.

Variations on Chicken Tikka Kebabs

The basic method is easy to adapt. Pieces of red onion or capsicum can be threaded between the chicken to add colour and vegetables. For a hotter version, use a spicier tikka paste or add fresh chilli to the marinade.

The cooked chicken can also be removed from the skewers and served in Wraps with lettuce, cucumber and raita. This makes leftover chicken particularly useful for lunch the following day, provided it has been stored and reheated correctly.

Storing Leftovers

Cooked chicken should be refrigerated promptly in a covered container. Keep the raita separate because it is intended to remain cold. When reheating the chicken, heat it thoroughly and add the chilled raita only immediately before serving.

Because this recipe uses poultry, careful food handling is essential. Keep raw chicken away from the naan, herbs, cucumber and other ready-to-eat ingredients. Wash hands, knives, boards and other surfaces thoroughly after contact with raw chicken.

Chicken Food Safety

Chicken must be cooked thoroughly before serving. A food thermometer provides the most reliable way to check that the centre has reached a safe temperature. For current information about handling, storing and preparing poultry safely, consult the U.S. Food and Drug Administration food-safety information.

With tender spiced chicken, warm naan and cooling herb-and-cucumber raita, Air Fryer Chicken Tikka Kebabs deliver a satisfying combination of spicy, creamy and fresh flavours. The short cooking time and flexible marinating period make them equally practical for a quick meal or for preparing ahead for dinner.
Spinach and Feta Pide


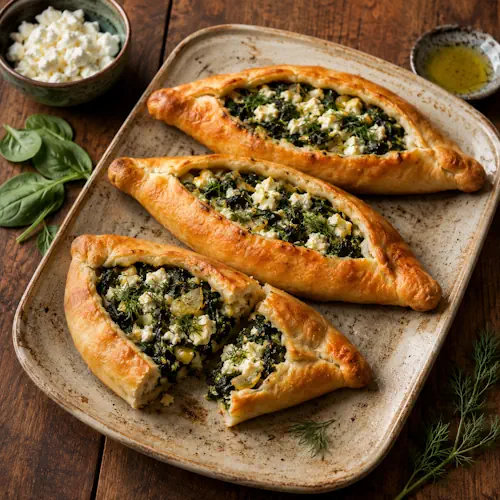
Golden Turkish-style pide filled with wilted spinach, crumbled feta, dill and onion on a rustic wooden table.

Spinach and Feta Pide

Golden boat-shaped pide filled with spinach, feta, onion, chilli and fresh parsley. This Turkish-inspired vegetarian bread is baked until crisp around the edges with a warm, savoury filling, making it ideal for lunch, dinner or sharing.
Couverts4
Preparation 20 minutes
Preparation time:30 minutes
Rising 1 hour
estimated costs pp $1.60
Deel op Facebook Print Recipe

Equipment

  • baking paper
  • baking tray
  • Bowl, large
  • Frying pan
  • Knife
  • Rolling Pin
  • Wooden spoon

Ingredients

Instructions

  • Combine the flour, yeast, sugar and salt in a large bowl. Add the warm water and olive oil and mix until a soft dough forms, adding a little extra water if needed.
  • Knead the dough for 5 minutes until elastic. Cover and leave in a warm place for about 1 hour or until doubled in size.
  • Heat 1 tablespoon olive oil in a frying pan over medium heat. Cook the onion for 5 minutes or until translucent.
  • Add the cumin seeds and spinach and cook until wilted and the moisture has evaporated. Allow the mixture to cool.
  • Stir in the feta, parsley, chives and chilli. Season with sea salt flakes and freshly ground black pepper.
  • Preheat the oven to 180ยฐC fan-forced. Line a baking tray with baking paper.
  • Divide the dough into four equal portions and roll each into a long oval, approximately 3 to 4 mm thick.
  • Place one-quarter of the filling along the centre of each oval, leaving a border around the edge.
  • Fold the long edges inward slightly and pinch the ends together to form pointed boat-shaped pides.
  • Brush the dough with olive oil and bake for 15 minutes or until golden and the filling is bubbling.
  • Repeat with any remaining pides if necessary. Serve warm.

Notes & Wine Advice

Serving Suggestions

Serve the pide warm from the oven while the crust is crisp and the feta filling is still hot. It works well with a fresh Salad or alongside several small dishes for a relaxed Lunch. Cut each pide into smaller pieces when serving as part of a shared meal.

Recipe Notes

The amount of water needed can vary slightly depending on the bread flour. Add enough to produce a soft, workable dough without making it sticky. Allow the dough to rise until approximately doubled in size before shaping.
Cook the spinach until excess moisture has evaporated. A filling that is too wet can make the centre of the pide soggy. Feta is naturally salty, so taste the filling before adding additional sea salt.

Variations

For a milder filling, remove the seeds from the green chilli or leave it out completely. Additional fresh herbs can be added, while extra spinach can be used for a more vegetable-rich filling. Browse the Bread collection for more savoury baked recipes.

Storage Advice

Store leftover pide in an airtight container in the refrigerator for up to 3 days. Reheat in a hot oven until the crust becomes crisp again and the filling is thoroughly heated. The baked pide can also be portioned before storing, making individual pieces easier to reheat.

Wine Advice

A crisp Sauvignon Blanc pairs well with the salty feta, fresh herbs and spinach. A dry Riesling is another suitable choice when the green chilli is noticeable, as its freshness provides a pleasant contrast to the heat.

Nutrition values

Serving: 195 gr | Calories: 405 kcal | koolhydraten: 55 g | Eiwitten: 13 g | Vet: 15 g | Verzadigd vet: 5 g | Natrium: 690 mg | Suiker: 5 g
————————————————————————————————–

About Spinach and Feta Pide

Spinach and Feta Pide is a savoury, boat-shaped bread filled with spinach, feta, onion, fresh herbs, cumin and green chilli. Pide is closely associated with Turkey, where numerous versions are prepared with different meat, cheese and vegetable fillings. This vegetarian version combines a homemade yeast dough with a simple spinach and feta filling that becomes warm and fragrant in the oven.

The Characteristic Pide Shape

One of the most recognisable features of pide is its elongated boat shape. Rather than covering the filling completely, the dough is rolled into an oval and the long edges are folded slightly inward. Pinching the ends creates pointed tips and helps contain the filling during baking.

The open centre also allows direct oven heat to reach the spinach and feta. While the dough becomes golden around the edges, the exposed filling heats through and the feta softens. Brushing the dough with olive oil before baking encourages an attractive golden finish.

Making the Yeast Dough

The dough uses bread flour, dried yeast, sugar, salt, water and olive oil. Bread flour provides enough structure for a dough that can be rolled fairly thin while still supporting the filling. The yeast needs time to work, so the dough is left in a warm place for approximately one hour or until doubled in size.

Kneading develops the dough structure and produces a smoother, more elastic texture. Once risen, the dough is divided into four portions so each person receives an individual pide. Similar homemade dough recipes can be found in the Bread collection.

Preparing the Spinach and Feta Filling

The filling begins with onion gently cooked in olive oil until translucent. Cumin seeds add warmth and an earthy aroma before the spinach is added. Cooking the spinach rather than placing it raw on the dough is useful because it removes much of its moisture.

Once cooled, the spinach mixture is combined with crumbled feta, parsley, chives and finely chopped green chilli. Feta provides both creaminess and saltiness, while the herbs keep the filling fresh. The chilli introduces a little heat without dominating the other ingredients.

Why Moisture Matters

Controlling moisture is particularly important when making filled breads. Spinach contains a considerable amount of water and releases it rapidly when heated. If that liquid remains in the filling, it can soak into the dough during baking and prevent the base from cooking properly.

Continue cooking the spinach mixture until excess moisture has evaporated, then allow it to cool before adding the feta. This produces a filling that remains moist without becoming watery.

A Vegetarian Main Course

Although pide can be served in smaller pieces, one individual Spinach and Feta Pide makes a satisfying Main Course. The bread provides the substantial base, while feta contributes protein and richness and spinach adds a fresh vegetable component.

A simple salad makes an excellent accompaniment. Tomatoes, cucumber, onion and fresh herbs dressed with lemon juice and olive oil provide a crisp contrast to the warm bread and salty cheese. The pide can also be included in a larger spread with dips and other small dishes.

Serving Pide for Sharing

Pide is particularly easy to share because the long shape can be sliced crosswise into smaller portions. This makes it useful for a Party, picnic or informal lunch where several dishes are placed on the table.

Serve it shortly after baking for the best contrast between the crisp edges and soft centre. If preparing several batches, keep the first pides warm in a low oven while the remaining ones bake.

Variations on the Filling

The basic spinach and feta combination is easy to adapt. More spinach can be added, or the chilli can be reduced when a milder filling is preferred. Different fresh herbs can alter the character without changing the dough or baking method.

Because feta already has a pronounced salty flavour, additional seasoning should always be added after tasting. Black pepper works particularly well, while extra cumin can provide a warmer, more aromatic filling.

Storing and Reheating

Leftover pide can be refrigerated in a covered container for up to three days. An oven is preferable to a microwave for reheating because dry heat helps restore the crisp texture of the bread. Heat the pide until both the bread and filling are thoroughly hot.

Spinach and Feta Pide combines homemade bread with a savoury vegetable and cheese filling in a format that works equally well for lunch, dinner or sharing. The contrast between golden bread, salty feta, tender spinach, fresh herbs and gentle chilli makes it a versatile Vegetarian meal with unmistakable Turkish inspiration.

Food Safety

Keep feta and other refrigerated ingredients properly chilled before use, and refrigerate leftovers promptly after the meal. For current guidance on safe food preparation, storage and handling at home, consult the U.S. Food and Drug Administration food-safety information.

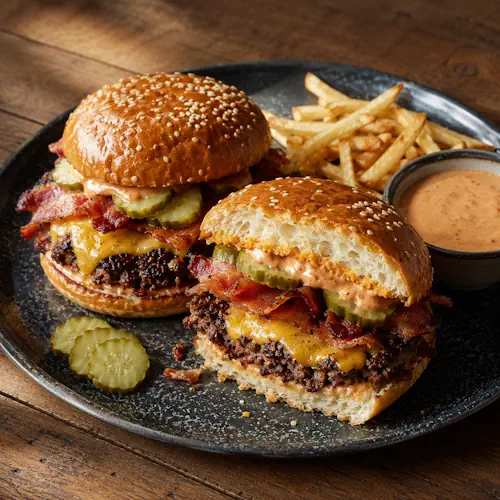
Smash Burgers with Cheese and Bacon


Cheesy smash burgers with crisp bacon, dill pickles and burger sauce, served with fries on a dark tray over a rustic wooden table.

Smash Burgers with Cheese and Bacon

Juicy smashed beef burgers topped with melted cheese, crispy bacon, pickles and burger sauce. Cooked quickly in the air fryer and served in soft burger buns, these loaded burgers make an easy Friday-night dinner for four.
Couverts4
Preparation 10 minutes
Preparation time:20 minutes
estimated costs pp $3.75
Deel op Facebook Print Recipe

Equipment

Ingredients

Instructions

  • Preheat the air fryer to 200ยฐC.
  • Cook the bacon for 8 to 9 minutes, turning once, until crisp and browned. Remove from the air fryer and set aside.
  • Season the beef mince with sea salt flakes and freshly ground black pepper, then divide it into four equal portions.
  • Shape each portion into a loose ball, taking care not to overwork the meat.
  • Place the beef portions in the air fryer basket and flatten each firmly with a spatula to create thin burger patties.
  • Air fry the burgers for 8 to 10 minutes, turning once, until browned and cooked through.
  • Place one cheese slice on each burger during the final minute of cooking and allow it to melt.
  • Split the burger buns and arrange lettuce and tomato on the bases if desired.
  • Top each bun with a cheesy smash burger, two crispy bacon rashers and sliced pickles.
  • Add burger sauce, close with the bun tops and serve immediately with extra pickles and burger sauce.

Notes & Wine Advice

Serving Suggestions

Serve these smash burgers immediately while the cheese is melted and the bacon is still crisp. They are excellent with French Fries, potato wedges, coleslaw or a fresh Salad. Put extra burger sauce and sliced pickles on the table for serving.

Recipe Notes

Do not overwork the beef mince when forming the portions. Keeping the meat relatively loose helps produce a more tender burger. Flatten each portion firmly to create the characteristic thin smash-burger shape.
The bacon is cooked first so its rendered fat can add extra flavour when the burgers are subsequently cooked in the air fryer. Cooking times can vary depending on the thickness of the patties and the particular air fryer.

Variations

Use your favourite cheese slices, such as cheddar or American-style cheese. Add sliced onion, lettuce or tomato for extra toppings. For additional heat, mix chilli sauce into the burger sauce or add sliced jalapeรฑos.

Storage Advice

Store leftover cooked burger patties and bacon in an airtight container in the refrigerator for up to 3 days. Keep the buns, sauce, pickles and fresh toppings separate. Reheat the patties thoroughly in the Airfryer before assembling the burgers.

Wine Advice

A fruity red wine works particularly well with the rich beef, bacon and melted cheese. A Merlot is a good choice because its soft fruit character complements the burger without overpowering it. A Cabernet Sauvignon is another suitable option when you prefer a fuller-bodied wine.

Nutrition values

Serving: 285 gr | Calories: 710 kcal | koolhydraten: 34 g | Eiwitten: 43 g | Vet: 44 g | Verzadigd vet: 16 g | Natrium: 1390 mg | Suiker: 7 g
————————————————————————————————–

About Smash Burgers with Cheese and Bacon

Smash Burgers with Cheese and Bacon bring together juicy beef, melted cheese, crisp bacon, pickles and creamy burger sauce in a soft bun. It is the kind of substantial Burgers recipe that works particularly well for an informal dinner, Game Day or Movie night. Cooking both the bacon and burgers in the air fryer also keeps preparation straightforward.

What Makes a Smash Burger Different?

A smash burger gets its name from the way the beef is firmly flattened during cooking. Instead of carefully shaping a thick, compact patty, the beef is divided into loose portions and pressed into thinner burgers. This creates more surface area for browning and gives the burger its characteristic combination of browned exterior and juicy centre.

For the best texture, avoid repeatedly kneading or compressing the beef before cooking. Simply divide the mince into four portions and loosely form them into balls. The actual flattening takes place immediately before cooking. More recipes built around beef can be found in the Beef collection.

Cooking Bacon Before the Burgers

The bacon goes into the Airfryer first. This allows it to become crisp without requiring another frying pan. Once cooked, remove the bacon and keep it nearby while preparing the burgers.

Two bacon rashers per burger provide plenty of smoky, salty flavour. Because bacon, cheese, pickles and burger sauce all contribute salt, season the beef carefully rather than automatically adding a large quantity of salt.

Cooking the Beef Patties

Once flattened, the burgers cook quickly because they are considerably thinner than traditional thick hamburger patties. Turning them once encourages even browning. During the final minute, each burger is topped with a slice of cheese so it melts directly over the hot beef.

The precise cooking time depends on the thickness of the patties and the performance of the air fryer. Beef mince should be cooked safely rather than judged only by exterior colour. This is particularly important with ground meat because bacteria originally present on the surface can become distributed throughout the meat during mincing.

Building a Loaded Bacon Cheeseburger

Once the burgers are cooked, assembly is simple. Start with a soft burger bun and add the cheesy beef patty, followed by crisp bacon and sliced pickles. Burger sauce adds moisture, sweetness and acidity, helping balance the richness of the beef, bacon and cheese.

Pickles play an especially useful role because their sharp acidity cuts through the fatty ingredients. Extra pickles can be served alongside the burgers for anyone who prefers a stronger tangy flavour.

Serving Ideas

These burgers make a substantial Main Course on their own, but classic sides turn them into a complete meal. French fries, potato wedges, onion rings, coleslaw or salad all work well. For a lighter contrast, serve the burgers with a crisp green salad rather than another fried side dish.

They are also well suited to a relaxed Family Dinner. Put the pickles, sauce and any additional toppings on the table so everyone can build their burger according to preference.

Easy Ways to Change the Burgers

The basic combination can easily be adapted. Cheddar gives a stronger cheese flavour, while a milder burger cheese melts particularly smoothly. Fresh onion adds crunch, caramelised onion provides sweetness and jalapeรฑos introduce extra heat.

You can also change the sauce without altering the cooking method. Barbecue sauce works particularly well with bacon, while a spicy mayonnaise creates a hotter burger. Keep the toppings reasonably balanced so the flavour of the browned beef does not disappear underneath them.

Storing and Reheating

If you have leftovers, store the cooked beef patties and bacon separately from the buns and cold toppings. Refrigerate them promptly in covered containers. Reheating the patties in the air fryer helps retain a better exterior texture than microwaving them.

Assemble leftover burgers only after the meat has been reheated. This prevents the buns from becoming soggy and keeps pickles and other cold toppings crisp.

Ground Beef Food Safety

Raw beef mince should be kept refrigerated and separated from ready-to-eat foods. Wash hands, utensils and preparation surfaces after they have been in contact with raw meat. For current guidance on storing, handling and safely cooking meat at home, consult the U.S. Food and Drug Administration food-safety information.

With browned beef, melted cheese, smoky bacon, sharp pickles and creamy sauce, these Smash Burgers with Cheese and Bacon deliver all the familiar elements of a loaded cheeseburger. The air fryer keeps the cooking process compact, while the toppings can easily be adjusted for each person at the table.

Salt and Pepper Chicken


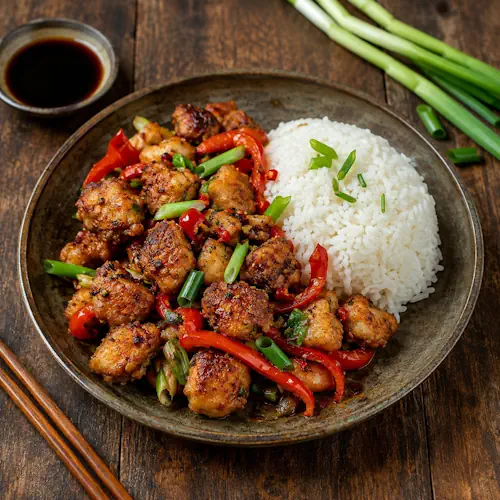
Crisp salt-and-pepper chicken with red pepper, spring onion and chilli, served with rice and soy sauce on a rustic wooden table.

Salt and Pepper Chicken

Crispy air-fried chicken thighs seasoned with Sichuan pepper, Chinese five spice and chilli, then tossed with pak choy, spring onions and red capsicum. A quick Chinese-inspired chicken dinner with plenty of spice and fresh vegetables.
Couverts4
Preparation 15 minutes
Preparation time:15 minutes
Total time 30 minutes
estimated costs pp $3.25
Deel op Facebook Print Recipe

Equipment

Ingredients

Instructions

  • Preheat the air fryer to 200ยฐC.
  • Combine the chicken, cornflour, ยฝ teaspoon sea salt flakes, Sichuan pepper and Chinese five spice in a large bowl. Toss until the chicken is evenly coated.
  • Transfer the chicken to the air fryer basket. Cook for 5 minutes or until cooked through, then set aside.
  • Toss the chilli, red capsicum and roughly chopped spring onion with the olive oil.
  • Place the vegetables in the air fryer basket and cook for 10 minutes.
  • Add the pak choy leaves and cook for a further 5 minutes.
  • Return the chicken to the air fryer basket with the vegetables. Add the honey and cooking wine, then toss to combine and cook for another 2 minutes.
  • Scatter with the sliced spring onion and serve immediately with rice and soy sauce.

Notes & Wine Advice

Serving Suggestions

Serve the Salt and Pepper Chicken immediately while the chicken is hot and the vegetables still have some texture. Steamed Rice makes an ideal accompaniment and helps balance the chilli and Sichuan pepper. Serve extra soy sauce at the table if desired.

Recipe Notes

Cut the chicken thighs into similarly sized pieces so they cook evenly. The cornflour creates a light coating that becomes crisp in the Airfryer. Avoid overcrowding the basket because good air circulation is important for browning.
Sichuan pepper has a distinctive citrusy flavour and produces its characteristic tingling sensation rather than simply adding chilli heat. Add extra only after tasting the finished dish.

Variations

Reduce the amount of fresh chilli for a milder version or add more for additional heat. Other quick-cooking Vegetables can be added, although they should be cut into pieces that will cook in approximately the same time.

Storage Advice

Store leftover chicken and vegetables in an airtight container in the refrigerator for up to 3 days. Reheat thoroughly in the air fryer until piping hot. The chicken coating will be crisper when reheated in the air fryer rather than in a microwave.

Wine Advice

A dry Riesling is particularly suitable with Sichuan pepper and fresh chilli because its freshness balances the heat and aromatic spices. A Sauvignon Blanc is another good option, especially when the dish is served with plenty of pak choy and spring onion.

Nutrition values

Serving: 245 gr | Calories: 330 kcal | koolhydraten: 27 g | Eiwitten: 27 g | Vet: 14 g | Verzadigd vet: 3 g | Natrium: 690 mg | Suiker: 15 g
————————————————————————————————–

About Salt and Pepper Chicken

Salt and Pepper Chicken combines crisp pieces of seasoned chicken thigh with red capsicum, chilli, spring onion and pak choy. Sichuan pepper and Chinese five spice provide the distinctive aromatic flavour, while honey adds sweetness to balance the heat. Cooking everything in the Airfryer creates a quick and colourful chicken dinner without deep frying.

Why Chicken Thighs Work Well

Boneless, skinless chicken thighs are particularly useful for this recipe because they remain juicy during high-temperature cooking. They contain slightly more fat than chicken breast, which helps prevent the small pieces from drying out while the outside becomes crisp.

Cutting the thighs into similarly sized chunks helps them cook evenly. The pieces are coated with cornflour, salt, Sichuan pepper and Chinese five spice before cooking. Cornflour forms a thin coating around the chicken and helps create the lightly crisp exterior associated with this style of dish. More ideas using poultry can be found in the Chicken collection.

Sichuan Pepper and Chinese Five Spice

Sichuan pepper gives this chicken much of its personality. Despite its name, it does not behave like ordinary black pepper or chilli. It has a fragrant citrus character and creates a distinctive tingling sensation on the lips and tongue. Combined with Chinese five spice, it gives the relatively simple chicken coating considerable depth.

Fresh red chilli supplies the more familiar heat. Because chilli strength varies considerably, the quantity can easily be adjusted. Keeping the chilli separate from the initial chicken coating also makes it easier to reduce the amount when preparing the recipe for people who prefer milder food.

Cooking the Chicken in the Air Fryer

The air fryer allows the cornflour-coated chicken to cook at high heat while using very little additional oil. Keeping the pieces in a reasonably loose layer allows hot air to circulate around them. If the basket is small, cooking in batches will generally give a better result than overcrowding it.

Chicken thighs should be cooked completely before being combined with the vegetables. Once cooked, they are temporarily removed so the capsicum, chilli and spring onion can cook without causing the chicken to become dry.

Adding the Vegetables

Red capsicum and spring onion can tolerate a longer cooking time than pak choy, which explains why they go into the air fryer first. The pak choy leaves are added later so they soften and lightly char without completely collapsing.

This staggered method is useful whenever vegetables with different cooking times are combined in an air fryer. It allows each ingredient to reach a suitable texture instead of leaving some vegetables raw while others become excessively soft. Browse the Vegetables collection for more vegetable-based side dishes and meals.

A Sweet and Spicy Finish

The cooked chicken is returned to the basket near the end, where it is tossed with the vegetables, honey and cooking wine. Honey softens the chilli heat and provides a slightly sticky finish. Because honey contains sugar and can darken rapidly, it is added only for the final stage rather than at the beginning.

Sliced spring onion added immediately before serving brings fresh flavour and a little crunch. Extra crushed Sichuan pepper can also be scattered over individual portions for anyone who enjoys its characteristic aromatic, tingling effect.

Serving Salt and Pepper Chicken

Steamed Rice is an easy accompaniment because it absorbs the juices and balances the stronger seasonings. Soy sauce can be served separately rather than poured over the entire dish, allowing each person to control the saltiness.

The combination of chicken and vegetables makes this substantial enough for a Family Dinner. It is also suitable for a Quick Dinner because both preparation and cooking are relatively short.

Variations and Adjustments

The spice level is easy to alter. Use one chilli instead of two for a milder dish, or add extra chilli when you want considerably more heat. Additional capsicum can increase the vegetable content, while other quick-cooking vegetables can be substituted for some of the pak choy.

The final soy sauce should be added cautiously because the seasoning mixture already contains salt. This is particularly relevant when using a strongly flavoured soy sauce. Taste the finished chicken before adding more seasoning.

Storage and Chicken Safety

Leftovers should be refrigerated promptly in a covered container and reheated thoroughly before serving. Using the air fryer for reheating helps restore some of the crisp texture of the cornflour coating.

Raw chicken should be kept separate from vegetables and other ready-to-eat ingredients during preparation. Wash hands, knives, boards and other surfaces after contact with raw poultry. For current information about safely handling and preparing chicken, consult the U.S. Food and Drug Administration food-safety information.

With juicy chicken thighs, aromatic Sichuan pepper, colourful vegetables and a sweet-spicy finish, Salt and Pepper Chicken delivers plenty of flavour from a relatively short ingredient list. The air fryer keeps the cooking method simple, while the chilli and seasoning can easily be adjusted to suit individual tastes.

Air Fryer Chicken Fajitas


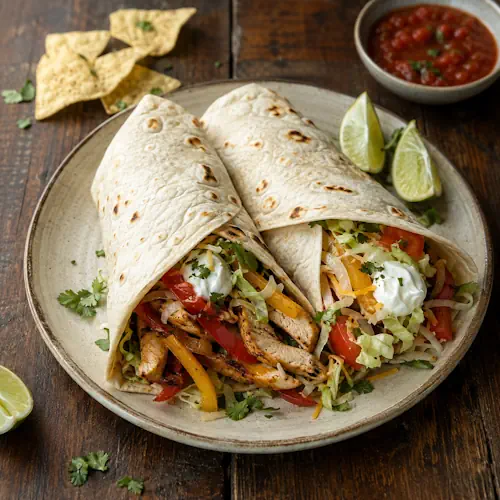
Chicken fajitas filled with sautรฉed peppers, onion, cheese, lettuce and sour cream, served with salsa, lime and tortilla chips on a rustic wooden table.

Air Fryer Chicken Fajitas

Juicy strips of chicken breast air fried with red, orange and yellow peppers, onion and fajita seasoning, then wrapped in warm tortillas with lettuce, avocado, sour cream, lime and coriander. A colourful and easy family dinner with plenty of fresh toppings.
Couverts4
Preparation 15 minutes
Preparation time:15 minutes
Total time 30 minutes
estimated costs pp $3.50
Deel op Facebook Print Recipe

Equipment

Ingredients

Instructions

  • Preheat the air fryer to 190ยฐC.
  • Place the chicken strips, red capsicum, orange capsicum, yellow capsicum and red onion in a large bowl. Drizzle with olive oil and toss thoroughly.
  • Add the fajita or peri peri seasoning and sea salt flakes, then toss again until the chicken and vegetables are evenly coated.
  • Transfer the mixture to the air fryer basket and cook for 15 minutes, stirring once or twice, until the chicken is thoroughly cooked and the vegetables are tender and lightly browned.
  • Warm the tortilla wraps briefly in a dry frying pan or microwave.
  • Divide the shredded lettuce between the four warm wraps.
  • Top with the chicken and pepper mixture, avocado, sour cream and coriander leaves.
  • Serve immediately with lime wedges for squeezing over the fajitas.

Notes & Wine Advice

Serving Suggestions

Serve the fajitas immediately while the chicken and vegetables are hot and the lettuce is still crisp. Put extra lime wedges, sour cream and coriander on the table so everyone can finish their own wrap. They work particularly well for a relaxed Family Dinner or Cinco de Mayo meal.

Recipe Notes

Cut the chicken into evenly sized strips so all the pieces cook at approximately the same rate. Slice the peppers and onion fairly thickly because very thin pieces can soften too much before the chicken is ready.
Do not overcrowd the Airfryer basket. If you have a smaller appliance, cook the chicken and vegetables in two batches to maintain good airflow and encourage browning.

Variations

Use fajita seasoning for a classic Tex-Mex flavour or peri peri seasoning for a hotter variation. Extra chilli can be added for more heat. You can also add tomato, cucumber or additional lettuce when assembling the Wraps.

Storage Advice

Store leftover cooked chicken and vegetables in an airtight container in the refrigerator for up to 3 days. Keep the lettuce, avocado, sour cream and tortillas separate. Reheat the chicken mixture thoroughly before assembling fresh fajitas.

Wine Advice

A fresh Sauvignon Blanc is a good match for the lime, coriander and peppers, particularly when mild fajita seasoning is used. A dry Riesling also works well when the fajitas are prepared with hotter peri peri seasoning because its freshness provides a pleasant contrast to the spices.

Nutrition values

Serving: 390 gr | Calories: 495 kcal | koolhydraten: 43 g | Eiwitten: 35 g | Vet: 21 g | Verzadigd vet: 6 g | Natrium: 60 mg | Suiker: 6 g
————————————————————————————————–

About Air Fryer Chicken Fajitas

Air Fryer Chicken Fajitas combine seasoned chicken breast, colourful peppers and red onion with fresh lettuce, avocado, sour cream, coriander and lime. Everything is wrapped in a warm tortilla, creating an easy Dinner with plenty of contrasting flavours and textures. Cooking the chicken and vegetables together in the air fryer also keeps preparation straightforward and reduces the amount of cookware needed.

Chicken and Peppers Cooked Together

The main filling starts with strips of chicken breast and three different colours of capsicum. Red, orange and yellow peppers provide sweetness as they cook, while thickly sliced red onion adds a stronger savoury note. Cutting everything into reasonably similar pieces helps the ingredients cook evenly.

A tablespoon of olive oil is enough to lightly coat the chicken and vegetables. The oil helps the seasoning adhere and encourages browning in the air fryer. For more meals using the same main ingredient, browse the Chicken collection.

Choosing the Seasoning

The original recipe allows either fajita or peri peri seasoning. Fajita seasoning keeps the flavour firmly in the familiar Tex-Mex direction, while peri peri produces a hotter and slightly different result. Both work with the sweet peppers, chicken and cooling sour cream.

Commercial seasoning blends vary considerably in salt and chilli content. Taste and check the packaging before adding a large amount of additional salt. If cooking for children or people who prefer milder food, a mild fajita seasoning is the safer choice and extra chilli can be offered separately.

Cooking Fajitas in the Air Fryer

Cooking the filling in the Airfryer allows hot air to circulate around the chicken, peppers and onion. This helps the edges brown while the vegetables soften. Stirring the mixture during cooking exposes different surfaces to the circulating heat and promotes more even cooking.

The exact cooking time can vary according to the thickness of the chicken strips and the air fryer model. The chicken should be completely cooked before serving. Avoid relying only on exterior colour, particularly with thicker pieces.

Building the Fajita Wraps

Warm tortillas are softer and easier to fold than cold ones, so heat them briefly just before serving. Start with shredded baby cos lettuce and then add the hot chicken and vegetable mixture. Chopped avocado brings a creamy texture, while sour cream provides a cool contrast to the warm spices.

Fresh coriander and lime are more than decorative additions. Coriander contributes a fresh herbal note, while lime juice cuts through the richness of the avocado and sour cream. Together they make the finished Wraps taste fresher and more balanced.

A Colourful Family Dinner

Fajitas work particularly well for a Family Dinner because the individual components can be placed on the table and everyone can assemble their own. Someone who prefers extra avocado can add more, while another person can leave out the sour cream or add additional seasoning.

This serving style also makes the recipe useful when different people prefer different levels of heat. Keep the basic chicken mixture relatively mild and provide chilli sauce separately. The recipe is also well suited to Cinco de Mayo as part of a larger Mexican or Tex-Mex-inspired spread.

Serving and Variations

The fajitas are filling enough to serve on their own, but they can be combined with a fresh Salad, rice or other vegetables. Extra avocado, salsa or hot sauce can be placed on the table for anyone who wants to customise their portion.

You can also change the balance of vegetables without altering the basic method. Additional onion or capsicum works easily, while sliced courgette can provide another vegetable component. Just avoid filling the air fryer basket too tightly because overcrowding can cause the ingredients to steam rather than brown.

Storage and Food Safety

If you have leftovers, separate the cooked chicken and vegetables from the cold toppings. Refrigerate the chicken mixture promptly in a covered container. Lettuce, avocado and sour cream should remain refrigerated separately and should only be added after the chicken has been reheated.

Raw chicken requires careful handling to avoid cross-contamination. Wash hands, utensils and preparation surfaces after contact with raw poultry and cook the chicken thoroughly before serving. For current information about handling and preparing poultry safely, consult the U.S. Food and Drug Administration food-safety information.

With juicy seasoned chicken, sweet peppers, creamy avocado, crisp lettuce and fresh lime, Air Fryer Chicken Fajitas offer plenty of flavour without a complicated cooking process. The toppings can be adjusted at the table, making this a practical recipe for four people with different preferences while keeping the preparation quick and uncomplicated.

Kung Pao Prawn Rice Bowls


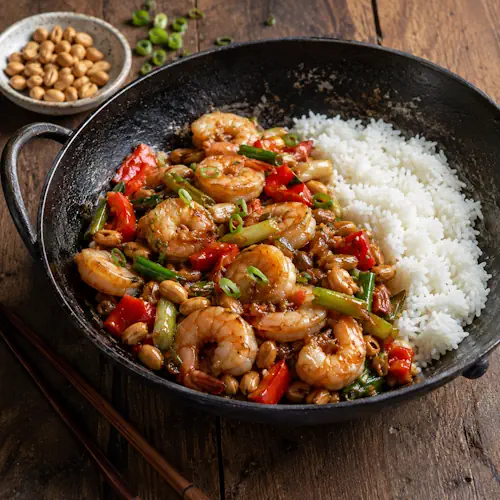
Kung Pao-style prawns with roasted peanuts, red pepper, spring onion and rice, served in a black wok on a rustic wooden table.

Kung Pao Prawn Rice Bowls

Juicy king prawns, colourful peppers and spring onions coated in a sweet, savoury and lightly spicy Kung Pao-style sauce. Cooked quickly in the air fryer and served over microwave rice, this makes an easy Asian-inspired dinner for four.
Couverts4
Preparation 10 minutes
Preparation time:10 minutes
Total time 20 minutes
estimated costs pp $4.25
Deel op Facebook Print Recipe

Equipment

Ingredients

Instructions

  • Place the prawns, red capsicums and white parts of the spring onions in a large bowl. Add the vegetable oil, season with sea salt flakes and freshly ground black pepper and toss to coat.
  • Transfer the mixture to the air fryer basket in a single layer. Air fry at 200ยฐC for 6 to 8 minutes, shaking halfway through, until the prawns are pink and cooked through.
  • Meanwhile, whisk the soy sauce, hoisin sauce, malt vinegar, sesame oil, cornflour, honey and chilli flakes, if using, together in a small bowl.
  • Pour the sauce over the cooked prawns and vegetables in the air fryer basket. Toss to coat, then air fry for another 1 to 2 minutes, stirring once, until the sauce thickens and becomes glossy.
  • Divide the warm rice between four bowls. Top with the Kung Pao prawns and vegetables, spoon over the sauce and scatter with the finely sliced green spring onion before serving.

Notes & Wine Advice

Serving Suggestions

Serve the Kung Pao prawns immediately over hot rice and finish with the finely sliced spring onion. For extra vegetables, add a simple Vegetables side dish or a fresh Salad.

Recipe Notes

Do not overcook the prawns. They cook very quickly in the Airfryer and are ready when pink, opaque and just firm. Cooking them for too long can make them rubbery.
The soy sauce and hoisin sauce already contain considerable salt, so add sea salt cautiously. The sauce is added near the end of cooking because its honey and hoisin sauce can caramelise quickly.

Variations

Add more chilli flakes for extra heat or leave them out for a milder version. Green capsicum can replace some of the red capsicum, while broccoli or other quick-cooking vegetables can also be added. For a more traditional Kung Pao-style finish, chopped peanuts can be scattered over individual portions if suitable.

Storage Advice

Store leftover prawns, vegetables and rice in airtight containers in the refrigerator for up to 2 days. Refrigerate leftovers promptly after the meal. Reheat thoroughly before serving and avoid repeatedly reheating the prawns.

Wine Advice

A dry Riesling is a good match for the sweet, savoury and spicy Kung Pao sauce because its freshness balances both the chilli and rich hoisin flavours. A crisp Sauvignon Blanc is another suitable choice, especially when the dish is prepared with less chilli.

Nutrition values

Serving: 375 gr | Calories: 485 kcal | koolhydraten: 69 g | Eiwitten: 29 g | Vet: 11 g | Verzadigd vet: 2 g | Natrium: 1680 mg | Suiker: 14 g
————————————————————————————————–

About Kung Pao Prawn Rice Bowls

Kung Pao Prawn Rice Bowls combine juicy king prawns, sweet red capsicum and spring onions with a glossy sauce built around soy sauce, hoisin, sesame oil, vinegar and honey. Everything is served over warm rice, turning a relatively short list of ingredients into a complete Dinner. Using the air fryer keeps the cooking quick and makes this particularly useful when you want a seafood meal without spending much time at the stove.

From Two Servings to Four

The original recipe is designed for two servings. Here the quantities have been recalculated for four, including the prawns, vegetables, rice and every ingredient in the sauce. Using 400 g of king prawns provides approximately 100 g per person before the vegetables and rice are added. The 500 g of cooked microwave rice gives each serving a generous base without overwhelming the prawns.

Cooking King Prawns in the Air Fryer

King prawns are particularly suitable for quick cooking because they need only a few minutes of heat. In this recipe they are combined with the red capsicum and chunky white sections of spring onion before going into the Airfryer. A small amount of vegetable oil helps the ingredients cook and colour without making the finished dish greasy.

Arrange the ingredients reasonably evenly in the basket. If your air fryer is small, cooking in two batches is preferable to packing everything tightly together. Good air circulation helps the capsicum soften and allows the prawns to cook evenly.

The Kung Pao-Style Sauce

The sauce provides most of the character of the dish. Soy sauce contributes salt and savoury depth, while hoisin brings sweetness and body. Malt vinegar provides acidity, sesame oil adds its distinctive toasted flavour and honey reinforces the sweet side of the sauce. Cornflour thickens everything into a glossy coating during the final minutes of cooking.

Chilli flakes are optional, which makes the level of heat easy to control. A small quantity produces gentle warmth, while additional chilli can make the dish considerably hotter. Because both soy and hoisin sauce can contain plenty of sodium, taste before adding extra salt.

Why Add the Sauce at the End?

The prawns and vegetables are mostly cooked before the sauce is introduced. This is useful because ingredients such as honey and hoisin sauce contain sugars that can darken quickly at high temperatures. Adding the sauce for only the final one or two minutes gives it enough time to thicken and cling to the prawns without unnecessarily exposing it to prolonged heat.

Cornflour also needs only a short period of cooking once it reaches temperature. As the sauce heats, it becomes thicker and glossier. Stirring once during this final stage helps coat the prawns and vegetables evenly.

Turning It into a Rice Bowl

Serving the prawns over rice makes the recipe a complete meal rather than simply a seafood dish. The relatively neutral flavour of rice absorbs some of the Kung Pao sauce and balances its salty, sweet and spicy characteristics. Browse the Rice collection for other meals built around the same versatile ingredient.

Microwave rice is used here for speed, but freshly cooked rice can be substituted without changing the rest of the recipe. Jasmine rice is particularly suitable if you want a more fragrant base. Divide the rice between four bowls before adding the prawns so everyone receives a similar balance of rice, vegetables, seafood and sauce.

Prawns as a Quick Seafood Dinner

Prawns are useful when time is limited because they cook considerably faster than many larger pieces of fish or meat. Their mild sweetness also works well with assertive sauces. This makes them a natural ingredient for quick Seafood meals and Asian-inspired dishes.

The main point to watch is cooking time. Properly cooked prawns should be opaque and firm but still juicy. Leaving them in the air fryer substantially longer than necessary can produce a dry or rubbery texture. For this reason, begin checking them at the lower end of the suggested cooking time.

Variations and Extra Vegetables

The red capsicum and spring onion provide colour, sweetness and texture, but the recipe can accommodate other vegetables. Small broccoli florets, sliced mushrooms or green capsicum can work well provided they are cut small enough to cook in roughly the same time as the prawns.

For extra crunch, peanuts are an obvious addition to a Kung Pao-inspired dish, although they should only be added when appropriate for everyone eating the meal. Scatter them over individual bowls immediately before serving rather than cooking them in the sauce.

Storage and Seafood Safety

Because this recipe contains cooked prawns and rice, leftovers should be cooled and refrigerated promptly. Keep them covered and use them within two days. Reheat only the quantity you intend to eat and make sure it is thoroughly hot before serving.

Good hygiene is particularly important when handling seafood. Keep raw prawns chilled, prevent them from contacting ready-to-eat ingredients and wash utensils and surfaces after preparation. For current guidance about handling, preparing and storing seafood safely, consult the U.S. Food and Drug Administration seafood safety guidance.

With tender prawns, colourful vegetables, fluffy rice and a glossy sweet-and-spicy sauce, Kung Pao Prawn Rice Bowls offer plenty of flavour without a complicated cooking process. The short air-fryer cooking time and easily adjustable chilli level make the dish practical for a quick family meal while still delivering the bold flavours expected from a Kung Pao-inspired recipe.

Air Fryer Chicken Nuggets


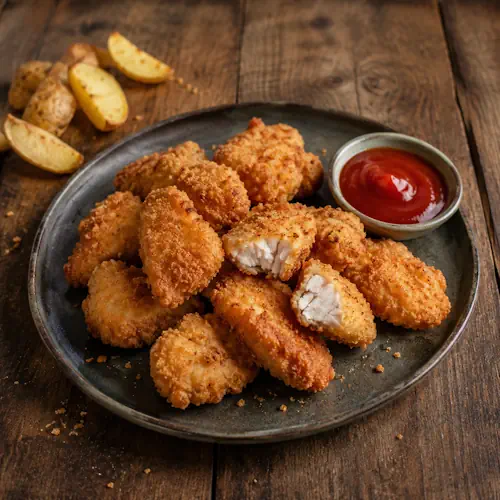
Homemade crispy chicken nuggets with ketchup and potato wedges on a dark ceramic plate over a rustic wooden table.

Air Fryer Chicken Nuggets

Crispy homemade chicken nuggets coated with seasoned flour, breadcrumbs and egg, then cooked in the air fryer until golden outside and juicy inside. A quick family-friendly chicken recipe that is perfect with tomato sauce for dipping.
Couverts4
Preparation 20 minutes
Preparation time:12 minutes
Total time 32 minutes
estimated costs pp 2.50
Deel op Facebook Print Recipe

Equipment

Ingredients

Instructions

  • Combine the plain flour, garlic powder and smoked paprika on a plate.
  • Season the chicken pieces with sea salt flakes and freshly ground black pepper.
  • Place the beaten egg in a bowl and the panko breadcrumbs on another plate.
  • Coat each chicken piece first in the seasoned flour, shaking off any excess, then dip it into the beaten egg and finally coat thoroughly with the panko breadcrumbs.
  • Preheat the air fryer to 200ยฐC.
  • Arrange the chicken nuggets in a single layer in the air fryer basket. Cook in batches if necessary so the nuggets are not overcrowded.
  • Air fry for 10 to 12 minutes, turning halfway through, until the coating is crisp and golden and the chicken is thoroughly cooked.
  • Serve immediately with tomato sauce for dipping.

Notes & Wine Advice

Serving Suggestions

Serve these chicken nuggets immediately while the coating is hot and crisp. Tomato sauce is the classic dipping option, but they also work well with other Dips. For a complete meal, serve them with a fresh Salad, potatoes or vegetables.

Recipe Notes

Cut the chicken breast into pieces of roughly equal size so they cook at the same rate. Coat each piece completely with flour, egg and panko breadcrumbs. Press the breadcrumbs lightly onto the chicken to help create an even, crispy coating.
Do not overcrowd the air fryer basket. Leaving some room between the nuggets allows hot air to circulate around them and helps the coating become crisp. Depending on the size of your air fryer, you may need to cook them in two batches.

Variations

Add chilli powder or cayenne pepper to the flour for spicy nuggets. Onion powder, dried herbs or additional smoked paprika can also be used to change the seasoning. For extra crunch, lightly spray the breaded nuggets with cooking oil immediately before air frying.

Storage Advice

Store cooked chicken nuggets in an airtight container in the refrigerator for up to 3 days. Reheat them in the Airfryer at 180ยฐC for several minutes until thoroughly hot and crisp. Reheating in the air fryer gives a better result than using the microwave because the breadcrumb coating stays crisper.

Wine Advice

A fresh Sauvignon Blanc works well with the crisp breadcrumb coating and mild chicken. A lightly oaked Chardonnay is another suitable choice, particularly when the nuggets are served as part of a larger meal.

Nutrition values

Serving: 205 gr | Calories: 39 kcal | koolhydraten: 32 g | Eiwitten: 42 g | Vet: 9 g | Verzadigd vet: 2 g | Natrium: 430 mg | Suiker: 2 g
————————————————————————————————–

About Air Fryer Chicken Nuggets

Air Fryer Chicken Nuggets are a homemade version of a familiar favourite, made with pieces of chicken breast rather than processed chicken. Each piece is coated in seasoned flour, beaten egg and crunchy panko breadcrumbs before being cooked in the Airfryer. The result is a crisp golden exterior surrounding tender chicken, with considerably less oil required than traditional deep frying.

Using Chicken Breast for Homemade Nuggets

Chicken breast works particularly well for homemade nuggets because it is easy to cut into evenly sized bite-size pieces. Keeping the pieces reasonably similar in size is important because they need to cook through at approximately the same time. Very small pieces can become dry before larger pieces are fully cooked.

Unlike many commercially produced nuggets, these homemade nuggets use recognisable pieces of chicken. This gives them a firmer, meatier texture and makes them suitable as either a Snack or part of a complete meal. More ideas using chicken breast and other cuts can be found in the Chicken collection.

Building a Crispy Panko Coating

The coating is created in three stages. First, the chicken is covered with flour seasoned with garlic powder and smoked paprika. The flour provides a dry surface that helps the beaten egg adhere properly. The egg then acts as the binding layer for the panko breadcrumbs.

Panko breadcrumbs are particularly useful for this recipe because their coarse texture produces a crisp exterior. Pressing the breadcrumbs gently onto each piece helps prevent bare patches and creates a more consistent crust. Shaking excess flour from the chicken before dipping it into the egg also prevents the coating from becoming excessively thick.

Cooking Chicken Nuggets in the Air Fryer

Air frying gives the breadcrumb coating direct exposure to rapidly circulating hot air. This allows the exterior to become crisp and golden without submerging the nuggets in cooking oil. Preheating the appliance to 200ยฐC helps the coating begin cooking immediately.

The nuggets should be placed in a single layer rather than piled on top of one another. Overcrowding restricts airflow and can leave parts of the breadcrumb coating soft. Cooking in batches may take slightly longer overall, but it produces much better results.

Turning the nuggets halfway through cooking exposes both sides to the strongest airflow and encourages even browning. Depending on the size of the chicken pieces and the particular air fryer, the exact cooking time may vary slightly.

A Versatile Family Meal

Chicken nuggets are particularly useful for an informal Family Dinner because everyone can choose their preferred accompaniments and dipping sauces. Tomato sauce keeps things simple, while barbecue sauce, yoghurt-based dips or other savoury sauces can provide variety.

For children, the seasoning can be kept mild. For adults or anyone who prefers stronger flavours, chilli powder, cayenne pepper or additional smoked paprika can be incorporated into the flour mixture. This makes it easy to adapt the same basic recipe without changing the cooking method.

Serving Ideas

These nuggets can be served alone as Fingerfood, but they can also form the centre of a complete dinner. Pair them with potato wedges, a green salad, coleslaw or roasted vegetables. Smaller portions work well for parties, Game Day or Movie night, especially when several dipping sauces are placed on the table.

Because the chicken itself is mildly seasoned, the dipping sauce can change the character of the dish considerably. Tomato sauce gives a familiar sweet and tangy finish, while a spicy sauce makes the nuggets considerably bolder.

Preparing and Storing Leftovers

Chicken nuggets have their best texture immediately after air frying, when the panko coating is at its crispiest. Leftovers can nevertheless be refrigerated and reheated successfully. Keep them in a covered container and return them to the air fryer for a few minutes rather than reheating them in a microwave.

The nuggets can also be prepared ahead through the breading stage and kept refrigerated for a short period before cooking. Keep raw breaded chicken properly chilled and avoid allowing it to remain at room temperature for extended periods.

Cooking Chicken Safely

Chicken must be cooked thoroughly before serving. The centre should no longer be raw, and using a food thermometer is the most reliable way to check doneness. For current guidance about handling poultry, preventing cross-contamination and cooking chicken safely, consult the U.S. Food and Drug Administration food-safety information.

With juicy chicken breast, a crisp panko coating and a short air-fryer cooking time, Air Fryer Chicken Nuggets are an easy alternative to packaged nuggets. The straightforward seasoning keeps them versatile, while different dips, side dishes and spices make it simple to adapt the recipe for lunch, dinner or sharing.

Black Bean Double Cheese Nachos


Melted double-cheese nachos with black beans, tomato salsa and jalapeรฑos in a cast-iron skillet, served with lime and fresh salsa on a rustic wooden table.

Black Bean Double Cheese Nachos

Crispy tortilla chips layered with seasoned black beans, Cheddar and mozzarella, then air fried until the cheese is bubbling and golden. Finished with a fresh tomato and red onion salsa, these nachos make an easy vegetarian snack, appetizer or sharing dish.
Couverts4
Preparation 10 minutes
Preparation time:15 minutes
Total time 25 minutes
estimated costs pp $2.25
Deel op Facebook Print Recipe

Equipment

Ingredients

Instructions

  • To make the salsa, coarsely grate the tomatoes into a bowl, discarding any skin. Grate the red onion into the bowl, then stir through the olive oil, lime juice and chilli powder, if using. Season with sea salt flakes and freshly ground black pepper, then set aside.
  • Place the black beans in a bowl with the Cajun-style or fajita seasoning and the remaining lime juice. Mash roughly with a potato masher, leaving some of the beans whole.
  • Preheat the air fryer to 200ยฐC for 3 minutes.
  • Place half of the tortilla chips in the air fryer basket, followed by half of the mashed beans and half of the cheese. Repeat with the remaining tortilla chips, beans and cheese.
  • Air fry at 200ยฐC for 8 to 10 minutes, until the cheese is melted, golden and bubbling.
  • Use a baking paper liner to carefully lift the nachos onto a serving platter.
  • Spoon the fresh salsa over the nachos, scatter with coriander leaves if using and serve immediately.

Notes & Wine Advice

Serving Suggestions

Serve these nachos immediately while the tortilla chips are crisp and the cheese is still hot and bubbling. They are ideal as an Appetizer, for Game Day or as informal Party food. Extra salsa can be served alongside for dipping.

Recipe Notes

Do not mash the black beans completely. Leaving some beans whole gives the topping more texture. When layering the nachos, distribute the beans and cheese evenly so there is plenty of topping between the tortilla chips rather than only on the surface.
The original recipe suggests using corn chips if hard taco shells are unavailable. Either can work, but sturdy tortilla chips are particularly convenient because they can be layered directly in the air fryer basket.

Variations

For extra heat, increase the chilli powder or add sliced fresh chilli. You can also add jalapeรฑos, sweetcorn or extra black beans. Different combinations of melting Cheese can be used, although Cheddar and mozzarella provide a good balance of flavour and melt.

Storage Advice

Nachos are best eaten immediately because the salsa and melted cheese gradually soften the tortilla chips. Store leftover salsa separately in an airtight container in the refrigerator for up to 2 days. Leftover bean mixture can also be refrigerated separately and reheated before assembling fresh nachos.

Wine Advice

A fresh Sauvignon Blanc works well with the lime, tomato and coriander, while a dry Riesling can provide a refreshing contrast when extra chilli is added. Choose a light, fresh wine rather than a heavily oaked style so it does not overpower the salsa and seasoned beans.

Nutrition values

Serving: 270 gr | Calories: 535 kcal | koolhydraten: 63 g | Eiwitten: 23 g | Vet: 23 g | Verzadigd vet: 10 g | Natrium: 850 mg | Suiker: 6 g
————————————————————————————————–

Shawarma Halloumi Slaw


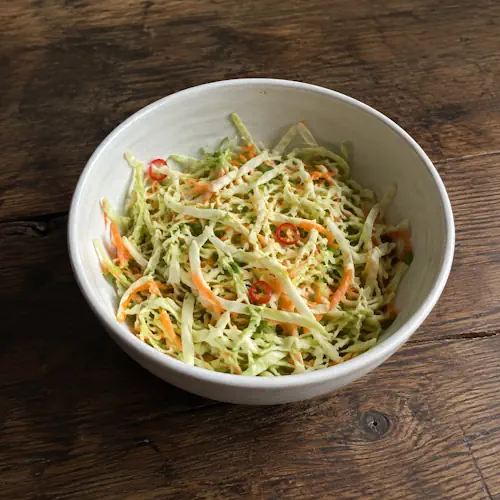
Fresh cabbage and carrot slaw with coriander and red chilli in a simple ceramic bowl on a rustic wooden table.

Shawarma Halloumi Slaw

A fresh and crunchy cabbage and carrot slaw with coriander, lemon and creamy yoghurt, served with warm shawarma-spiced halloumi. A quick vegetarian dish that combines crisp vegetables, salty cheese and aromatic Middle Eastern-inspired spices.
Couverts4
Preparation 10 minutes
Preparation time:8 minutes
estimated costs pp $2.10
Deel op Facebook Print Recipe

Equipment

Ingredients

Instructions

  • To make the slaw, combine the shredded cabbage and grated carrot in a large bowl. Stir through the lemon juice and garlic, then season with sea salt flakes and freshly ground black pepper.
  • Add the natural yoghurt and roughly chopped coriander. Stir thoroughly until the vegetables are evenly coated.
  • Preheat the air fryer to 180ยฐC.
  • Coat the halloumi slices with the shawarma spice mix.
  • Arrange the halloumi in a single layer in the air fryer basket and cook for about 8 minutes, turning halfway through, until golden.
  • Spread the hummus over the slaw and add the spiced halloumi. Drizzle with yoghurt or hot sauce and scatter with coriander leaves to serve.

Notes & Wine Advice

Serving Suggestions

Serve the slaw while the halloumi is still warm and golden. It works well as a light Lunch or alongside other Vegetables as part of a larger meal.

Recipe Notes

Slice the cabbage as finely as possible so it combines easily with the grated carrot and yoghurt dressing. Halloumi is naturally salty, so use additional sea salt sparingly.
Cook the halloumi immediately before serving. It has its best texture when hot and becomes considerably firmer as it cools.

Variations

Add extra shredded vegetables to the slaw or increase the amount of lemon juice for a sharper dressing. For additional heat, drizzle generously with hot sauce. Fresh mint can also be used alongside the coriander.

Storage and Reheating

Store leftover slaw in an airtight container in the refrigerator for up to 2 days. Keep leftover halloumi separately and reheat it briefly in the Airfryer before serving. The dressed cabbage may soften slightly during storage.

Wine Advice

A crisp Sauvignon Blanc works well with the lemon, coriander and salty halloumi. A dry Riesling is another good match, particularly when serving the dish with plenty of hot sauce.

Nutrition values

Serving: 180 gr | Calories: 245 kcal | koolhydraten: 11 g | Eiwitten: 15 g | Vet: 17 g | Verzadigd vet: 10 g | Natrium: 780 mg | Suiker: 7 g
————————————————————————————————–

About Shawarma Halloumi Slaw

Shawarma Halloumi Slaw combines cool, crunchy vegetables with warm, golden cheese and aromatic spices. Finely shredded red cabbage and grated carrot form the fresh base, while yoghurt, lemon, garlic and coriander create a creamy dressing. Shawarma-spiced halloumi adds richness and turns a simple Salad into something substantial enough for lunch or a light meal.

A Fresh Cabbage and Carrot Slaw

Red cabbage is particularly useful for slaw because it stays crisp after dressing and brings plenty of colour to the finished dish. Finely shredding it makes the cabbage easier to eat and allows the yoghurt dressing to coat it evenly. Coarsely grated carrot adds sweetness and another layer of texture.

Lemon juice provides acidity and freshness, while finely grated garlic adds savoury depth. Natural yoghurt gives the dressing its creamy consistency without making the vegetables excessively heavy. Fresh coriander completes the slaw with a bright herbal flavour that works particularly well with the shawarma spices.

Golden Shawarma-Spiced Halloumi

Halloumi transforms this simple slaw into a much more substantial dish. Unlike many cheeses, halloumi keeps its shape when exposed to high heat. This allows it to develop a golden exterior while remaining pleasantly firm inside. You can discover more recipes using this ingredient in our Cheese collection.

Coating the slices with shawarma seasoning before cooking introduces warm, aromatic spices. Halloumi already contains plenty of salt, so there is generally no need to add additional salt to the cheese itself.

Cooking Halloumi in the Air Fryer

The Airfryer makes it particularly easy to cook halloumi. Arrange the slices in a single layer so hot air can circulate around them. Turning them halfway through cooking encourages even browning on both surfaces.

Halloumi should ideally be served as soon as it has finished cooking. When hot, it has a pleasantly tender centre and golden exterior. As it cools, the cheese becomes noticeably firmer, so preparing the slaw before cooking the halloumi makes serving easier.

Balancing Creamy, Fresh and Spicy Flavours

The appeal of this dish comes largely from contrast. Cool yoghurt and crunchy cabbage sit against warm, salty halloumi, while lemon provides acidity and shawarma seasoning contributes warm spice. Coriander adds freshness throughout the dish.

Hot sauce is optional but works particularly well when you want more contrast. The creamy yoghurt helps soften the chilli heat, so you can adjust the amount of hot sauce individually at the table.

A Light Lunch or Side Dish

Shawarma Halloumi Slaw can be served in several ways. As written, it makes a colourful Lunch with plenty of texture. Smaller portions can be served as a Side Dish alongside other Mediterranean or Middle Eastern-inspired foods.

The combination is particularly appealing during spring and summer because much of the dish remains cool and fresh. Only the halloumi needs to be served hot, making it a useful option when you want something satisfying without a heavy sauce or lengthy cooking process.

Making the Dish Your Own

The slaw can easily accommodate additional vegetables. Finely sliced cucumber, spring onion or extra carrot can be incorporated without changing the basic method. Fresh mint can complement or replace some of the coriander, while additional lemon gives the dressing a sharper character.

The amount of shawarma seasoning can also be adjusted. A lighter coating allows the halloumi flavour to remain dominant, while a more generous coating creates a strongly spiced result. Check commercial spice blends before adding salt because some already contain a considerable amount.

Storage and Food Safety

The dressed slaw can be refrigerated, although the vegetables gradually soften as they stand. For the best texture, prepare it reasonably close to serving. Cooked halloumi should be stored separately and reheated before being returned to the slaw.

Keep yoghurt and halloumi refrigerated until needed and return leftovers to the refrigerator promptly. For current guidance about safely storing dairy products and prepared foods, consult the U.S. Food and Drug Administration food-safety information.

With crunchy cabbage, sweet carrot, creamy yoghurt, fragrant coriander and warm shawarma-spiced halloumi, this recipe brings together plenty of flavour and texture in a short preparation. It can work equally well as a fresh vegetarian lunch or as a colourful side dish for a larger meal.

Shawarma Halloumi Wraps


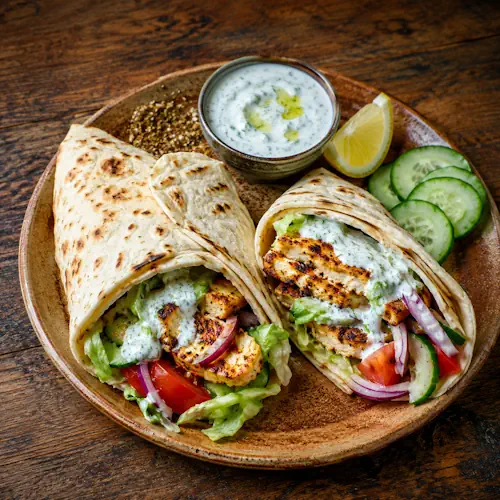
Two toasted flatbread wraps filled with seared shawarma-spiced halloumi, lettuce, tomato, cucumber and red onion, served with herb yogurt sauce and lemon on a rustic wooden table.

Shawarma Halloumi Wraps

Warm wraps filled with golden halloumi seasoned with aromatic shawarma spices. Quick to prepare and easy to customise with yoghurt or hot sauce, these savoury wraps make a satisfying vegetarian lunch or dinner.
Couverts4
Preparation 10 minutes
Preparation time:10 minutes
estimated costs pp $2.50
Deel op Facebook Print Recipe

Equipment

Ingredients

Instructions

  • Preheat the air fryer to 180ยฐC.
  • Combine the halloumi, cumin and shawarma spice mix in a bowl. Season lightly with sea salt and freshly ground black pepper, remembering that halloumi is already naturally salty.
  • Arrange the seasoned halloumi slices in a single layer in the air fryer basket.
  • Air fry for about 10 minutes, turning halfway through, until the halloumi is golden and lightly crisp around the edges.
  • Warm the flatbreads or wraps briefly before serving.
  • Divide the hot halloumi between the four wraps.
  • Drizzle with yoghurt or hot sauce as desired, then roll up and serve immediately.

Notes & Wine Advice

Serving Suggestions

Serve the Shawarma Halloumi Wraps immediately while the cheese is hot and golden. They pair well with a fresh Salad or grilled Vegetables. Yoghurt provides a cool contrast to the spices, while hot sauce is ideal if you prefer additional heat.

Recipe Notes

Halloumi is naturally quite salty, so season carefully. The shawarma spice mixture may also contain salt, depending on the brand. Taste before adding additional seasoning.
Arrange the halloumi in a single layer in the air fryer basket. Leaving space around the slices allows the circulating hot air to brown the cheese more evenly.

Variations

Add shredded lettuce, tomato, cucumber or thinly sliced red onion to turn the wraps into a more substantial meal. Hummus can be spread over the flatbread before adding the halloumi, while chilli sauce provides additional heat.

Storage and Reheating

Halloumi has its best texture immediately after cooking. Store leftover cooked halloumi in an airtight container in the refrigerator for up to 2 days. Reheat briefly in the Airfryer before assembling fresh wraps. Store the flatbreads and other fillings separately.

Wine Advice

A crisp Sauvignon Blanc provides a fresh contrast to the salty halloumi and aromatic shawarma spices. A dry Riesling is another good choice, particularly when the wraps are served with hot sauce.

Nutrition values

Serving: 195 gr | Calories: 475 kcal | koolhydraten: 48 g | Eiwitten: 21 g | Vet: 22 g | Verzadigd vet: 12 g | Natrium: 1180 mg | Suiker: 4 g
————————————————————————————————–

About Shawarma Halloumi Wraps

Shawarma Halloumi Wraps combine the distinctive salty flavour of halloumi with the warm aromatic character of shawarma seasoning. Instead of using the meat traditionally associated with shawarma-style dishes, thick slices of halloumi are seasoned and cooked until golden in the Airfryer. Wrapped in soft flatbread and finished with yoghurt or hot sauce, they make a straightforward vegetarian meal for four.

Halloumi as the Main Ingredient

Halloumi is particularly well suited to this recipe because it behaves differently from many softer cheeses when heated. Rather than immediately melting, it retains its shape and develops a golden exterior. This makes it useful for grilling, frying and air frying, and explains why it works so effectively as the substantial centre of these wraps.

The cheese is cut into slices about 1 cm thick. This gives the outside enough time to colour while keeping the centre pleasantly firm. Halloumi is naturally salty, so additional seasoning should be used sparingly. You can find other ways to use cheese in the Cheese collection.

Warm Shawarma Spices

Shawarma seasoning gives these wraps their main aromatic character. Spice blends vary, but they typically contain a combination of warm and earthy spices. In this recipe the prepared shawarma mixture is reinforced with cumin, giving the halloumi a pronounced savoury flavour.

Because both halloumi and some commercial spice mixtures can contain significant amounts of salt, it is sensible to season cautiously. Freshly ground black pepper can be added more freely and provides a little extra warmth without increasing the saltiness.

Cooking Halloumi in the Air Fryer

The air fryer provides a quick way to brown halloumi without needing a frying pan filled with oil. The slices are arranged in a single layer so circulating hot air can reach as much of their surface as possible. Turning them halfway through cooking encourages even colouring on both sides.

Halloumi is best served shortly after cooking. As it cools, its texture becomes firmer and more rubbery. For that reason, have the flatbreads and any sauces or additional fillings ready before the cheese finishes cooking.

Building the Wraps

Soft flatbreads or large wraps make an easy container for the hot spiced halloumi. Warming them briefly before assembly makes them more flexible and reduces the chance of tearing when they are rolled.

The original recipe keeps the fillings deliberately simple, using yoghurt or hot sauce as the finishing touch. Yoghurt provides a creamy, cooling contrast to the shawarma spices, while hot sauce takes the flavour in a spicier direction. Both options work particularly well with the salty cheese.

For a more substantial Lunch, add lettuce, tomato, cucumber or red onion. These fresh vegetables provide moisture and crunch without competing with the strongly flavoured halloumi.

An Easy Vegetarian Dinner

These wraps are also practical as a quick Dinner. Preparation mainly involves slicing and seasoning the cheese, and the air fryer handles the cooking in about ten minutes. This makes the recipe useful when you want something warm and filling without a lengthy preparation.

The recipe belongs naturally among Wrap Recipes, but the seasoned halloumi does not have to be served in bread. It can also be added to salads or served with roasted vegetables for a different presentation.

Variations and Serving Ideas

The simple format leaves plenty of room for additional ingredients. Hummus adds creaminess and works naturally with the Middle Eastern-inspired spices. Fresh herbs, shredded lettuce, tomatoes and cucumber can make the wraps lighter and fresher. Pickled vegetables provide acidity that cuts through the richness and saltiness of the cheese.

If you enjoy spicy food, chilli sauce can replace the yoghurt completely. Alternatively, combine yoghurt with a small amount of chilli sauce to create a creamy but moderately spicy dressing.

Storage and Food Safety

Cooked halloumi can be refrigerated, although its texture is best immediately after cooking. Store leftover cheese separately from the flatbreads and fresh ingredients. Reheat the halloumi briefly until thoroughly hot before assembling the wraps.

For current information about storing perishable foods, dairy products and prepared leftovers safely, consult the U.S. Food and Drug Administration food-safety information.

With golden halloumi, aromatic shawarma seasoning and warm flatbread, Shawarma Halloumi Wraps turn a very short ingredient list into a satisfying meal. The basic recipe is simple enough for an everyday lunch or dinner, while fresh vegetables, hummus, yoghurt or chilli sauce make it easy to adapt each wrap to individual tastes.