Air Fryer Polenta Base


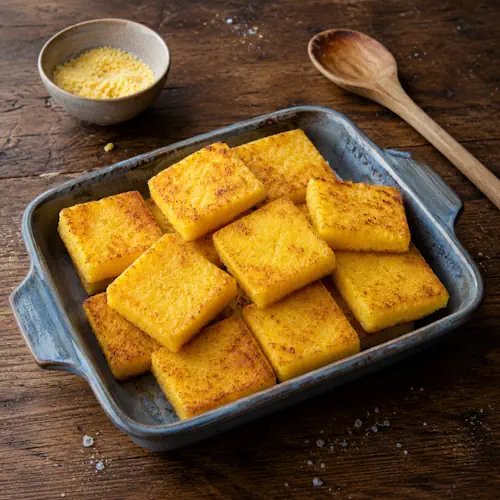
Crispy golden polenta squares in a rustic ceramic baking dish.

Air Fryer Polenta Base

Golden air-fried polenta pieces made with vegetable stock, Parmesan and olive oil. The polenta is chilled until firm, cut into bite-sized pieces and air fried until crisp, creating a versatile base for your favourite savoury toppings.
Couverts4
Total time 42 minutes
estimated costs pp $1.40
Deel op Facebook Print Recipe

Equipment

  • baking paper
  • baking tray
  • Knife
  • Saucepan, Large
  • Whisk

Ingredients

Instructions

  • Grease and line a 20 cm Swiss roll pan with baking paper.
  • Heat the olive oil and vegetable stock in a large saucepan over medium heat and bring to a simmer.
  • Gradually pour in the instant polenta, stirring constantly.
  • Cook for 5 minutes, until the mixture is thick and coming away from the sides of the saucepan.
  • Stir in the Parmesan and butter and season with sea salt flakes and freshly ground black pepper.
  • Pour the prepared polenta into the pan, smooth the surface and refrigerate for up to 3 days.
  • Preheat the air fryer to 200ยฐC.
  • Arrange the polenta pieces in a single layer in the air fryer basket.
  • Air fry for 15 to 20 minutes, until golden.
  • Store in an airtight container for up to 1 day.
  • Add your desired toppings shortly before serving.

Notes & Wine Advice

Serving Suggestions

Serve the polenta pieces warm and crisp with your favourite savoury toppings. They make an excellent Amuse, Appetizer or small Snack. Try them with roasted vegetables, cheese, mushrooms, tomato toppings or fresh herbs.

Recipe Notes

Add the instant polenta gradually while stirring constantly to prevent lumps. Once cooked, spread it evenly in the prepared pan and smooth the surface so the finished pieces have a similar thickness.
Allow the polenta to chill until completely firm before cutting. This helps the pieces retain their shape when cooked in the Airfryer.

Variations

Fresh herbs, garlic or spices can be stirred through the polenta before chilling. Different toppings can then transform the same Basic recipe into a variety of appetisers or snacks.

Storage Advice

The uncut cooked polenta can be refrigerated for up to 3 days. Once air fried, allow the pieces to cool and store them in an airtight container for up to 1 day. Reheat briefly in the air fryer before adding toppings.

Wine Advice

A fresh Pinot Grigio pairs well with the Parmesan and crisp polenta. A Chardonnay is a good alternative for richer cheese, mushroom or creamy toppings.

Nutrition values

Serving: 430 gr | Calories: 540 kcal | koolhydraten: 83 g | Eiwitten: 13 g | Vet: 17 g | Verzadigd vet: 7 g | Natrium: 760 mg | Suiker: 3 g
————————————————————————————————–

About Air Fryer Polenta Base

Air Fryer Polenta Base is a versatile way to transform simple instant polenta into golden, crisp pieces ready for a wide variety of savoury toppings. Polenta has strong roots in Italian cooking, where cooked cornmeal can be served soft or allowed to firm before being grilled, fried or baked. Here, the Airfryer provides the crisp finish.

Making Smooth Polenta

The foundation of the recipe is instant polenta cooked in vegetable stock. Adding the polenta gradually while whisking or stirring continuously helps prevent lumps and creates an even texture.

Once the mixture becomes thick and begins to pull away from the sides of the saucepan, Parmesan and butter are stirred through. These ingredients provide richness and additional savoury flavour.

Chilling the Polenta

Freshly cooked polenta is too soft to use as a canapรฉ base. Spreading it into a lined pan and refrigerating it allows the mixture to become firm enough to cut cleanly.

The cooked polenta can remain refrigerated for up to 3 days before the final cooking stage, making this a useful Basic recipe when preparing food ahead for guests.

Creating Crisp Polenta Pieces

Once chilled, the firm polenta can be cut into pieces and arranged in a single layer in the air fryer. Leaving space around the pieces allows the circulating hot air to reach more of their surface.

The finished polenta should be golden on the outside while remaining softer inside. Cooking times can vary slightly according to the thickness of the pieces and the particular air fryer.

Choosing Savoury Toppings

The mild corn flavour and Parmesan make these pieces suitable for many toppings. Roasted Vegetables, mushrooms, tomato, cheese and fresh herbs can all work particularly well.

For an Appetizer platter, prepare several different toppings and use the same polenta bases underneath. This provides variety without requiring several separate base recipes.

Serving for Parties and Birthdays

The small pieces work well as finger food for a Party or Birthday. Prepare the polenta in advance, then air fry the pieces closer to serving time so they remain crisp.

Add moist toppings shortly before serving. Leaving sauces or juicy vegetables on the polenta for too long can gradually soften the crisp surface.

Using Polenta as a Side Dish

The pieces do not have to be used exclusively for appetisers. Served without elaborate toppings, they can also work as a Side Dish alongside vegetables or other main dishes.

A little grated Parmesan, chopped herbs or freshly ground black pepper added immediately before serving is enough when the polenta accompanies a strongly flavoured main course.

Preparing and Storing Ahead

The cooked polenta can be prepared well ahead of the final air-frying stage. Keep it covered in the refrigerator and cut it only when you are ready to cook the pieces.

Air-fried leftovers can be refrigerated in an airtight container and reheated briefly in the air fryer. This method restores more of the crisp exterior than reheating in a microwave.

Food Safety

Refrigerate the cooked polenta promptly once it has cooled and keep Parmesan, butter and any perishable toppings properly chilled. Finished pieces topped with dairy, meat, fish or other perishable ingredients should not remain unrefrigerated unnecessarily. For current food preparation and storage guidance, consult the U.S. Food and Drug Administration food-safety information.

Air Fryer Polenta Base combines the flavour of Parmesan with the crisp exterior and soft centre of cooked polenta. Whether served as an Amuse, party snack or simple side dish, the neutral base provides plenty of room to experiment with different savoury toppings.
Air Fryer Potato Bases


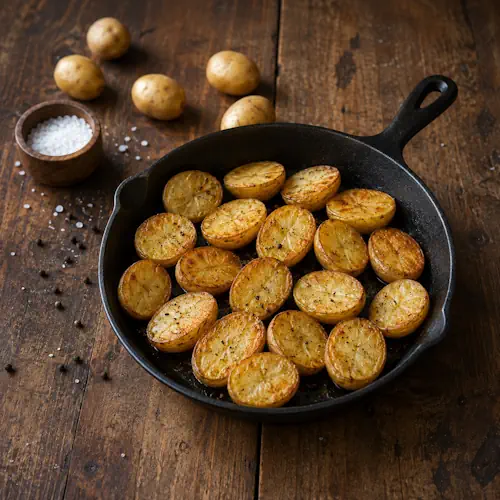
Golden air-fried baby potato halves with sea salt and black pepper in a cast-iron skillet.

Air Fryer Potato Bases

Simple golden potato bases made with baby potatoes, olive oil and seasoning. The potatoes are air fried until tender, gently crushed and cooked again until crisp, creating an easy base for your favourite savoury toppings.
Couverts4
Total time 42 minutes
estimated costs pp $1.10
Deel op Facebook Print Recipe

Equipment

Ingredients

Instructions

  • Preheat the air fryer to 200ยฐC.
  • Toss the baby potatoes with the olive oil and season with sea salt flakes and freshly ground black pepper.
  • Air fry for 20 to 30 minutes, shaking every 10 minutes, until lightly golden.
  • Gently crush the potatoes to create flat edges.
  • Return the potatoes to the air fryer and cook for a further 10 minutes, until crisp.
  • Store in an airtight container for up to 1 day.
  • Add your desired toppings before serving.

Notes & Wine Advice

Serving Suggestions

Serve these crisp potato bases with your favourite savoury toppings. They work particularly well as an Amuse, Appetizer or Side Dish. Try toppings such as cheese, smoked salmon, sour cream, roasted vegetables or fresh herbs.

Recipe Notes

Choose baby potatoes of a similar size so they cook evenly. The potatoes should be completely tender before crushing them. Press gently with a fork so they flatten without falling apart.
The second cooking stage in the Airfryer is what creates the crisp edges, so leave a little space between the potatoes where possible.

Variations

Season the potato bases with herbs, garlic or spices before the final cooking stage. The neutral potato flavour makes this Basic recipe suitable for many different toppings.

Storage Advice

Allow the cooked potato bases to cool completely before storing them in an airtight container in the refrigerator for up to 1 day. Reheat briefly in the air fryer until hot and crisp before adding the toppings.

Wine Advice

The ideal wine depends on the topping. A fresh Sauvignon Blanc works well with vegetable, herb or fresh cheese toppings. A Chardonnay is suitable for richer cheese or creamy toppings.

Nutrition values

Serving: 320 gr | Calories: 290 kcal | koolhydraten: 54 g | Eiwitten: 6 g | Vet: 7 g | Verzadigd vet: 1 g | Natrium: 180 mg | Suiker: 3 g
————————————————————————————————–

About Air Fryer Potato Bases

Air Fryer Potato Bases turn simple baby potatoes into crisp little platforms for a wide variety of savoury toppings. The potatoes are first cooked until tender in the Airfryer, then gently crushed and cooked again to develop golden, crisp edges. This straightforward Basic recipe can be adapted for appetisers, snacks and side dishes.

Choosing the Potatoes

Baby potatoes are particularly suitable because their small size makes them easy to serve as individual portions. Choose potatoes that are reasonably similar in size so they become tender at approximately the same time.

Keeping the skin on helps the potatoes hold together after they are crushed. It also gives the finished bases additional texture around their crisp edges.

Cooking the Potatoes

The first cooking stage is designed to make the potatoes completely tender. Tossing them with olive oil helps the skins brown while sea salt and freshly ground black pepper provide simple seasoning.

Shake the air fryer basket approximately every 10 minutes so the potatoes cook and colour more evenly. Larger baby potatoes may need slightly longer than smaller ones.

Creating the Potato Bases

Once tender, gently crush each potato with a fork. The aim is to flatten it enough to create a surface for toppings without completely breaking the potato apart.

Returning the flattened potatoes to the air fryer exposes more surface area to the circulating heat. This second cooking stage produces the crisp edges that distinguish these bases from ordinary boiled or baked potatoes.

Choosing Your Toppings

The mild flavour of potato makes these bases extremely versatile. They can support creamy, savoury, fresh or spicy toppings and therefore work particularly well as an Appetizer or Amuse.

Possible toppings include smoked salmon and cream cheese, grated cheese, roasted Vegetables, sour cream with herbs or other savoury combinations. Add toppings shortly before serving.

Serving for a Party

Small potato bases are particularly useful for a Party because several different toppings can be offered using the same basic potato preparation. Arrange the finished bases on a large platter and vary the toppings for colour and flavour.

Keep hot toppings hot and chilled toppings refrigerated until shortly before assembly. This also helps prevent the potatoes from becoming soft while waiting to be served.

Serving as a Side Dish

Without elaborate toppings, the potatoes can also be served as a crisp Side Dish. Fresh herbs, a little extra seasoning or a simple sauce may be all that is required.

The crisp exterior and soft centre make them suitable alongside grilled or roasted dishes where ordinary boiled potatoes might feel a little too plain.

Preparing Them Ahead

The recipe can be prepared ahead because the cooked potato bases can be refrigerated for up to one day. Allow them to cool completely before transferring them to an airtight container.

For the best texture, reheat them briefly in the air fryer before serving. Add cold or moist toppings only after reheating so the bases remain as crisp as possible.

Food Safety

Cool cooked potatoes promptly before refrigeration and keep any perishable toppings refrigerated until needed. Once assembled with dairy, fish, meat or other perishable ingredients, the finished appetisers should not remain at room temperature unnecessarily. For current food preparation and storage guidance, consult the U.S. Food and Drug Administration food-safety information.

Air Fryer Potato Bases are a useful foundation for everything from a simple Snack to a platter of party appetisers. With a crisp exterior, fluffy centre and neutral flavour, the same basic potato recipe can be finished in many different ways.

Star-Shaped Toast Canapรฉ Bases


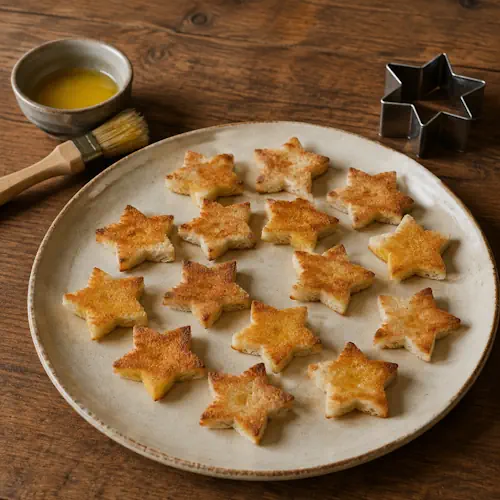
Golden butter-brushed star-shaped toast bases on a rustic wooden table.

Star-Shaped Toast Canapรฉ Bases

Simple star-shaped white bread canapรฉ bases, lightly buttered and air fried until golden and crisp. These versatile little toasts can be prepared ahead and topped with your favourite savoury ingredients just before serving.
Couverts4
Total time 20 minutes
estimated costs pp $0.35
Deel op Facebook Print Recipe

Equipment

  • Butter knife
  • Star-shaped cutter, small

Ingredients

Instructions

  • Using a small star-shaped cutter, cut about 15 stars from the bread, approximately three stars per slice.
  • Brush the lower bread crumbs with melted butter and place them in a single layer in the air fryer.
  • Cook at 200ยฐC for 8 to 10 minutes or until golden.
  • Store the cooled toast bases in an airtight container for up to 1 day.
  • Add your desired toppings shortly before serving.

Notes & Wine Advice

Serving Suggestions

Top these crisp canapรฉ bases shortly before serving so the bread stays crunchy. They work particularly well for an Amuse or Appetizer. Try toppings such as smoked salmon, cream cheese, pรขtรฉ, cheese, roasted vegetables or your favourite savoury spread.

Recipe Notes

Use a small star-shaped cutter that allows you to cut approximately three stars from each slice of bread. Brush the bread lightly rather than soaking it with butter so the canapรฉ bases become crisp in the Airfryer.

Variations

Different small cutters can be used to adapt these Bread bases for different occasions. Stars are particularly suitable for festive serving, while circles, hearts or other shapes can be used when appropriate.

Storage Advice

Allow the toast bases to cool completely before transferring them to an airtight container. Store for up to 1 day and add moist toppings only shortly before serving to prevent the bread from becoming soft.

Wine Advice

The best wine depends mainly on the topping. A fresh Sauvignon Blanc works well with lighter vegetable or fresh cheese toppings, while a Chardonnay can suit richer cheese or creamy toppings.

Nutrition values

Serving: 32 gr | Calories: 105 kcal | koolhydraten: 15 g | Eiwitten: 3 g | Vet: 4 g | Verzadigd vet: 2 g | Natrium: 180 mg | Suiker: 2 g
————————————————————————————————–

About Star-Shaped Toast Canapรฉ Bases

Star-Shaped Toast Canapรฉ Bases are a simple Basic recipe for turning ordinary white bread into crisp little bases for savoury toppings. A small cutter creates the decorative shape, while a thin coating of melted butter helps the bread become golden and crisp in the Airfryer. Because the flavour of the toast itself remains neutral, these bases can be combined with many different toppings.

Making Even Canapรฉ Bases

Use a small star-shaped cutter and position it carefully on each slice to minimise waste. The original recipe makes approximately 15 stars from five slices of white bread. Keeping the pieces similar in size is useful because they will brown at approximately the same speed.

A light coating of melted butter adds flavour and encourages browning. Avoid applying too much, because the goal is a dry, crisp base sturdy enough to support a topping.

Cooking Them in the Air Fryer

Arrange the stars in a single layer so hot air can circulate around them. Depending on the size and power of the air fryer, they should become golden and crisp within approximately 8 to 10 minutes.

Check them toward the end of cooking because small pieces of Bread can change from golden to overly dark quite quickly.

Choosing the Toppings

The finished toast bases can be used for many types of Appetizer. Cream cheese with smoked salmon, pรขtรฉ, soft cheese, roasted vegetables or savoury spreads are all possible combinations. Keep the toppings relatively small so the star shape remains visible.

For a selection of party food, prepare several different toppings and arrange the finished canapรฉs together on a large serving platter. This provides variety without requiring several different bases.

Preparing Them Ahead

One advantage of these canapรฉ bases is that they can be prepared before they are needed. Once completely cool, place them in an airtight container and store them for up to one day.

Do not add toppings before storage. Moist ingredients will gradually soften the toast, so assemble the finished canapรฉs as close to serving time as practical.

Useful for Festive Occasions

The star shape makes these little toasts particularly suitable for Christmas and other celebrations. The same technique can also be used with different cutters when another shape better suits the occasion.

Because each piece is small, they work particularly well as an Amuse before a meal or as part of a larger platter of snacks and appetisers.

Keeping the Toast Crisp

The most important consideration after cooking is moisture. Allow the bread stars to cool completely before sealing them in a container. Trapped steam can soften them even before toppings are added.

If the bases lose a little crispness during storage, they can be returned briefly to the air fryer. Allow them to cool again before adding cold toppings.

Food Safety

The toast itself is straightforward to store, but the food-safety requirements of the finished canapรฉ depend on its topping. Ingredients such as meat, fish, dairy products and other perishable foods should remain properly refrigerated until needed. For current guidance on preparing and storing food safely, consult the U.S. Food and Drug Administration food-safety information.

Star-Shaped Toast Canapรฉ Bases are an easy way to create homemade Snack or party-food bases from everyday bread. Once the crisp stars are prepared, changing the toppings allows the same basic recipe to work for everything from a simple gathering to a festive celebration.

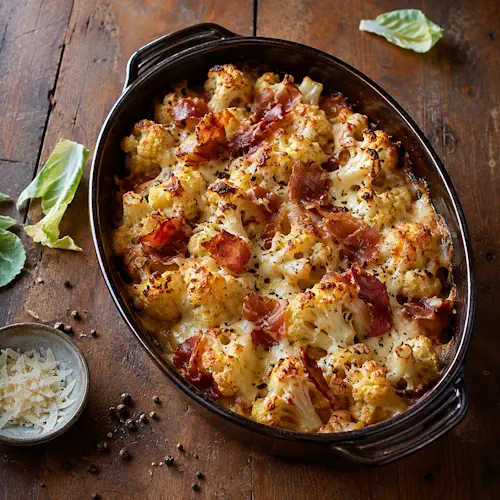
Cheesy Roast Cauliflower with Prosciutto


Roasted cauliflower with melted cheese, crisp prosciutto and cracked black pepper in a rustic baking dish.

Cheesy Roast Cauliflower with Prosciutto

Tender air-fried cauliflower topped with crispy prosciutto and melted Gruyรจre cheese. A rich and savoury vegetable dish that works beautifully as a side dish, lunch or light meal.
Couverts4
Total time 45 minutes
estimated costs pp $2.75
Deel op Facebook Print Recipe

Equipment

Ingredients

Instructions

  • Preheat the air fryer to 180ยฐC.
  • Remove the leaves from the cauliflower and trim the base without cutting so much that the head collapses.
  • Cut the cauliflower in half, then cut four slices approximately 2 cm thick from each half.
  • Blanch the cauliflower slices in a large saucepan of boiling water for 3 minutes.
  • Drain thoroughly and arrange the cauliflower in the air fryer basket.
  • Brush with olive oil and season with sea salt flakes and freshly ground black pepper.
  • Air fry at 180ยฐC for 10 to 15 minutes, until tender and golden, turning halfway through.
  • Preheat the air fryer to 180ยฐC.
  • Top each cauliflower slice with half a slice of prosciutto and a spoonful of crรจme fraรฎche.
  • Sprinkle with Gruyรจre cheese and return to the air fryer for 5 to 10 minutes, until the cheese is melted and golden.
  • Season with freshly ground black pepper and scatter with chopped parsley before serving.

Notes & Wine Advice

Serving Suggestions

Serve the Cheesy Roast Cauliflower with Prosciutto immediately while the Cheese is melted and the cauliflower is hot. It makes a rich Side Dish alongside meat or poultry, but the generous cauliflower slices are also substantial enough for a light Lunch.

Recipe Notes

Keep part of the cauliflower stalk attached when cutting the slices. This helps hold the florets together during blanching and air frying. Cut the slices to a similar thickness so they cook at approximately the same rate.
Drain the blanched cauliflower thoroughly before brushing it with olive oil. Excess surface moisture can prevent good browning in the air fryer.

Variations

Gruyรจre gives the dish a rich, slightly nutty flavour, but another suitable melting cheese can be used when preferred. For a meat-free version, leave out the prosciutto, although this changes the original recipe. Browse the Vegetables collection for more cauliflower and vegetable dishes.

Storage Advice

Store leftovers in an airtight container in the refrigerator for up to 3 days. Reheat them in the Airfryer until thoroughly hot and the cheese is bubbling again. The microwave can be used, but the cauliflower and prosciutto will be softer.

Wine Advice

A Chardonnay pairs well with the creamy Gruyรจre and crรจme fraรฎche, while its acidity balances the salty prosciutto. A fresh Sauvignon Blanc is a lighter alternative that works particularly well with the cauliflower and parsley.

Nutrition values

Serving: 260 gr | Calories: 245 kcal | koolhydraten: 11 g | Eiwitten: 15 g | Vet: 17 g | Verzadigd vet: 9 g | Natrium: 620 mg | Suiker: 5 g
————————————————————————————————–

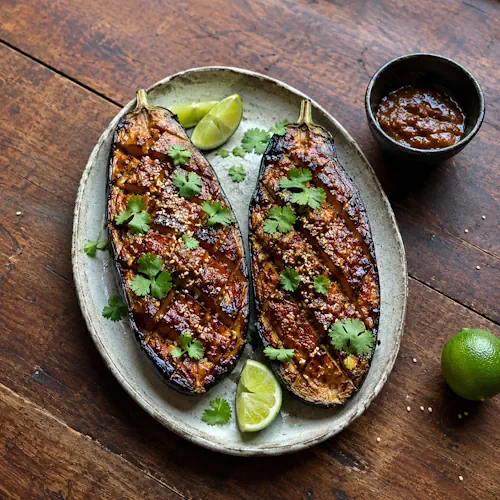
Air Fryer Miso Eggplant


Caramelised miso-glazed eggplant with sesame seeds, coriander and lime.

Air Fryer Miso Eggplant

Tender air-fried eggplant coated with a savoury miso, soy and lime glaze. The eggplant is scored to absorb the flavours before being cooked until soft and lightly charred, creating an easy Japanese-inspired vegetable dish.
Couverts4
Total time 45 minutes
estimated costs pp $1.65
Deel op Facebook Print Recipe

Equipment

Ingredients

Instructions

  • Score a criss-cross pattern into the flesh of the eggplants, taking care not to cut through to the skin.
  • Combine the white miso paste, soy sauce, honey, vegetable oil and lime juice in a small bowl.
  • Brush the miso glaze generously over the eggplant flesh, coating the scored surface thoroughly.
  • Preheat the air fryer to 200ยฐC.
  • Place the eggplant halves in the air fryer basket, cut-side up.
  • Air fry for 25 to 35 minutes, until the eggplant is soft, lightly charred and tender throughout.
  • Transfer to a serving plate and scatter with sesame seeds and coriander leaves.
  • Serve with lime wedges on the side.

Notes & Wine Advice

Serving Suggestions

Serve the Miso Eggplant hot from the Airfryer, sprinkled with sesame seeds and accompanied by fresh lime wedges. It works well as a Side Dish or with steamed Rice for a more substantial meal.

Recipe Notes

Scoring the eggplant allows the miso glaze to penetrate more deeply into the flesh. Make the cuts deep enough to hold the glaze without cutting through the skin.
White miso is naturally salty, as is soy sauce, so additional salt is normally unnecessary. Check the eggplant toward the end of cooking because the honey in the glaze can brown quickly.

Variations

For extra heat, add finely chopped chilli or chilli flakes to the miso mixture. A little grated fresh ginger can also be added for a more aromatic glaze. For a vegan version, replace the honey with maple syrup or another suitable plant-based sweetener.

Storage Advice

Store leftover cooked eggplant in an airtight container in the refrigerator for up to 3 days. Reheat it in the Airfryer until thoroughly hot. Add fresh lime only after reheating.

Wine Advice

A dry Riesling pairs well with the salty-sweet miso glaze and fresh lime. A crisp Sauvignon Blanc is another refreshing choice, particularly when the eggplant is served with fresh herbs.

Nutrition values

Serving: 220 gr | Calories: 175 kcal | koolhydraten: 26 g | Eiwitten: 5 g | Vet: 7 g | Verzadigd vet: 1 g | Natrium: 610 mg | Suiker: 17 g
————————————————————————————————–

About Air Fryer Miso Eggplant

Air Fryer Miso Eggplant combines soft, tender eggplant with a savoury-sweet glaze made from white miso, soy sauce, honey and fresh lime. The flavours have a clear Japan-inspired character, while cooking the eggplant in the Airfryer provides an easy way to achieve tender flesh and lightly caramelised edges without using a large amount of oil.

Why Eggplant Works with Miso

Eggplant has a mild flavour and porous texture, making it particularly good at absorbing strongly flavoured sauces. Miso brings saltiness, savoury depth and umami, while honey balances that intensity with sweetness. Soy sauce reinforces the savoury character and lime provides acidity and freshness.

The combination creates a glaze that is much more intense than the eggplant itself. As the vegetable cooks, its flesh becomes increasingly soft while the surface of the glaze begins to caramelise.

Scoring the Eggplant

Cutting a criss-cross pattern into the flesh is more than a decorative step. The cuts create additional surface area and allow the miso mixture to penetrate deeper into the eggplant. This helps distribute the seasoning instead of leaving most of the glaze sitting on the surface.

Use a sharp knife and stop before reaching the skin. Keeping the skin intact helps each eggplant half retain its shape as the flesh becomes very soft during cooking.

Making the Miso Glaze

White miso paste is generally milder and slightly sweeter than darker varieties, making it particularly suitable for a glaze. Combining it with soy sauce, honey, vegetable oil and lime creates a balance of salty, sweet, rich and acidic flavours.

Brush the mixture over the entire cut surface and work some of it into the scored sections. There is normally no need to add extra salt because both miso and soy sauce already contribute significant seasoning.

Cooking Eggplant in the Air Fryer

The circulating heat of an air fryer cooks the eggplant while concentrating the glaze on its surface. Depending on the size and thickness of the eggplants, they may require between 25 and 35 minutes to become completely tender.

The flesh should be very soft when pierced with a knife. If the surface is browning faster than the centre is cooking, reduce the temperature slightly for the remaining cooking time.

A Versatile Vegetable Dish

Miso Eggplant can be served as a Side Dish alongside other Asian-inspired recipes, but it can also become part of a larger vegetarian meal. Serving it with steamed rice provides a neutral base that absorbs some of the flavourful glaze.

For a lighter Lunch, combine the eggplant with a fresh salad or additional Vegetables. Lime wedges served alongside allow each person to adjust the acidity to taste.

Dietary Considerations

The basic recipe contains no dairy products or eggs, making it suitable for several dietary preferences. However, soy sauce and miso both contain soy, and conventional soy sauce usually contains wheat. For that reason, the recipe should not automatically be classified as soy-free, gluten-free or wheat-free.

Honey also means the original recipe is not vegan. It can easily be adapted by replacing the honey with maple syrup, but the recipe should only be classified as Vegan after that substitution has actually been made.

Serving and Garnishing

Sesame seeds add a slight crunch to the otherwise very soft eggplant. Fresh lime provides a useful acidic contrast to the rich miso glaze. The original recipe also uses coriander leaves, which can be scattered over the eggplant immediately before serving.

If serving the dish as part of a larger meal, pair it with Rice and other vegetable dishes. The strong miso glaze means relatively simple accompaniments work particularly well.

Storage and Reheating

Cooked eggplant is at its best immediately after preparation, but leftovers can be refrigerated in a covered container for up to 3 days. Reheating in the air fryer helps restore some of the caramelisation on the surface.

The flesh will remain softer after refrigeration, so avoid excessive reheating. Fresh garnishes and lime wedges should be added after the eggplant has been reheated.

Food Safety

Wash the eggplants and fresh garnishes thoroughly before preparation and refrigerate leftovers promptly after serving. Use clean utensils when preparing the glaze and handling the cooked vegetables. For current information about safe food preparation and storage, consult the U.S. Food and Drug Administration food-safety information.

Air Fryer Miso Eggplant transforms a simple vegetable into a richly flavoured dish through the combination of miso, soy, honey and lime. Its tender centre, caramelised surface and savoury-sweet glaze make it a versatile addition to a Vegetarian lunch or dinner.

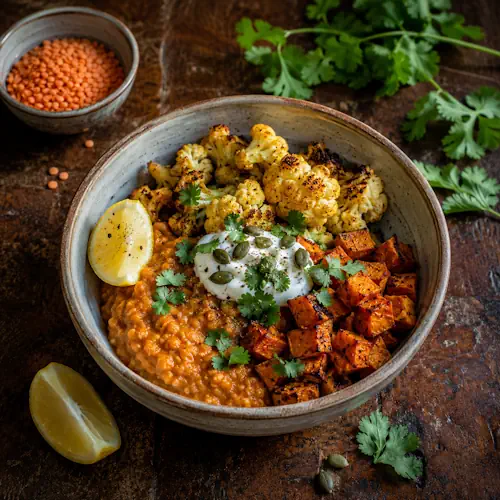
Sweet Potato and Cauliflower Lentil Bowl


Roasted sweet potato and cauliflower over spiced red lentils with yoghurt, coriander, lemon and pumpkin seeds.

Sweet Potato and Cauliflower Lentil Bowl

A nourishing lentil bowl with roasted sweet potato, cauliflower, red cabbage and warm Indian spices. The vegetables are cooked until tender and golden, then combined with green lentils for a filling plant-based meal.
Couverts4
Preparation 10 minutes
Preparation time:30 minutes
estimated costs pp $2.20
Deel op Facebook Print Recipe

Equipment

  • Bowl, large
  • Knife
  • Saucepan, Medium
  • Wooden spoon

Ingredients

Instructions

  • Preheat the air fryer to 180ยฐC.
  • Toss the sweet potato and cauliflower with the canola oil, garam masala, half the sea salt flakes and freshly ground black pepper.
  • Spread evenly in the air fryer basket and cook for 25 to 30 minutes, stirring every 10 minutes, until the vegetables are golden and tender.
  • Meanwhile, place the green lentils in a saucepan with 400 ml cold water. Bring to the boil, then simmer for 20 to 25 minutes until tender but still holding their shape. Drain.
  • Place the cooked garlic, ginger, carrots and red cabbage in a bowl. Mash the garlic cloves with the back of a knife.
  • Add the cooked lentils, lime juice, remaining vegetable oil, cumin and coriander. Toss together until combined.
  • Divide the lentil mixture between four bowls and top each serving with one-quarter of the roasted sweet potato and cauliflower.

Notes & Wine Advice

Serving Suggestions

Serve the Sweet Potato and Cauliflower Lentil Bowl warm, with the seasoned lentils underneath and the golden vegetables piled on top. A fresh Salad can be served alongside, although the combination of lentils and vegetables already makes this a substantial Lunch or light dinner.

Recipe Notes

Cut the sweet potato into similarly sized chunks and keep the cauliflower florets reasonably large so both vegetables cook evenly. Stir or shake the vegetables several times during cooking in the Airfryer to encourage even browning.
Cook the green lentils until tender while still holding their shape. They should not become as soft as lentils used for dhal because the individual lentils provide texture in this bowl.

Variations

The proportions of the Vegetables can be adjusted according to what is available. Extra carrot or cabbage can be added, while additional chilli can provide more heat. A little extra lime juice gives the lentils a sharper, fresher finish.

Storage Advice

Store the lentil mixture and roasted vegetables in airtight containers in the refrigerator for up to 3 days. Reheat the sweet potato and cauliflower in the air fryer to restore some of their roasted texture. The lentil mixture can be served warm or at room temperature.

Wine Advice

A fresh Sauvignon Blanc pairs well with the lime, coriander and vegetables. A dry Riesling is another suitable choice because its acidity complements the sweet potato and aromatic garam masala.

Nutrition values

Serving: 380 gr | Calories: 420 kcal | koolhydraten: 60 g | Eiwitten: 18 g | Vet: 14 g | Verzadigd vet: 2 g | Natrium: 310 mg | Suiker: 11 g
————————————————————————————————–

About Sweet Potato and Cauliflower Lentil Bowl

Sweet Potato and Cauliflower Lentil Bowl combines roasted vegetables, green lentils, fresh lime, coriander and warming spices in a colourful plant-based meal. The sweet potato and cauliflower are cooked in the Airfryer, giving them golden edges and a deeper flavour before they are served over the seasoned lentils. With vegetables and legumes in the same bowl, it works particularly well as a satisfying Main Course.

Roasting Sweet Potato and Cauliflower

Sweet potato and cauliflower respond particularly well to intense dry heat. Sweet potato becomes soft and naturally sweeter as it cooks, while cauliflower develops browned edges and a slightly nutty roasted flavour. Cooking them together makes good use of the air fryer, although the pieces need to be cut carefully so they finish cooking at approximately the same time.

The vegetables are seasoned with garam masala before cooking. This gives them a warm aromatic character that works naturally with the lentils, ginger, garlic and coriander used in the remainder of the dish.

Green Lentils for Texture

Green lentils are an important part of this recipe because they add both substance and texture. Unlike split red lentils, which soften considerably and are ideal for dhal, green lentils retain their shape when cooked correctly. This makes them particularly suitable for bowls and Salad recipes.

Cook the lentils until tender but stop before they begin to break apart. Drain away any remaining water before combining them with the other ingredients so the finished bowl does not become watery.

Fresh Vegetables and Aromatics

Carrot and red cabbage provide a different texture from the roasted vegetables. Their fresher character contrasts with the soft sweet potato and cauliflower, while ginger and garlic provide additional depth.

Fresh coriander and lime are added to brighten the finished lentil mixture. Lime is especially useful because its acidity balances the natural sweetness of the roasted sweet potato and the warmth of the garam masala.

A Plant-Based Main Course

The combination of lentils and vegetables makes this bowl a practical Vegan meal rather than simply a vegetable side dish. Green lentils provide plant protein, while sweet potato makes the bowl more filling.

It is also naturally suitable for a Vegetarian meal. When preparing the dish for specific allergies or intolerances, check packaged spices and other processed ingredients to make sure they meet the required dietary restrictions.

Why the Different Textures Matter

One of the strengths of this recipe is the contrast between its ingredients. The sweet potato is soft, the cauliflower has roasted edges, the green lentils retain a slight bite and the cabbage and carrot bring freshness and crunch.

Combining everything too aggressively can reduce that contrast. Instead, divide the lentil mixture between the bowls first and arrange the roasted vegetables over the top. This also makes the individual ingredients more visible when serving.

Serving the Lentil Bowls

The bowls can be served warm as a Dinner or allowed to cool slightly for lunch. Extra coriander and a squeeze of lime can be added immediately before serving.

For a larger Family Dinner, place the lentil mixture and roasted vegetables in separate serving dishes and allow everyone to assemble their own bowl. Additional vegetables can be served alongside if desired.

Preparing the Recipe Ahead

The lentils and vegetables can be prepared in advance, making this recipe useful for meal preparation. For the best texture, store the roasted sweet potato and cauliflower separately from the lentil mixture.

When ready to eat, the roasted vegetables can be returned briefly to the air fryer. This reheats them while restoring some of the crispness around the edges. The lentils can be gently warmed or served closer to room temperature.

Storage Advice

Allow all cooked ingredients to cool promptly before refrigerating them in covered containers. Properly stored leftovers can be kept in the refrigerator for up to 3 days. Add fresh coriander after reheating rather than storing large quantities mixed into the warm vegetables.

The dish is not dependent on being piping hot to taste good, which makes it particularly convenient for lunch. However, if reheating the cooked components, make sure they are heated thoroughly before serving.

Food Safety

Wash fresh vegetables thoroughly before preparation and keep cooked ingredients refrigerated when they are not being served. Cool leftovers promptly and use clean utensils and containers for storage. For current guidance on preparing and storing food safely at home, consult the U.S. Food and Drug Administration food-safety information.

Sweet Potato and Cauliflower Lentil Bowl brings together roasted Vegetables, tender green lentils, fresh coriander, lime and aromatic spices in a filling everyday meal. The combination of warm roasted ingredients and fresher vegetables gives the bowl enough variety in flavour and texture to work equally well for lunch or dinner.

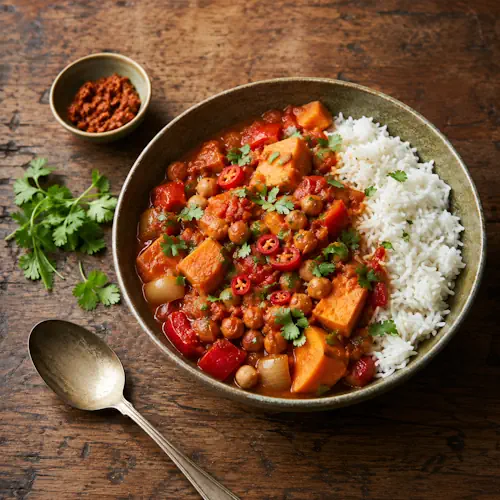
Air Fryer Veggie Curry


Sweet potato and chickpea curry with tomato, red pepper, coriander and basmati rice.

Air Fryer Veggie Curry

A colourful vegetable curry with sweet potato, courgette and red chilli in a creamy coconut and tomato sauce. Air-fried sweet potato adds texture, while ginger and curry paste bring plenty of warming flavour to this easy plant-based dinner.
Couverts4
Preparation 15 minutes
Preparation time:40 minutes
estimated costs pp $2.25
Deel op Facebook Print Recipe

Equipment

  • Bowl, large
  • Frying pan (large)
  • Knife
  • Wooden spoon

Ingredients

Instructions

  • Preheat the air fryer to 200ยฐC.
  • Toss the sweet potatoes with the oil and cook in the air fryer for 15 minutes or until almost tender.
  • Add the onion and cook for a further 5 minutes or until softened and lightly browned.
  • Transfer the mixture to a heatproof tin that fits inside the air fryer.
  • Stir in the ginger and garlic and cook for 2 minutes.
  • Add the curry paste and chickpeas and cook for 4 to 5 minutes, stirring occasionally, until sizzling.
  • Stir in the chopped tomatoes and cook for 8 to 12 minutes or until the vegetables are tender and the sauce has thickened.
  • Loosen with a little water if necessary.
  • Season with sea salt flakes and freshly ground black pepper.
  • Serve with rice, coriander and sliced red chilli, if using.

Notes & Wine Advice

Serving Suggestions

Serve the Veggie Curry hot with Rice and finish each portion with chopped coriander and sliced red chilli. It also works well with warm bread or alongside a fresh Salad for a larger plant-based meal.

Recipe Notes

Cut the sweet potatoes into similarly sized pieces so they cook evenly in the Airfryer. Curry pastes vary considerably in strength, so start with 2 tablespoons and add more when a stronger flavour is preferred.
If the curry becomes too thick during cooking, stir in a small amount of water. If the sauce is too thin, continue cooking uncovered for a few additional minutes.

Variations

Different Vegetables can be used according to what you have available. Cauliflower, peppers or spinach can work particularly well. Check the cooking time when substituting vegetables because harder vegetables require longer than leafy greens.

Storage Advice

Allow leftover curry to cool before transferring it to an airtight container. Refrigerate for up to 3 days and reheat thoroughly before serving. Store cooked rice separately from the curry.

Wine Advice

A dry Riesling works well with the ginger, curry spices and creamy coconut sauce. A fresh Sauvignon Blanc is another suitable choice, particularly when the curry is finished with plenty of coriander and fresh chilli.

Nutrition values

Serving: 390 395 | Calories: 48 kcal | koolhydraten: 9 g | Eiwitten: 20 g | Vet: 14 g | Verzadigd vet: 430 g | Natrium: 12 mg
————————————————————————————————–

About Air Fryer Veggie Curry

Air Fryer Veggie Curry is a colourful plant-based meal built around sweet potato, courgette, tomatoes, coconut and aromatic curry flavours. Using the Airfryer gives the sweet potato a lightly roasted character before it becomes part of the rich sauce. The result is a satisfying Main Course that combines tender vegetables with warming spices and creamy coconut.

Why Sweet Potato Works So Well

Sweet potato is particularly useful in curry because its natural sweetness balances chilli and aromatic spices. Air frying the pieces before adding the remaining ingredients gives them a firmer exterior and deeper flavour than simply simmering everything together from the beginning.

Cut the sweet potato into roughly equal pieces so they cook at approximately the same speed. Very large pieces may still be firm when the remaining ingredients are ready, while very small pieces can become too soft and begin to disappear into the sauce.

Building the Curry Flavour

Fresh ginger and curry paste provide most of the aromatic character. Cooking them briefly before adding the wetter ingredients allows their flavours to develop. The exact result will depend on the curry paste used because different varieties contain different combinations of chilli, spices and aromatics.

Starting with a moderate amount of curry paste makes the recipe easier to control. Additional paste can be used when a stronger or hotter curry is preferred. Fresh red chilli served at the end provides another way to increase the heat without making every portion equally spicy.

A Creamy Coconut Sauce

Coconut milk creates the creamy foundation of the sauce, while chopped tomatoes contribute acidity and a more savoury character. Together they produce a sauce rich enough to coat the vegetables without requiring dairy products.

If the curry becomes thicker than desired, a little water can be stirred through before serving. Conversely, allowing it to cook uncovered for several additional minutes will reduce a sauce that remains too thin.

A Plant-Based Dinner

This curry is suitable as a Vegan or Vegetarian dinner. Sweet potato and the other vegetables provide substance, while the coconut-based sauce makes the finished dish rich and satisfying.

When preparing the recipe for a specific allergy or intolerance, check the labels on curry paste, coconut milk and canned ingredients. Curry pastes in particular can vary considerably between manufacturers and may contain ingredients that affect dietary suitability.

Serving the Curry

Steamed Rice is one of the simplest accompaniments because it absorbs the coconut and tomato sauce. Coriander added immediately before serving gives the curry freshness, while sliced chilli adds colour and extra heat.

For a larger Family Dinner, place the curry and rice in separate serving dishes and offer coriander and chilli at the table. This allows everyone to adjust the garnishes according to preference.

Adding Other Vegetables

The recipe is easy to adapt with other Vegetables. Cauliflower, peppers and spinach are all useful options, although their cooking times differ. Firm vegetables should be added earlier, while spinach and other leafy vegetables only need a short cooking time.

This flexibility also makes the curry useful for using vegetables already available in the refrigerator. Keep the overall quantity reasonably similar so there is enough sauce to coat everything properly.

Preparing the Curry Ahead

Vegetable curries are well suited to advance preparation. The flavours of the curry paste, ginger, tomato and coconut continue to combine while the dish rests. After refrigeration, the sauce may become noticeably thicker.

Reheat gently and add a splash of water if necessary. Fresh coriander and sliced chilli are best added after reheating rather than being stored in the curry because they lose some of their freshness during refrigeration.

Storage and Food Safety

Cool leftover curry promptly and refrigerate it in a covered container for up to 3 days. If serving it with rice, store the rice separately and refrigerate it promptly as well. Reheat leftovers thoroughly before serving.

For current information about preparing, cooling, storing and reheating food safely at home, consult the U.S. Food and Drug Administration food-safety information.

Air Fryer Veggie Curry brings together roasted sweet potato, vegetables, creamy coconut and warming curry flavours in an uncomplicated meal. Served with rice and fresh coriander, it makes a versatile plant-based Dinner that can be adapted easily with different vegetables and levels of spice.

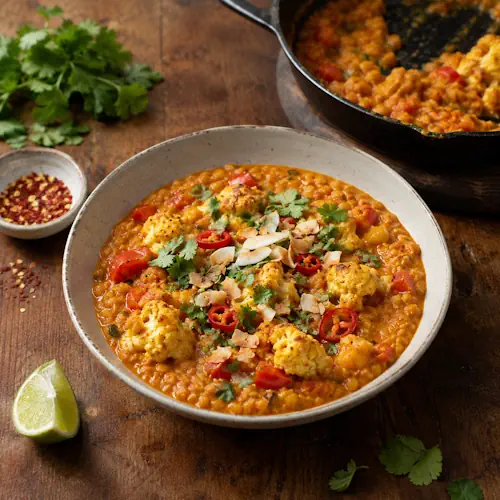
Cauliflower and Coconut Dhal


Homemade coconut dhal with cauliflower, red lentils, tomato, toasted coconut, coriander and chilli.

Cauliflower and Coconut Dhal

A creamy red lentil dhal with tender cauliflower, red cabbage, coconut milk and fragrant Indian spices. The cauliflower is air fried until golden before being combined with the lentils and finished with lime, toasted coconut, coriander and optional fresh chilli.
Couverts4
Preparation 20 minutes
Preparation time:1 hour
estimated costs pp $2.10
Deel op Facebook Print Recipe

Equipment

  • Bowl, large
  • Knife
  • Saucepan, Medium
  • Wooden spoon

Ingredients

Instructions

  • Preheat the air fryer to 200ยฐC. Toss the cauliflower with 1 tablespoon canola oil and season with sea salt flakes and freshly ground black pepper. Air fry for 20 to 25 minutes, turning halfway through, until golden and tender.
  • Heat the remaining 1 tablespoon canola oil in a medium saucepan over medium heat. Cook the onion and red cabbage for 10 minutes or until soft.
  • Add the ginger, garlic, chilli powder, turmeric, garam masala, black mustard seeds and curry leaves. Cook for 2 minutes, stirring, until fragrant.
  • Stir in the split red lentils and most of the cooked cauliflower. Add the hot vegetable stock and bring to the boil, then reduce to a simmer. Cook uncovered for 40 minutes or until the lentils are tender.
  • Stir through the light coconut milk and lime juice. Season with sea salt flakes and freshly ground black pepper.
  • Divide between four bowls and top with the reserved cauliflower, toasted coconut flakes, chopped coriander and fresh chilli, if using.

Notes & Wine Advice

Serving Suggestions

Serve the dhal hot in deep bowls and finish each portion with the reserved golden cauliflower, toasted coconut flakes, chopped coriander and fresh chilli. It is substantial enough to serve as a Main Course, or combine it with Rice for a larger meal.

Recipe Notes

Cut the cauliflower into similarly sized florets so they cook evenly in the Airfryer. Keep some of the golden cauliflower aside for serving and stir the remainder through the dhal.
Split red lentils soften considerably during cooking and naturally thicken the dhal. If it becomes too thick before the lentils are tender, stir in a little additional hot water or vegetable stock.

Variations

Add extra fresh chilli or chilli powder for more heat. For a milder version, leave out the fresh chilli. Spinach can also be stirred through during the final few minutes of cooking for additional Vegetables.

Storage Advice

Store leftover dhal in an airtight container in the refrigerator for up to 3 days. Reheat gently until thoroughly hot, adding a splash of water or vegetable stock if necessary. Keep the toasted coconut and fresh coriander separate until serving.

Wine Advice

A dry Riesling pairs well with the aromatic spices, ginger, chilli and lime. A fresh Sauvignon Blanc is another good choice, particularly with the coriander, lime and creamy coconut flavours.

Nutrition values

Serving: 510 gr | Calories: 445 kcal | koolhydraten: 65 g | Eiwitten: 22 g | Vet: 12 g | Verzadigd vet: 5 g | Natrium: 590 mg | Suiker: 10 g
————————————————————————————————–

About Cauliflower and Coconut Dhal

Cauliflower and Coconut Dhal combines creamy split red lentils with golden cauliflower, red cabbage, coconut milk and aromatic spices. Inspired by the flavours of India, this satisfying plant-based dish uses the Airfryer to give the cauliflower extra colour and texture before it is combined with the soft lentils.

Golden Air-Fried Cauliflower

Cooking the cauliflower separately is one of the features that gives this dhal its distinctive texture. The florets are tossed with a small amount of canola oil, seasoned and cooked at 200ยฐC until golden and tender. The intense circulating heat browns the edges while keeping the centres tender.

Most of the cauliflower is eventually stirred through the dhal, but some is reserved for serving. This means every bowl contains both soft cauliflower coated in the creamy lentils and more strongly roasted pieces on top.

Building the Flavour

Onion and red cabbage create the vegetable base. Ginger, garlic, chilli powder, turmeric, garam masala, black mustard seeds and curry leaves provide the aromatic character. Cooking these spices briefly before adding the liquid helps release their fragrance and distributes their flavour throughout the dish.

The chilli powder provides gentle background heat, while sliced fresh chilli can be added when serving for anyone who prefers a hotter dhal. This makes it easy to adjust individual portions without changing the complete recipe.

Why Split Red Lentils Work So Well

Split red lentils are particularly useful for dhal because they become soft as they cook. Rather than remaining separate and firm, they gradually break down and naturally thicken the vegetable stock. The result is the creamy consistency associated with this style of dish.

The 300 g of red lentils also make this much more substantial than a simple vegetable side dish. Combined with cauliflower and coconut milk, they turn the recipe into a satisfying Vegan Dinner for four.

Coconut Milk and Fresh Lime

Light coconut milk is stirred through after the lentils have become tender. It adds creaminess and gently softens the intensity of the spices. Lime juice provides the contrasting acidity needed to prevent the dhal from becoming too rich.

Taste the dhal after adding both ingredients before adjusting the final seasoning. Reduced-salt vegetable stock is useful because it gives you greater control over the amount of salt in the finished dish.

Finishing the Dhal

The toppings are more than decoration. Toasted coconut flakes add crunch and emphasise the coconut flavour, while fresh coriander provides a bright herbal note. The reserved air-fried cauliflower gives the finished bowls additional texture, and sliced chilli can provide extra heat.

Add these ingredients immediately before serving rather than stirring everything into the saucepan. Keeping some contrasting textures on top makes the finished dhal considerably more interesting.

A Satisfying Plant-Based Meal

With red lentils as its foundation, this recipe makes a substantial Main Course without meat. It is naturally made without dairy products or eggs and can fit several dietary preferences when the packaged ingredients used are also suitable.

When preparing the recipe for someone with an allergy or intolerance, check the labels on vegetable stock, garam masala, coconut milk and other packaged ingredients. Recipes and manufacturing processes vary between brands, so suitability should never be assumed solely from the ingredient name.

What to Serve with Dhal

The dhal can simply be divided between four bowls and eaten on its own. For a more substantial meal, serve it with basmati Rice. A fresh Salad can provide a cool contrast to the warm spices and creamy lentils.

It also works well as part of a larger Family Dinner with several vegetable dishes placed on the table. Keep extra coriander, toasted coconut and chilli nearby so everyone can finish their own bowl.

Preparing and Storing Leftovers

Dhal is particularly suitable for making ahead because the flavours continue to combine as it rests. The lentils absorb additional liquid during refrigeration, so the consistency will usually be considerably thicker the following day.

Reheat it gently in a saucepan and add a little water or vegetable stock until the desired consistency returns. The reserved cauliflower can be reheated separately in the air fryer to restore some of its roasted texture. Add fresh coriander and toasted coconut only after reheating.

Food Safety

Cool leftovers promptly and store them covered in the refrigerator. Reheat the dhal thoroughly before serving and keep fresh garnishes refrigerated separately. For current guidance about safe food preparation, storage and handling, consult the U.S. Food and Drug Administration food-safety information.

Cauliflower and Coconut Dhal combines creamy lentils, aromatic spices, golden cauliflower and coconut with the freshness of lime and coriander. The contrast between soft dhal and roasted cauliflower gives this straightforward Vegetarian dish plenty of texture while keeping it practical enough for an everyday meal.

Air Fryer Cauliflower and Coconut Dhal


Creamy coconut dahl with roasted cauliflower, red lentils, tomato, coriander, toasted coconut and chilli.

Air Fryer Cauliflower and Coconut Dhal

A warming plant-based dhal made with red lentils, cauliflower, coconut milk, tomatoes and aromatic spices. The cauliflower is lightly charred in the air fryer before being folded through the creamy lentils and finished with lime, coriander and toasted coconut.
Couverts4
Preparation 15 minutes
Preparation time:1 hour
estimated costs pp $2.10
Deel op Facebook Print Recipe

Equipment

  • Bowl, large
  • Knife
  • Saucepan, Medium
  • Wooden spoon

Ingredients

Instructions

  • Preheat the air fryer to 200ยฐC.
  • Toss the cauliflower with 1 tablespoon canola oil and season with sea salt flakes and freshly ground black pepper.
  • Air fry the cauliflower for 20 to 25 minutes, turning halfway through, until golden and tender.
  • Meanwhile, heat the remaining 1 tablespoon canola oil in a medium saucepan over medium heat.
  • Cook the onion and red cabbage for 10 minutes or until soft.
  • Add the ginger, garlic, spices and curry leaves and cook for 2 minutes, stirring, until fragrant.
  • Stir in the split red lentils and most of the cauliflower.
  • Add the hot vegetable stock and bring to the boil, then reduce to a simmer.
  • Cook uncovered for 40 minutes or until the lentils are tender.
  • Stir the coconut milk and lime juice through the dhal.
  • Season with sea salt flakes and freshly ground black pepper.
  • Divide between four bowls and top with the reserved cauliflower, toasted coconut flakes, coriander leaves and fresh chilli, if using.

Notes & Wine Advice

Serving Suggestions

Serve the dhal hot in deep bowls, topped with the reserved air-fried cauliflower, toasted coconut flakes, chopped coriander and fresh chilli. It is filling enough to serve as a Main Course, but it also works well with Rice or warm bread for a larger meal.

Recipe Notes

Cut the cauliflower into similarly sized florets so they cook evenly in the Airfryer. Reserve some of the cooked cauliflower for serving and stir the remainder into the dhal so you get cauliflower throughout the dish as well as crisp, golden pieces on top.
Split red lentils naturally soften and thicken during cooking. If the dhal becomes too thick before the lentils are completely tender, add a little extra hot water or vegetable stock. Reduced-salt stock makes it easier to control the final seasoning.

Variations

Increase the chilli powder or add more fresh chilli for a hotter dhal. For a milder version, omit the fresh chilli entirely. Extra spinach or other suitable Vegetables can be stirred through near the end of cooking.

Storage Advice

Allow leftover dhal to cool and transfer it to an airtight container. Refrigerate for up to 3 days. Reheat gently in a saucepan until thoroughly hot, adding a splash of water or vegetable stock if it has thickened during storage. Keep any toasted coconut and fresh coriander separate and add them after reheating.

Wine Advice

A dry Riesling works particularly well with the ginger, chilli, garam masala and lime because its fresh acidity balances the spices and creamy coconut. A fruity Sauvignon Blanc is another good choice, especially with the coriander and lime.

Nutrition values

Serving: 510 gr | Calories: 445 kcal | koolhydraten: 65 g | Eiwitten: 22 g | Vet: 12 g | Verzadigd vet: 5 g | Natrium: 590 mg | Suiker: 10 g
————————————————————————————————–

About Air Fryer Cauliflower and Coconut Dhal

Air Fryer Cauliflower and Coconut Dhal combines creamy red lentils with golden cauliflower, coconut milk, aromatic spices and fresh lime. Inspired by the flavours of India, it is a substantial plant-based dish that combines inexpensive pantry ingredients with fresh vegetables. Air frying the cauliflower separately gives the finished dhal an extra layer of texture that distinguishes it from a traditional one-pot lentil dish.

Why Air Fry the Cauliflower?

Cauliflower changes considerably when exposed to the intense circulating heat of an Airfryer. The edges become browned and lightly charred while the centres turn tender. This creates both flavour and texture without requiring large quantities of cooking oil.

Most of the cooked cauliflower is stirred through the lentils, while a portion is reserved for the top of each bowl. This gives you soft cauliflower throughout the dhal as well as more strongly roasted pieces in every serving.

Building the Aromatic Base

Onion, red cabbage, ginger and garlic form the vegetable base of the dhal. Turmeric, garam masala, chilli powder, black mustard seeds and curry leaves then provide layers of warmth and aroma. Briefly cooking these ingredients in oil before adding the liquid helps release their flavours.

The chilli level can easily be adjusted. The chilli powder provides background heat, while fresh chilli added at the end creates a brighter and more immediate spiciness. Leaving the fresh chilli off individual portions makes the same recipe easier to serve to people with different preferences.

Red Lentils Create the Creamy Texture

Split red lentils are particularly suitable for dhal because they soften and begin to break down as they cook. Unlike lentils intended for salads, they do not need to retain a firm individual shape. Their natural starch thickens the cooking liquid and creates the characteristic creamy consistency.

Using 300 g of lentils makes this a substantial Vegan meal for four rather than simply a vegetable side dish. Lentils also contribute a useful amount of plant protein and make the dhal satisfying without meat or dairy products.

Coconut Milk and Lime

Light coconut milk is stirred into the dhal near the end of cooking. It softens the spices and gives the lentils a smoother, richer texture without overwhelming the other flavours. Lime juice performs the opposite job by adding fresh acidity.

This balance between creamy coconut, earthy lentils, warm spices and sharp lime is central to the finished dish. Taste after adding the coconut milk and lime before making the final adjustment with salt and pepper.

Toasted Coconut for Contrast

Toasted coconut flakes are used as a finishing ingredient rather than disappearing into the dhal. Toasting intensifies their flavour and provides a crisp contrast to the soft lentils. Fresh coriander contributes another layer of freshness, while optional sliced chilli adds colour and heat.

These toppings are best added immediately before serving. If you are storing leftovers, keep the coconut and coriander separate so they retain their texture and freshness.

A Complete Plant-Based Dinner

The combination of red lentils, cauliflower and coconut makes the dhal substantial enough for a Dinner. It can be eaten on its own, but rice or bread makes it even more filling. For additional Indian-inspired dishes, browse the India collection.

The recipe is naturally free from meat, eggs and dairy ingredients, making it suitable for several dietary preferences. When cooking for someone with a specific allergy or intolerance, always check packaged ingredients such as vegetable stock, garam masala and coconut milk because formulations can vary between manufacturers.

Preparing the Dhal Ahead

Dhal is particularly suitable for preparing in advance because the flavours continue to combine while it rests. The lentils will absorb more liquid as they cool, so refrigerated dhal is normally considerably thicker the following day.

When reheating, add a small quantity of water or vegetable stock until the preferred consistency returns. Heat gently while stirring regularly. The reserved cauliflower can be reheated separately in the air fryer if you want to restore some of its roasted texture.

Serving Ideas

For a simple meal, divide the dhal between four bowls and add the cauliflower, toasted coconut, coriander and chilli. For a larger Family Dinner, place rice, bread and extra toppings on the table so everyone can assemble their own bowl.

A fresh salad can provide a cool contrast to the warm spices. Alternatively, serve the dhal alongside other Vegetables for a completely plant-based spread.

Storage and Food Safety

Cool leftovers promptly and refrigerate them in a covered container. Reheat only the quantity required and heat it thoroughly before serving. Fresh garnishes should be stored separately and added after reheating.

For current guidance about storing leftovers and preparing food safely at home, consult the U.S. Food and Drug Administration food-safety information.

Air Fryer Cauliflower and Coconut Dhal brings together creamy lentils, roasted cauliflower, fragrant spices, coconut and lime in one satisfying bowl. The contrast between the soft dhal and golden cauliflower makes it particularly appealing, while the straightforward ingredients make it practical for an everyday vegetarian or vegan dinner.

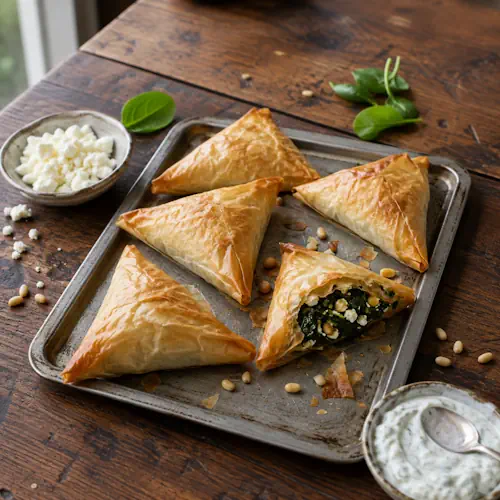
Spinach and Feta Filo Parcels


Crisp golden filo parcels filled with spinach, feta, onion and pine nuts on a rustic wooden table.

Spinach and Feta Filo Parcels

Crispy filo pastry parcels filled with spinach, feta, onion and fresh herbs. Cooked in the air fryer until golden and flaky, these savoury vegetarian parcels are ideal as an appetizer, lunch or light meal.
Couverts4 servings
Preparation 20 minutes
Preparation time:25 minutes
estimated costs pp $1.50
Deel op Facebook Print Recipe

Equipment

  • Frying pan
  • Knife
  • Pastry brush
  • Wooden spoon

Ingredients

Instructions

  • Heat the butter in a large frying pan over medium heat and cook the onion and garlic for 5 to 10 minutes, until softened and golden. Transfer to a large bowl.
  • Squeeze the excess water from the defrosted spinach, then add it to the bowl with the onion and garlic. Season with sea salt flakes and freshly ground black pepper.
  • Mix half of the beaten egg into the spinach mixture, then add the crumbled feta and chopped dill or parsley. Stir until evenly combined.
  • Lay one filo pastry sheet on a clean work surface and spray lightly with olive oil. Fold it in half to create a long strip.
  • Spoon one-quarter of the filling onto the top of the pastry strip. Fold diagonally to form a triangle, then continue folding down the length of the pastry, keeping the filling enclosed.
  • Repeat with the remaining filo pastry sheets and filling to make four parcels.
  • Brush the parcels with the remaining beaten egg and scatter with sesame or nigella seeds.
  • Preheat the air fryer to 180ยฐC.
  • Cook the parcels for 12 to 14 minutes, until crisp and golden. Serve warm.

Notes & Wine Advice

Serving Suggestions

Serve the Spinach and Feta Filo Parcels warm while the pastry is crisp and flaky. They work well with a fresh Salad for a light Lunch, or serve smaller portions alongside other dishes as an Appetizer.

Recipe Notes

Squeeze as much liquid as possible from the defrosted spinach before combining it with the other ingredients. Excess moisture can soften the filo pastry and prevent the parcels from becoming properly crisp.
Filo pastry dries very quickly once exposed to air. Keep sheets that you are not currently using covered while assembling the parcels. Spray each sheet lightly with olive oil rather than soaking it.

Variations

Use fresh dill for a more aromatic filling or parsley for a milder herbal flavour. Nigella seeds provide a slightly savoury, onion-like note, while sesame seeds give the parcels a nuttier finish. Browse the Vegetables collection for more vegetable-based recipes.

Storage Advice

Store leftover parcels in an airtight container in the refrigerator for up to 3 days. Reheat them in the Airfryer until thoroughly hot and crisp. Avoid reheating them in the microwave if possible because the filo pastry will become soft.

Wine Advice

A crisp Sauvignon Blanc pairs particularly well with the spinach, salty feta and fresh herbs. A dry Rosรฉ is another refreshing choice when the parcels are served as an appetizer or light lunch.

Nutrition values

Serving: 190 gr | Calories: 275 kcal | koolhydraten: 24 g | Eiwitten: 11 g | Vet: 15 g | Verzadigd vet: 8 g | Natrium: 570 mg | Suiker: 4 g
————————————————————————————————–
Cuisine; Mediterranean
Season: All Seasons
Occasions Brunch / Lunch / Party / Picnic / Weekend

About Spinach and Feta Filo Parcels

Spinach and Feta Filo Parcels combine a savoury spinach and cheese filling with thin layers of crisp pastry. The filling is made with onion, garlic, spinach, feta and fresh herbs, while the parcels are finished with sesame or nigella seeds before being cooked in the Airfryer. The combination produces a crisp exterior surrounding a soft, flavourful centre.

Spinach and Feta as a Classic Combination

Spinach and feta are natural partners because their flavours balance one another. Spinach has an earthy, slightly mineral character, while feta provides saltiness, acidity and creaminess. Onion and garlic create a savoury base, and dill or parsley adds freshness.

The combination is particularly familiar in Mediterranean cooking and works especially well inside pastry. Because feta already contains plenty of salt, additional seasoning should be added cautiously.

Removing Moisture from the Spinach

One of the most important parts of this recipe is removing excess water from the defrosted spinach. Frozen spinach releases considerable liquid as it thaws. If that moisture goes directly into the filling, it can soak into the filo and produce soft rather than crisp pastry.

Squeeze the spinach thoroughly before adding it to the cooked onion and garlic. The filling should remain moist enough to be pleasant but should not contain visible liquid. This small preparation step makes a considerable difference to the finished parcels.

Working with Filo Pastry

Filo is much thinner than most other types of Pastry, which allows it to become exceptionally crisp. The disadvantage is that the sheets can dry quickly and become brittle. Keep unused filo covered while working on each parcel individually.

Spraying the pastry lightly with olive oil helps separate the layers and encourages browning. Folding each sheet in half also gives the parcel enough structure to contain the spinach filling without making the pastry excessively heavy.

Folding the Parcels

The triangular folding technique keeps the filling enclosed while creating multiple overlapping layers of filo. Place the filling near one end of the long pastry strip and fold diagonally. Continue alternating the fold until you reach the end of the strip.

Try to keep the parcels reasonably compact without pressing them tightly. A little space inside allows the filling to heat while the surrounding pastry becomes crisp.

Cooking Filo Parcels in the Air Fryer

The air fryer is particularly effective for filo because rapidly circulating dry heat encourages the thin pastry layers to crisp. The parcels require relatively little additional fat because the pastry has already been lightly sprayed with olive oil.

Arrange the parcels so that air can circulate around them. If your air fryer basket is small, cook them in two batches rather than overlapping them. They are ready when the exterior is evenly golden and crisp and the filling is thoroughly heated.

Serving Spinach and Feta Parcels

One parcel per person works well for a light Lunch, particularly when accompanied by salad. They can also be cut into smaller portions and served as part of a Party spread.

A tomato and cucumber salad provides a fresh contrast to the warm pastry and salty cheese. They can also be served with a yogurt-based dip or alongside other Mediterranean-inspired dishes.

A Useful Vegetarian Option

With spinach, feta and egg providing the filling, these parcels make a satisfying Vegetarian option without requiring meat substitutes. When buying feta, check the label if strict vegetarian suitability is required because traditional feta and similar cheeses may use animal-derived rennet.

The filling can also be adjusted with additional herbs or vegetables. The important point is to avoid ingredients that release large amounts of liquid during cooking, as excess moisture works against the crisp texture of the filo.

Storage and Reheating

These parcels are at their best shortly after cooking. If leftovers remain, refrigerate them promptly in a covered container. The air fryer is the preferred method for reheating because it restores much of the pastry’s original crispness.

A microwave will heat the filling but tends to soften filo pastry. For that reason, reheating with dry heat produces a noticeably better result.

Food Safety

The recipe contains egg and cheese, so the filling should be cooked thoroughly and leftovers should be refrigerated promptly. Keep refrigerated ingredients chilled until required and avoid leaving the prepared parcels at room temperature for extended periods. For current information about safe food preparation, handling and storage, consult the U.S. Food and Drug Administration food-safety information.

With crisp golden filo, tender spinach, salty feta and fresh herbs, Spinach and Feta Filo Parcels offer plenty of texture and flavour from a relatively simple filling. They are versatile enough for lunch, an appetizer or sharing and are especially convenient when you want a crisp pastry dish without deep frying.